Tag Archive for: self sufficiency

Kombucha Brewing

Kombucha Brewing

Kombucha Brewing

Kombucha Brewing

I first stumbled across kombucha,  that lightly fermented fizzy drink made from sugar and tea, and a culture called a scoby (symbiotic culture of bacteria and yeast) when in November 2019 I gave up booze and was looking for a grown-up drink that wasn’t sweet and sickly and didn’t cost a fortune.

Not that you have to have given up alcohol to enjoy drinking kombucha. Kombucha has health benefits all of its own.

Rather than type out their words and risk being accused of plagiarism, here is a post from those good folk at BBC Good Food, sharing some of the alleged health benefits of drinking kombucha.

Not being prepared to part with large sums of money for shop-bought kombucha, I set about learning to make my own.

I am sure there are far better guides to making your own kombucha that the one I am going to share with you. When I started, I went to The Happy Pear, a jolly couple of lads from Ireland who are both pleasing to the eye and full of sound advice about healthy living. I watched their YouTube video and it told me all I needed to know.

The Happy Pear Kombucha Brewing Video

However, here is how I brew it.

FIRST FERMENT

You will need:

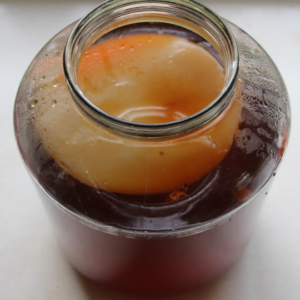
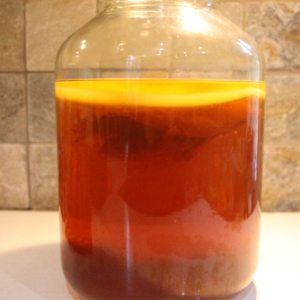
  • Kombucha Brewing - A scoby floating in the brew,

    Kombucha Brewing – A scoby floating in the brew,

    A Scoby – Symbiotic Culture of Bacteria and Yeast. This is the being that floats or bobs about, doing its magic to turn sweetened tea into kombucha. With each new batch a new baby scoby is formed, so if you know someone already who brews their own kombucha, then see if they have a baby scoby you can adopt.
    Failing that, head online – I got mine from Happy Kombucha who also do starter kits, have full instructions and guides and are generous with their advice.


  • Tea: You then need cooled, fermented tea. Green tea or black tea – take your pick. I like the freshness of taste that comes with green tea kombucha and like to think it is even healthier. use four tea bags or two tablespoons tea. Use around 2 litres boiled water to make your tea.


If you have a filter jug, kombucha prefers filtered water or spring water – but don’t go buying plastic bottles!! We don’t want any more non disposable plastic in the world.


  • Sugar: 150g – 180g granulated sugar.

Add sugar to the tea – don’t worry, the sugar is fermented out!

So, brew up a batch of tea and sugar and leave to cool.

  • Wide Necked Jar: Without squeezing the tea bags, drain your cold tea into a wide necked jar. I’m using these wide necked glass jars that I got from a local delicatessen – they were olive jars.

Top us with cooled water.

Another word of warning – scobies don’t like metal – so don’t strain your tea through a metal sieve or stir with a metal spoon. I’ve found a cotton cloth bag bought for straining nuts of making vegan milk to be great. I got mine from Amazon, but other sellers are available I’m sure. I even take off my rings to be extra kind.
Kombucha Brewing

Kombucha Brewing

Then lower your scoby along with around 200ml starter liquid from a previous batch or the liquid your scoby arrived with. Wish him happy brewing, cover and leave in a warmish place for around 10 days.

SECOND FERMENT
 

Kombucha Brewing - second ferment

Kombucha Brewing – second ferment

You should by now have a healthy-looking white rubbery crust on top of your kombucha. Congratulations, you have made a kombucha baby! This can be popped into a scoby nursery with some of the fermented liquid, passed on to a friend or put on the compost heap. We have a septic tank here, and I like to think that if kombucha keeps my gut healthy then maybe it will do the same for the septic tank. But how can we flush our babies down the loo? Give it a new home, and encourage your friends to take up kombucha brewing too.

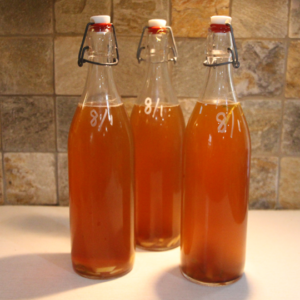
  • Pressure Bottles Into sterilised pressure bottles – like the ones Grolsh use for beer – the ones with metal swing tops. Add a tsp of sugar ( I find coconut sugar works well) and any flavouring you want to add. You can leave it plain, but the addition of some natural flavouring can be fun. As we’re huge fans of seasonal eating, we make this depending on what’s available.
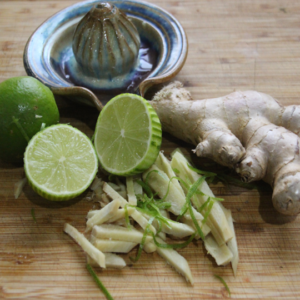
Lime and ginger to flavour kombucha in the second ferment

Lime and ginger to flavour kombucha in the second ferment

  • Flavouring Strips of ginger or lime/lemon zest work well, apple slices or fresh raspberries or blackberries too. –  experiment and let us know on social media what you prefer.Now, siphon your kombucha through the nut bag and into a jug, then pour it into your sterilised bottles, making sure any fluid used for sterilising is rinsed away. Leave for another week.

There are two schools of thought on burping. Some burp and some don’t. It depends on how much fizz you want. If you don’t release the pressure, make sure you open your kombucha over the sink.

Then store it in the fridge! This should arrest the fermenting process but still open with caution.

Enjoy the taste, health benefits & sustainability of your home-brewed kombucha.

Kombucha Brewing - the outtake

Kombucha Brewing – the outtake

Now for the outtake! It’s not easy pouring kombucha with one hand whilst taking a photo with the other. Note to self – use a tripod and camera timer!!

In case you’re wondering if I’m still totally alcohol-free? No. I gave up for just shy of a year, and during that time, reset my relationship with booze, but when Tim sold his accountancy business and retired, I shared a bottle of very decent red wine with him and I do still love a gin and tonic!

For other posts on fermented food and seasonal eating, head back to the kitchen, or why not pop into the garden to see what’s growing or what jobs can be done?

If you’d like to join the gentle rhythm of our four newsletters that come out via Substack, on the Spring and Autumn Equinox and Winter and Summer Solstices, then sign up here:

The Bridge Cottage Way Newsletter on Substack.

To follow Sue’s writing journey and hear about other published work, her debut, The Rewilding of Molly McFLynn and other writing, sign up to Sue Reed Writes on Substack or hunt her out on her social media and website of that name.

Want to leave a comment? We’d love to hear from you


Fermented Vegetable Stock Pot

Fermented Vegetable Stock Pot.

As I sit down to write about making my own fermented vegetable stock, a weak winter sun peers through the pines opposite. It doesn’t even clear the tops in these long dark days, and in this Northumbrian frost pocket, warming food is called for. Tim’s just come in from the garden rubbing his hands that have gone white with cold on the ends. He’s been pruning the apple trees. ‘Soup’s ready, I say’.

It’s a lentil soup today, make with a tablespoon of fermented vegetable stock, leeks, carrots, celery and red lentils. I wrote last week about the basics of soup making in Seasonal Eating with Warming Winter Soups, with a recipe for Parsnip and Chestnut Soup, but as promised then, today I’m going to talk about the stock.

Fermented Vegetable Stock Pot

Fermented Vegetable Stock Pot

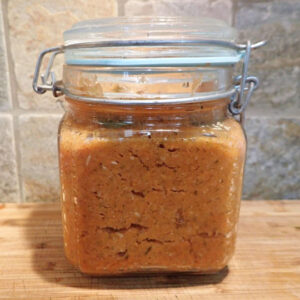
If you open the fridge, you’ll find a jar I call the ‘fizzing stock pot’. It’s a jar of fermented vegetables blitzed to a fine paste that has been allowed to ferment with the addition of salt water.
The ancients used fermentation as a way of preserving food and drink before fridges came on the scene. Here’s the science: there is controlled microbial growth and enzyme action in fermented foods that simply put, change some of the food’s parts into others. Microorganisms, bacteria, yeast or fungi convert organic substances like sugars and starch into alcohol or acids which act as natural preservatives as well as enhance the taste and texture.

Fermented foods have a distinctive strong, salty, slightly sour taste. If you watched the Hairy Bikes ‘Go Local In Northumberland’ last night, you’ll have seen them visit Belle and Herbs Fermentary in Wallsend and talk about fermented foods and their kimchi in particular. We are lucky to have both Bell and Herbs and Meraki Cacao from last night’s programme come to Hexham Farmer’s Market.
Health Benefits of Fermented Food

  1. Fermentation gives us probiotics from bacteria which can restore the balance of bacteria in your gut, supporting digestive health.
  2. Fermented food is easy to digest as some of the natural sugars and starches are already broken down.
  3. The vitamins and minerals produced by fermented food are easier to absorb,
  4. Understanding of the link between gut health and mood and behaviour is an evolving science. It is believed that some of the strains of probiotic bacteria found in fermented foods can help with anxiety and depression, and may produce cortisol, minimising the physical symptoms of stress.
  5. Fermented foods can reduce blood pressure and address cholesterol balance, improving heart health.

That’s quite enough explanation of fermented foods for one week. Back to our stock pot!

Fermented Vegetable Stock Pot

Fermented Vegetable Stock Pot

Fermented Vegetable Stock Pot

Packaging and transportation besides, most commercially produced vegetable stock contains additives that I don’t want in my food. Once you start making your own fermented veg stock, you’ll soon realise how much the taste not to mention the health benefits of your soup is enhanced by it. And it’s easy to make! You’ll need a jar with an airtight lid.
Ingredients for Fermented Vegetable Stock Pot

Ingredients for Fermented Vegetable Stock Pot

Ingredients

I don’t want to be too prescriptive here – use what you have in! Experiment and don’t be too exact!
In this latest batch of stock, we used:

Onions – a medium-sized brown and small red

3 sticks celery

2 carrots

A slice of celeriac

½ small parsnip (we find the taste of parsnip can be overpowering is too much is used)

Couple cloves garlic

A few leaves each of parsley, thyme, sage, rosemary

A pinch of pink peppercorns and a couple of black,

½ tsp each of coriander, fennel and cumin seeds

Sea salt.

2 large or 3-4 small bay leaves

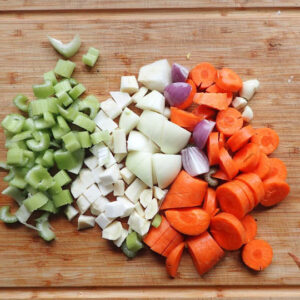
Chopped vegetables for Fermented Vegetable Stock Pot

Chopped vegetables for Fermented Vegetable Stock Pot

Method

Roughly chop all the veg and blitz in a food processor with the green herbs.

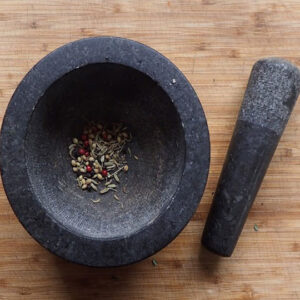
Pestle and Mortar for grinding spices for Fermented Vegetable Stock Pot

Pestle and Mortar for grinding spices for Fermented Vegetable Stock Pot

Dry fry the spices and seeds in a small pan over low heat then grind with a pestle and mortar, coffee grinder or whatever you have to hand. A lump hammer might have to suffice!

Mix into the veggies.

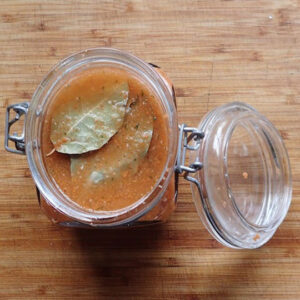
Weigh the mixture and calculate what 4% of this is – ie if you have 100g, then you will need 4g of salt. Add 4% of the weight in salt and mix well. Pack into the jar until the paste comes about half an inch or 1cm from the top. Cover with bay leaves.


Fermented Vegetable Stock Pot

Fermented Vegetable Stock Pot

Press down on the bay leaves to get a briny liquid from the sea salt and veggies. If this doesn’t appear, make a bit of brine yourself  – 2g sea salt and 50ml water should do the trick.

Pop the lid on and stand on a small plate or saucer.

We now pop it in our airing cupboard. It needs to be somewhere warm but not hot: ‘room temperature’ but here at Bridge Cottage most rooms are Baltic by day!

Leave it now for a few days. You can leave it for over a week. Once it starts fizzing, you may want to ‘burp’ it from time to time to release any built-up gas. (Nowt worse than trapped wind).

The longer you leave it, the stronger the flavour. Once you are happy with the taste, pop it in the fridge to stop it from fermenting further.

As a rough guestimate, (followers of the Bridge Cottage Way know I’m not one for exact measurements) use about a tablespoon of fermented stock in a pan of soup or stew.


As I type, I’m sipping on a glass of homemade kombucha, another fermented favourite here at Bridge Cottage, so while we’re talking fermented foods, I’ll make that the next post. Look out on social media for that coming up next week.

Fermented hot chilli sauce

Fermented hot chilli sauce

Other posts on fermented food:
Make Your Own Fermented Hot Chilli Sauce

Homemade Yoghurt and Soft Cheese


Thank you so much for reading, and happy fermenting.

As ever, we’d love you to share your thoughts, either by leaving a comment here or on our social media pages, where this article will be shared.

You can find the Bridge Cottage Way on Facebook Twitter and Instagram.

You might enjoy some of the writing and ideas in other sections of this website, as we look towards leading more sustainable lives by growing our own food and creating dishes in line with seasonal eating, or head to our handy ‘Month by Month’ guides to find out what we have been doing here at Bridge Cottage as the months go by:

Many thanks for reading.

With Facebook and Instagram algorithms being fickle friends at times, be sure to get all new posts from The Bridge Cottage Way by signing up for the mailing list by this link:

Newsletter sign-up form link.

This will go out four times a year, with the seasons in Spring, Summer, Autumn and Winter. We, of course, will not share your details with third parties, and you have the right to unsubscribe at any time.

You can also use the form below to ask us to sign you up for the newsletter, or just a message or comment on this post. We’d love to hear from you!


Tim & Sue in the Bridge Cottage Way garden

Make Your Own Fermented Hot Chilli Sauce

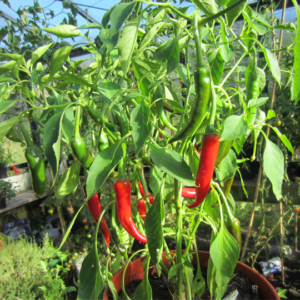
Ring of Fire Chillies

Ring of Fire Chillies

Are you a fan of hot chilli sauce? Do you grow chillies? Here at Bridge Cottage we make our own fermented hot chilli sauce which has no nasty additives, is sugar-free, great for your gut health and very easy to make. If that wasn’t enough, you’ll be producing food at home, without lining the coffers of the big food corporations who push their plastic-wrapped, shipped foods full of additives, preservatives and goodness knows what. Sure, it takes a bit of time and effort, but isn’t that worth it in the grand scheme of things?

There are other ways to preserve chillies: they freeze well, and a bag of frozen chillies will keep well all year round, ready to pluck from the freezer when a recipe calls for a whole chilli. Dried chillies are great too, chopped finely for chilli flakes, and keep well in a jar in the spice cupboard, but by far the most popular method of using chillies here at Bridge Cottage is by making fermented chilli sauce.

saving chilli seeds

saving chilli seeds

It’s early autumn now and the chillies have ripened in the greenhouse. Time to pick them and freeze a few but use most of them for a handy hot chilli sauce which is incredibly easy to make. (Don’t forget to split open a couple of your favourites, dry and save the seeds for next year).

Bridge Cottage Fermented Hot Chilli Sauce 

You will need:

A large glass jar with a screw top lid

A circle of plastic cut from the lid of a plastic tub

Water

Salt

Chillies

Ginger

Garlic


Fermented hot chilli sauce

Fermented hot chilli sauce

Wash them and pack your jar with whole chillies, a couple of cloves of garlic and a couple of chunks of root ginger.

Add water so the chillies are all covered.

Pour out the water into a jug and add 4% salt – weigh the empty jug first, then weigh the water and add 4% of the water’s weight in salt. Dissolve the salt then our back over the chillies.

Fermented hot chilli sauce

Fermented hot chilli sauce

Place a disc of plastic over the chillies – this is important and is to ensure all the chillies are kept submerged. This is anaerobic fermentation, meaning starved of oxygen. Alcohol and pickles are made this way and the airtight condition creates ethanol and lactic acid. The addition of salt is important as it raises the acidity and to cut a long story short, prevents you from catching botulism.

Place the lid on the jar and leave somewhere reasonably warm.

Your chillies will soon start to ferment, so once bubbles appear, it is important to ‘burp’ them every day to release the gas. You don’t want an exploding jar of chillies up your wall. This is done by carefully unscrewing the lid and allowing the gas to escape. There’s nowt worse than trapped wind!

Screw the lid back on, and burp daily til the bubbles stop. You can leave them like this for as long as you want. Some people leave them for months. We tend to wait til they have stopped fizzing and then move on to the next stage and make the sauce.

Strain the contents, making sure to reserve some of the liquid.

Put into a food processor and blitz.

BE CAREFUL – YOU NOW HAVE THE EQUIVALENT OF PEPPER SPRAY.

If it is too thick, add a dash of the reserved liquid, and pour it into sterilised screw-top glass bottles.

Here is a timely reminder to never throw glass bottles away. We like to bottle our chilli sauce in small bottles and give some away as gifts.

It is important to remember with fermented sauces that they are live. You will need to loosen the lids from time to time to let the gas escape.

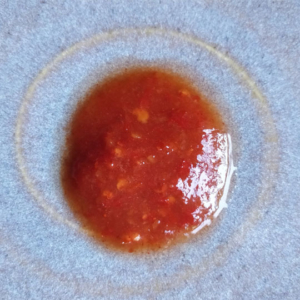
Fermented Chilli Sauce

Fermented Chilli Sauce

Once opened, we keep a bottle in the fridge and add a dash to soups, stews and curries. A Sunday morning breakfast of smashed avocado on toast with grated lime zest and a dash of chilli sauce is divine. Non-vegans can add a poached egg.

I’ll be writing more on fermenting foods in due course, but in the meantime if you want to find out more and get some fabulous recipes, look no further than the River Cottage Handbook No. 18. Fermentation by Rachel de Thample. 

It’s October as I write this, and we’re saving seeds for planting out next year, chillies being the first crop that gets sown in the greenhouse in the New Year.

Growing chillies

Growing chillies

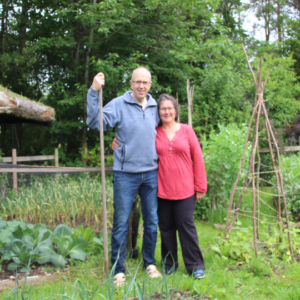
This old photo did make me laugh! How earnest did I look? It was taken for the old Bridge Cottage Way blog I first started on BlogSpot over ten years ago when I left teaching, (but it no longer exists) and harks back to my Woolly Pedlar days when I make clothing from recycled knitwear. I also dyed my hair back then, but now embrace the grey, having ditched the need to try and look younger. I’ll make sure there’s a post on growing chillies in good time for the new growing season over in the Bridge Cottage Garden section of this new website.


October in the veggie garden

October in the veggie garden

I’d better get this article finished and published, and go and join Tim, who is outside in the veggie plot planting out winter kale and getting sections ready for garlic and onions which can go in any day now.

The seasons are rolling on, and there’s always something to do here at Bridge Cottage.

We still haven’t finished making apple juice, chutney or jams jellies.

Autumn’s Bounty: Apples. 

As ever, we’d love you to share your thoughts, either by leaving a comment here or on our social media pages, where this article will be shared.

You can find the Bridge Cottage Way on Facebook Twitter and Instagram.

You might enjoy some of the writing and ideas in other sections of this website, as we look towards leading more sustainable lives by growing our own food and creating dishes in line with seasonal eating, or head to our handy ‘Month by Month’ guides to find out what we have been doing here at Bridge Cottage as the months go by:

Many thanks for reading.

With Facebook and Instagram algorithms being fickle friends at times, be sure to get all new posts from The Bridge Cottage Way by signing up for the mailing list by this link:

Newsletter sign-up form link.

This will go out four times a year, with the seasons in Spring, Summer, Autumn and Winter. We, of course, will not share your details with third parties, and you have the right to unsubscribe at any time.

You can also use the form below to ask us to sign you up for the newsletter, or just a message or comment on this post. We’d love to hear from you!


Tim & Sue in the Bridge Cottage Way garden

Harvest Time Minestrone.

August Harvest Minestone

August Harvest Minestone

Minestrone making is one of the joys of late summer’s harvest time. A seasonal recipe that freezes well, is a meal in a bowl and brings a welcome reminder of summer in the depths of winter. I first wrote this piece on the first of August and Lammas, the pagan celebration of the harvest. This bountiful collection of vegetables was gathered from the Bridge Cottage garden yesterday.

We’re just back from a trip away and we’ve come home to some courgettes of marrow proportion. Courgettes are still in their ‘glut’ season, and I’ve written a separate post giving some seasonal recipes for courgettes. Here, in minestrone, they can be added in chunks along with seasonal tomatoes. Both of these are covered in separate posts to give more inspiration for seasonal eating.


Our broad beans are past their best now, leathery in texture, so are shelled. It’s a bit of a phaff, but well worth it. Simply blanch for a couple of minutes in boiling water, then plunge into a bowl of cold water with ice. The skins will then be easy to squeeze and the tender insides squashed out.

I also like to skin the tomatoes – it’s up to you if you want to make a passata or keep them in chunks.


Here is our minestrone recipe, though feel free to adapt according to what you have ripe and ready, and vary the amounts if you don’t have as much veg ready and ripe. We like to cook in bulk and freeze, so this will make around ten generous portions:


August Harvest Minestrone

August Harvest Minestrone

Bridge Cottage Minestrone

(Makes ten portions – enough to keep some in the fridge and freeze the rest for winter)

2 tbsp olive oil

1 large onion

4 cloves garlic

3 red peppers

Handful each of French, Runner, Borlotti beans, chopped.

Broad beans

1 kg ripe tomatoes

4 courgettes

Chopped fresh herbs eg oregano, parsley, basil.

2 litres stock (chicken or vegetable)

100g small pasta – we like little star-shaped Stellete but Orzo works well too.

Salt and pepper


Method

Shell the broad beans and remove skins by blanching for two minutes in boiling water, then plunging into a bowl of iced water. Squeeze to remove outer shells.

Prepare the tomatoes: Simply score with a sharp knife then put in a heatproof bowl, and cover with boiling water. Leave for a couple of minutes, then drain. Peel off the skins once cold enough to handle, and whizz them up in a blender to give a beautiful tomato sauce. If you don’t like the pips, then pass through a sieve. Alternately, skin then chop into rough chunks for a chunkier soup.

In a large saucepan, heat the olive oil and gently cook the onion, adding the tomatoes, peppers, beans, chopped herbs and stock. Bring everything to the boil and cook for five minutes before adding the chopped courgettes, crushed garlic and pasta. Cook for a further ten minutes or until the pasta is done. Season with salt and pepper.

Enjoy warm, then cool the rest for the freezer, putting in recycled plastic bags or tubs, and labelling with the date. You’ll be glad you went to the bother in darkest January!

As ever, we’d love you to share your thoughts, either by leaving a comment here or on our social media pages, where this article will be shared.

You can find the Bridge Cottage Way on Facebook Twitter and Instagram.

You might enjoy some of the writing and ideas in other sections of this website, as we look towards leading more sustainable lives by growing our own food and creating dishes in line with seasonal eating, or head to our handy ‘Month by Month’ guides to find out what we have been doing here at Bridge Cottage as the months go by:

Many thanks for reading.

With Facebook and Instagram algorithms being fickle friends at times, be sure to get all new posts from The Bridge Cottage Way by signing up for the mailing list here. This will go our four times a year, with the seasons in Spring, Summer, Autumn and Winter. We, of course, will not share your details with third parties, and you have the right to unsubscribe at any time.

Tim & Sue in the Bridge Cottage Way garden


Homemade Yoghurt and Soft Cheese

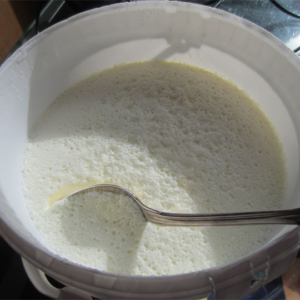
Homemade yoghurt

Homemade yoghurt

We’ve been making our own yoghurt and soft cheese for years here at Bridge Cottage. The Guardian even got in touch a couple of years ago and interviewed us about switching from commercially bought yoghurt to making our own: Culture shock for ‘big yoghurt’ as foodies switch to DIY 

So why bother? for one, we get through about four pints of yoghurt a week so can make it in bulk. We have it for breakfast most days with fruit either fresh from the garden in summer, or from the freezer in winter.

There is the plastic issue – we use the same tub, and so are reducing our plastic consumption by not buying new every time.

It’s delicious, good for us, with live bugs that do our tummies good!

It’s not delivered on lorries and saves us driving to the shops! So that’s reducing our carbon footprint.

It’s also really easy to make. Here’s how:


Homemade yoghurt.

Homemade yoghurt

Homemade yoghurt

(makes 2 pints)

Heat 2 pints whole milk in a large pan to 95 degrees. (almost boiling if you don’t have a thermometer)

Whisk in 2 tablespoons dried skimmed milk. (this makes it thick and creamy)

Place saucepan in a sink of cold water and cool to 45 deg (blood temperature)

Whisk in a small pot (2 tbsp) live yoghurt.

Place in a clean container with a lid and put somewhere warm for 4-5 hours. an airing cupboard is ideal.

Save 2 tbsps of the new yoghurt for next time, in a sterilised container in the fridge.

It is important to pour boiling water over all equipment before use, to make sure it is clean.


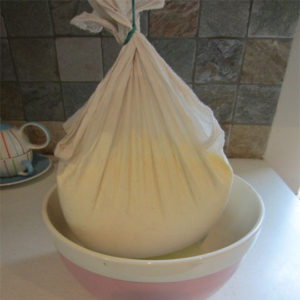
homemade soft cheese

homemade soft cheese

To make soft cheese, simply place yoghurt in a muslin or cheesecloth, tie and hang over a bowl to drip for about six hours. Keep in fridge.

You might like to add chopped chives, garlic, or other herbs to your soft cheese.

Easy peasy, lemon squeezy!

Do let us know how you get on!

As ever, we’d love you to share your thoughts, either by leaving a comment here or on our social media pages, where this article will be shared.

You can find the Bridge Cottage Way on Facebook Twitter and Instagram.

You might enjoy some of the writing and ideas in other sections of this website, as we look towards leading more sustainable lives by growing our own food and creating dishes in line with seasonal eating, or head to our handy ‘Month by Month’ guides to find out what we have been doing here at Bridge Cottage as the months go by:


Many thanks for reading.

With Facebook and Instagram algorithms being fickle friends at times, be sure to get all new posts from The Bridge Cottage Way by signing up for the mailing list here. This will go our four times a year, with the seasons in Spring, Summer, Autumn and Winter. We, of course, will not share your details with third parties, and you have the right to unsubscribe at any time.

Tim & Sue in the Bridge Cottage Way garden


Pickled Wild Garlic, Ransom and Chive Buds

Wild Garlic. Foraging & Cooking Food for Free

Wild Garlic. Foraging & Cooking Food for Free

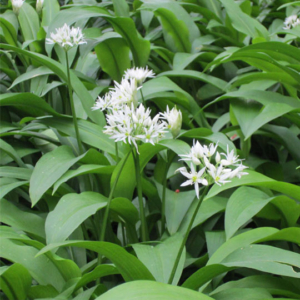
Have you, like us, been enjoying the tender young leaves of the wild garlic, Allium Ursinum? We shared information on recognising and how to forage responsibly for this pungent plant, plus some of our favourite recipes for using these delicious leaves in a previous post back in March: Wild Garlic, foraging and cooking.

Now April is upon us, and the wild garlic is sending up its buds, soon to burst into beautiful white flowers. There is a window in early Spring when the buds can be harvested to make a deliciously simple pickle. I noticed too that the chives that are growing in a bucket in the greenhouse are also showing signs of buds. Both ransoms, aka wild garlic, and chive buds are delicious pickled. You might also like to try other buds, such as sage? Pep up your salads and add them to sauces for an extra layer of flavour. It’s only a ten-minute job, so why not give it a go?


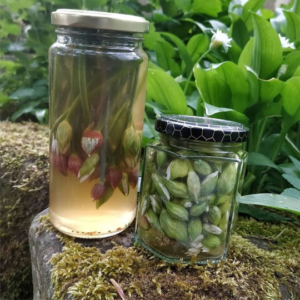
Pickled Wild Garlic Buds

Pickled Wild Garlic Buds

Ingredients:

Handful wild garlic or chive buds
50g cider vinegar
50g sugar
50g water
Pinch pink peppercorns
Pinch salt
Method:
Begin by making the pickling liquid.
Put vinegar, sugar and water in a pan and heat until sugar is dissolved. Leave to cool.
Once cooled, place wild garlic or chive buds in a sterilised jar and pour over pickling liquid. Place in fridge & leave to pickle for three days before using.

Lasts for up to six months in the fridge.

Chive Blossom Vinegar

Chive Blossom Vinegar

See also the post on making floral vinegars for when the flowers burst open!

We do hope you enjoy foraging for or picking wild garlic, but please remember to forage responsibly, leaving plenty for others and for wildlife.
If you have a shady spot in your garden, you might like to consider growing your own wild garlic. We have! A quick google and I see it can be bought in the green or by seed. Here’s one such site, from garden supply direct. 
Anyone close to us, do pop over and I’ll give you a clump of ours!
Wild Garlic. Foraging & Cooking Food for Free

Wild Garlic. Foraging & Cooking Food for Free

As ever, we’d love you to share your thoughts, either by leaving a comment here or on our social media pages, where this article will be shared.

You can find the Bridge Cottage Way on Facebook Twitter and Instagram.

You might enjoy some of the writing and ideas in other sections of this website, as we look towards leading more sustainable lives by growing our own food and creating dishes in line with seasonal eating, or head to our handy ‘Month by Month’ guides to find out what we have been doing here at Bridge Cottage as the months go by:


Many thanks for reading.

With Facebook and Instagram algorithms being fickle friends at times, be sure to get all new posts from The Bridge Cottage Way by signing up for the mailing list here. This will go our four times a year, with the seasons in Spring, Summer, Autumn and Winter. We, of course, will not share your details with third parties, and you have the right to unsubscribe at any time.

Tim & Sue in the Bridge Cottage Way garden

Cooking with Wild Garlic. Recipes and Tips

Wild Garlic. Foraging & Cooking Food for Free

Wild Garlic. Foraging & Cooking Food for Free

The smell of wild garlic takes me back to the day we moved to Bridge Cottage. As we drove along with a car full of boxes, marvelling at the beauty of the Northumberland countryside, a pungent pong wafted through the car window. Wild garlic. It was growing in abundance along the roadside. Imagine our delight when we discovered it growing along the banks of the burn that runs through the garden. Food for free, and delicious at that.

Here in Northumberland, it is the beginning of March when the wild garlic is poking up, ready to pick. It may well be February if you are in warmer climes. The fresh young leaves can be picked and added to a salad. We planted some salad leaves in the greenhouse in the autumn, and are reaping the benefits now.

Not only is it tasty, but wild garlic is also good for you, proven to reduce blood pressure. Wild garlic has all manner of health benefits too.

I need to check the freezer. We made lots of wild garlic pesto last year. There may well be some packs lurking in the back. I’ll pop some recipes below, and add them to the Bridge Cottage Kitchen page.

wild garlic and nettles

wild garlic and nettles

By far the favourite recipe of last year was for wild garlic and blue cheese scones – delicious with a bowl of soup. – you can also add nettles to many of these recipes, but be careful to pick with gloves and take note that nettles will still sting until wilted or cooked. Don’t do what a friend of mine did, and use nettles in pesto without wilting first. She, unfortunately, tasted a spoon of nettle pesto and stung her mouth and throat. It could have been a lot nastier than it was. I’ll write more about nettles in a month or so, when they’re properly up.

Blue Cheese & Wild Garlic Scones

Blue cheese and wild garlic scones

Blue cheese and wild garlic scones

Ingredients

225g plain or spelt flour

3 tsp baking powder

Pinch salt, half tsp English mustard powder

50g cold butter

125g blue cheese (or any strong cheese)

2 tbsp washed & chopped wild garlic (nettle tops and chives work well too)

60ml cold milk

1 beaten egg

Method

Scones are best handled as little as possible. I use a food processor, but mixing by hand is fine

Sift flour, baking powder, salt & mustard. Grate in the butter, cheese, & mix with wild garlic and nettles. Mix in egg & milk with a clawed hand, adjusting the amount of liquid to give a soft, slightly sticky dough. (Scones are better on the wet side rather than dry).

Tip onto a floured worktop and handling as little as possible, knead gently then press down into a flat shape about 3cm thick. Cut into shapes, top with a little cheese or egg & milk from the jug you used.

Bake at 220 deg (200 deg fan) Gas 7 for 12 minutes.

Serve with butter. Delicious with some wild garlic and nettle soup.


Pesto

Add a couple of good handfuls of wild garlic to about 200ml of olive oil, a handful of nuts (eg walnuts, cashew or pine nuts), 50g grated parmesan cheese, 1/2 tsp salt, 1/2 tsp sugar, and blitz in a food processor.

Add your pesto to pasta for a simple but tasty lunch or rub onto chicken. Wild garlic and chicken go very well together.

I like to make several batches and freeze them in small bags. There is nothing better in the depths of winter than to go foraging in the freezer and finding little bags of spring wild garlic pesto to use for lunches.

Salads

Wild garlic leaves can be added whole to salads or chopped according to taste. Use instead of spring onions for a mild, oniony taste, but with the added zing of garlic. They make an interesting addition to a cheese sandwich married with a touch of mayonnaise.

Salad dressing can also be made more interesting with finely chopped wild garlic leaves or add to mayonnaise or butter.

Tomatoes

In his iconic foraging guide, Food for Free, written many moons ago, Richard Mabey tells us that wild garlic goes handsomely with tomatoes

Richard tells us to take advantage of their size and lay them criss-cross over sliced beefsteak tomatoes’. I like to chop them finely and add to chopped tinned tomatoes for a quick and tasty tomato sauce that can go with pasta, or as an accompaniment to fish cakes.

Alternatively, make simple tomato salsa, by chopping fresh tomatoes with finely chopped wild garlic, and fresh deseeded chilli, and a squeeze of lemon or lime juice.

wild garlic and nettle soup

wild garlic and nettle soup

Wild garlic can be used with young nettle tops for a healthy, delicious soup, or for the meat-eaters amongst us, simply add to chicken stock and blitz for a delicious wild garlic soup.

I’m off to pick some wild garlic to use tonight with simple mayonnaise to have with our chips.

Happy foraging, but remember to forage responsibly – leave plenty for others and for wildlife.

Wild Garlic. Foraging & Cooking Food for Free

Wild Garlic. Foraging & Cooking Food for Free


As ever, we’d love you to share your thoughts, either by leaving a comment here or on our social media pages, where this article will be shared.

You can find the Bridge Cottage Way on Facebook Twitter and Instagram.

You might enjoy some of the writing and ideas in other sections of this website, as we look towards leading more sustainable lives by growing our own food and creating dishes in line with seasonal eating, or head to our handy ‘Month by Month’ guides to find out what we have been doing here at Bridge Cottage as the months go by:


Many thanks for reading.

With Facebook and Instagram algorithms being fickle friends at times, be sure to get all new posts from The Bridge Cottage Way by signing up for the mailing list here. This will go our four times a year, with the seasons in Spring, Summer, Autumn and Winter. We, of course, will not share your details with third parties, and you have the right to unsubscribe at any time.

Tim & Sue in the Bridge Cottage Way garden

Wild Garlic. Foraging & Cooking Food for Free

Wild Garlic. Foraging & Cooking Food for Free

Wild Garlic. Foraging & Cooking Food for Free

Wild Garlic, Allium ursinum, also known as: ramsons, buckrams, broad-leaved garlic, wood garlic, bear leek or bear’s garlic, is a bulbous perennial flowering plant in the amaryllis family Amaryllidaceae. It is native to Europe and Asia, where it grows in moist woodland. It can be grown in your garden, or foraged for, for free!

The smell of wild garlic takes me back to the day we moved to Bridge Cottage. As we drove along with a car full of boxes, marvelling at the beauty of the Northumberland countryside, a pungent pong wafted through the car window. Wild garlic. It was growing in abundance along the roadside. Imagine our delight when we discovered it growing along the banks of the burn that runs through the garden. Food for free, and delicious at that.

Here in Northumberland, it is the beginning of March when the wild garlic is poking up, ready to pick. It may well be February if you are in warmer climes. The fresh young leaves can be picked and added to a salad. We planted some salad leaves in the greenhouse in the autumn, and are reaping the benefits now.

Not only is it tasty, but wild garlic is also good for you, proven to reduce blood pressure. Wild garlic has all manner of health benefits too.

I need to check the freezer. We made lots of wild garlic pesto last year. There may well be some packs lurking in the back. I’ll pop some recipes below, and add them to the Bridge Cottage Kitchen page.

wild garlic and nettles

wild garlic and nettles

By far the favourite recipe of last year was for wild garlic and blue cheese scones – delicious with a bowl of soup. – you can also add nettles to many of these recipes, but be careful to pick with gloves and take note that nettles will still sting until wilted or cooked. Don’t do what a friend of mine did, and use nettles in pesto without wilting first. She, unfortunately, tasted a spoon of nettle pesto and stung her mouth and throat. It could have been a lot nastier than it was. I’ll write more about nettles in a month or so, when they’re properly up.

Blue Cheese & Wild Garlic Scones

Blue cheese and wild garlic scones

Blue cheese and wild garlic scones

Ingredients

225g plain or spelt flour

3 tsp baking powder

Pinch salt, half tsp English mustard powder

50g cold butter

125g blue cheese (or any strong cheese)

2 tbsp washed & chopped wild garlic (nettle tops and chives work well too)

60ml cold milk

1 beaten egg

Method

Scones are best handled as little as possible. I use a food processor, but mixing by hand is fine

Sift flour, baking powder, salt & mustard. Grate in the butter, cheese, & mix with wild garlic and nettles. Mix in egg & milk with a clawed hand, adjusting the amount of liquid to give a soft, slightly sticky dough. (Scones are better on the wet side rather than dry).

Tip onto a floured worktop and handling as little as possible, knead gently then press down into a flat shape about 3cm thick. Cut into shapes, top with a little cheese or egg & milk from the jug you used.

Bake at 220 deg (200 deg fan) Gas 7 for 12 minutes.

Serve with butter. Delicious with some wild garlic and nettle soup.


Pesto

Add a couple of good handfuls of wild garlic to about 200ml of olive oil, a handful of nuts (eg walnuts, cashew or pine nuts), 50g grated parmesan cheese, 1/2 tsp salt, 1/2 tsp sugar, and blitz in a food processor.

Add your pesto to pasta for a simple but tasty lunch or rub onto chicken. Wild garlic and chicken go very well together.

I like to make several batches and freeze them in small bags. There is nothing better in the depths of winter than to go foraging in the freezer and finding little bags of spring wild garlic pesto to use for lunches.

Salads

Wild garlic leaves can be added whole to salads or chopped according to taste. Use instead of spring onions for a mild, oniony taste, but with the added zing of garlic. They make an interesting addition to a cheese sandwich married with a touch of mayonnaise.

Salad dressing can also be made more interesting with finely chopped wild garlic leaves or add to mayonnaise or butter.

Tomatoes

In his iconic foraging guide, Food for Free, written many moons ago, Richard Mabey tells us that wild garlic goes handsomely with tomatoes

Richard tells us to take advantage of their size and lay them criss-cross over sliced beefsteak tomatoes’. I like to chop them finely and add to chopped tinned tomatoes for a quick and tasty tomato sauce that can go with pasta, or as an accompaniment to fish cakes.

Alternatively, make simple tomato salsa, by chopping fresh tomatoes with finely chopped wild garlic, and fresh deseeded chilli, and a squeeze of lemon or lime juice.

wild garlic and nettle soup

wild garlic and nettle soup

Wild garlic can be used with young nettle tops for a healthy, delicious soup, or for the meat-eaters amongst us, simply add to chicken stock and blitz for a delicious wild garlic soup.

I’m off to pick some wild garlic to use tonight with simple mayonnaise to have with our chips.

Happy foraging, but remember to forage responsibly – leave plenty for others and for wildlife.

Wild Garlic. Foraging & Cooking Food for Free

Wild Garlic. Foraging & Cooking Food for Free


As ever, we’d love you to share your thoughts, either by leaving a comment here or on our social media pages, where this article will be shared.

You can find the Bridge Cottage Way on Facebook Twitter and Instagram.

You might enjoy some of the writing and ideas in other sections of this website, as we look towards leading more sustainable lives by growing our own food and creating dishes in line with seasonal eating, or head to our handy ‘Month by Month’ guides to find out what we have been doing here at Bridge Cottage as the months go by:


Many thanks for reading.

With Facebook and Instagram algorithms being fickle friends at times, be sure to get all new posts from The Bridge Cottage Way by signing up for the mailing list here. This will go our four times a year, with the seasons in Spring, Summer, Autumn and Winter. We, of course, will not share your details with third parties, and you have the right to unsubscribe at any time.

Tim & Sue in the Bridge Cottage Way garden

How to build a hotbox for propagation, early seed sowing and growing

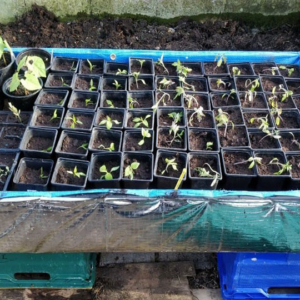
Hot box propagation

Hotbox propagation

Making a hotbox may well be the answer if are you chomping at the bit to get the growing season started, It’s still February and last week we had snow. However, the sun started shining this week after a long Winter. We are still in Lockdown due to the pandemic and goodness knows we are longing to get growing again. Last year’s lockdown seemed so much easier to bear, with veggies to grow and gardens to tend, but we must remember it is still Winter!

Hotbox propagation. for early seed sowing and growing

Hotbox propagation. for early seed sowing and growing

Last year Tim built a hot box for the greenhouse, and it’s brilliant! We can set seeds away and grow then on without fear of the frost getting to them. I know some of you who have seen pictures of this on the Bridge Cottage Way Facebook page have asked how he made it, so here you go.

It’s quite simple. We got the idea and all the help we needed from Jungle Seeds.

You will need a greenhouse or cold frame and a source of electricity. We have run an outdoor extension lead from the garage into the greenhouse. We have taken care to cover any electrical parts with a bucket so avoid accidents when watering!

The heat comes from Bio Green Soil Warming cables.  available from Jungle Seeds.


Building a hotbox for early seed sowing a propagation

Building a hotbox for early seed sowing a propagation

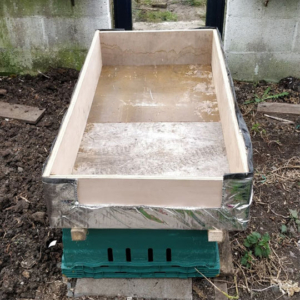
We started by building a wooden box. The bottom was taken from an old dining room table, and the sides, off-cuts of plywood. You may want to build something smaller, a tray for example. In this first picture, you can see it has been covered on the outside by insulation. We used this insulation as we had it hanging around after building the sauna. You might want to use polystyrene, or Kingspan. Use what you have!

Building a hotbox for early seed sowing and propagation

Building a hotbox for early seed sowing and propagation

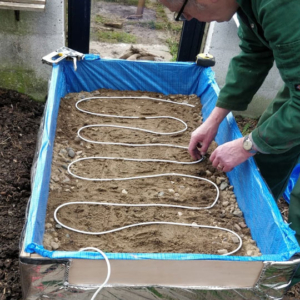
Next, add a layer of sand, and then lay the cables on top of that. We got the Bio Green Warming Cables from Jungle Seeds, and you’ll see that they give basic instructions too for building a hotbox.

The cable is normally laid in runs 3″ to 4″ apart. This layout will allow you to raise the soil temperature by 11-13 C, above the greenhouse ambient. Higher temperatures can be achieved by laying the cable runs as close together as 5cm. In this case, a thermostat should be used to precisely control the soil temperature to avoid overheating.

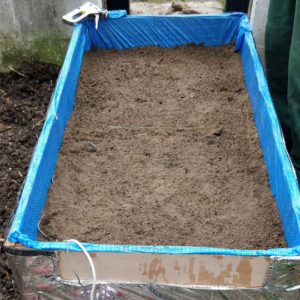
After laying the cables, cover again with another layer of sand. Water all this well. It needs to be kept moist to give good heat transference.

building hot box propagation, early seed sowing and growing

building a hot box for propagation, early seed sowing and growing


building a hot box for propagation, early seed sowing and growing

building a hot box for propagation, early seed sowing and growing

A top tip is to cover the plug socket and thermostat with an upturned bucket. This prevents any water from getting in the electrics when watering the greenhouse!

At night, a layer of bubble wrap can go over the top to tuck your baby plants in.


building a hot box for propagation, early seed sowing and growing

building a hot box for propagation, early seed sowing and growing

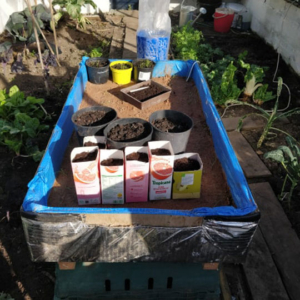
That’s all there is to it! We’ve set leeks, board beans, chillies, lettuce and tomatoes away already and they are growing well in the hot box. You can see I’ve used sawn-off juice bottles as seed pots – waste not, want not!

Do get in touch if you have any questions!

Wishing you a very happy growing season.

As ever, we’d love you to share your thoughts, either by leaving a comment here or on our social media pages, where this article will be shared.

You can find the Bridge Cottage Way on Facebook Twitter and Instagram.

You might enjoy some of the writing and ideas in other sections of this website, as we look towards leading more sustainable lives by growing our own food and creating dishes in line with seasonal eating, or head to our handy ‘Month by Month’ guides to find out what we have been doing here at Bridge Cottage as the months go by:


Many thanks for reading.

With Facebook and Instagram algorithms being fickle friends at times, be sure to get all new posts from The Bridge Cottage Way by signing up for the mailing list here. This will go our four times a year, with the seasons in Spring, Summer, Autumn and Winter. We, of course, will not share your details with third parties, and you have the right to unsubscribe at any time.

Tim & Sue in the Bridge Cottage Way garden

Make Your Own Apple and Fennel Chutney & Fennel Tea

Fennel seeds

Fennel seeds

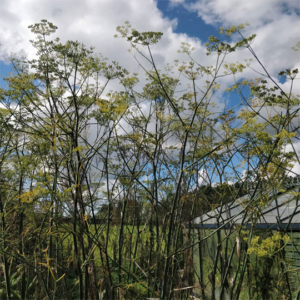
The stems from the fennel are reaching for the sky, each upturned umbrella laden with seeds. It’s October and the fennel seeds are ready to be harvested, and although these can be left on the plant to dry, I do like to gather them before the birds strip them clean. I reckon there are enough for us to all share!

We’ve just opened the last jar of the apple and fennel chutney, made last year, so time to make some more, especially as we’re knee-deep in apples. What a bumper year it’s been for those!

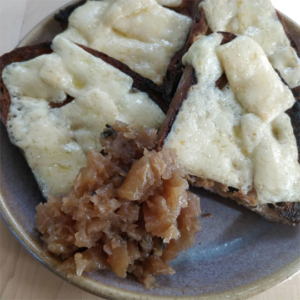
This is top of the list of favourite chutneys here at Bridge Cottage, and when the ‘kids’ come home and raid the larder, this is one they all plump for, but one I try and hide and the back! It goes especially well with a strong cheddar and makes a great lunch with cheese on toast.

Here’s the recipe:


Apple and Fennel Chutney

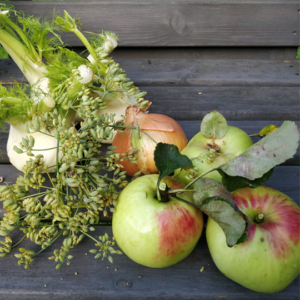
Ingredients for apple and fennel chutney

Ingredients for apple and fennel chutney

Ingredients:

500g fennel bulbs

500g onions

1 kg cooking apples

2 tbsp fresh fennel seeds or 1 tbsp dried.

500ml apple cider vinegar

600g granulated or light soft brown sugar.


Method:

Finely chop the fennel bulbs and onion, or blitz in a food processor. Add to a deep preserving pan. Peel, core and chop the cooking apples into small chunks. Add fennel seeds, apple cider vinegar and sugar and bring to the boil.

Boil fairly rapidly, stirring often and reducing the temperature to a simmer at the end, to prevent sticking.

The chutney is cooked when it has darkened slightly and is thick and sticky, and a wooden spoon leaves the bottom of the pan momentarily clean when stirred across.

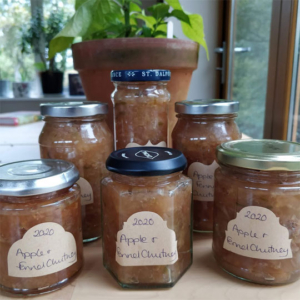
Apple and Fennel Chutney

Apple and Fennel Chutney

Place into clean, warmed jars and cover.

Label and store.

Apple and Fennel Chutney

Apple and Fennel Chutney

Best left a month before eating if you can bear it!

Fennel Tea

Fennel seeds also make a delicious tea, rich in vitamin A, great for the digestion and to reduce water retention.

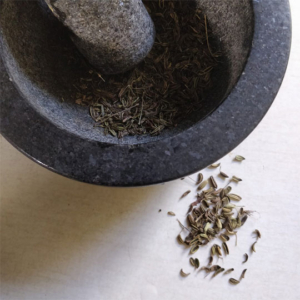
Simply crush a teaspoon of dried fennel seeds lightly in a pestle and mortar, and then pour on boiling water in a small teapot. Leave to steep for five minutes before straining and drinking.

For more information about making your own herbal teas follow this link:

Fennel Seeds

Fennel Seeds

Make Your Own Herbal Tea


As ever, we’d love you to share your thoughts, either by leaving a comment here or on our social media pages, where this article will be shared.

You can find the Bridge Cottage Way on Facebook Twitter and Instagram.

You might enjoy some of the writing and ideas in other sections of this website, as we look towards leading more sustainable lives by growing our own food and creating dishes in line with seasonal eating, or head to our handy ‘Month by Month’ guides to find out what we have been doing here at Bridge Cottage as the months go by:

Many thanks for reading.

With Facebook and Instagram algorithms being fickle friends at times, be sure to get all new posts from The Bridge Cottage Way by signing up for the mailing list here. This will go out four times a year, with the seasons in Spring, Summer, Autumn and Winter. We, of course, will not share your details with third parties, and you have the right to unsubscribe at any time.

Tim & Sue in the Bridge Cottage Way garden