Tag Archive for: organic gardening

Harvest Time Minestrone.
August Harvest Minestone

August Harvest Minestone

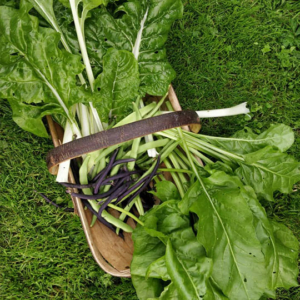
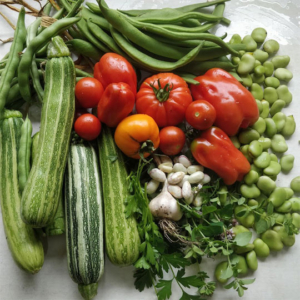
Minestrone making is one of the joys of late summer’s harvest time. A seasonal recipe that freezes well, is a meal in a bowl and brings a welcome reminder of summer in the depths of winter. I first wrote this piece on the first of August and Lammas, the pagan celebration of the harvest. This bountiful collection of vegetables was gathered from the Bridge Cottage garden yesterday.

We’re just back from a trip away and we’ve come home to some courgettes of marrow proportion. Courgettes are still in their ‘glut’ season, and I’ve written a separate post giving some seasonal recipes for courgettes. Here, in minestrone, they can be added in chunks along with seasonal tomatoes. Both of these are covered in separate posts to give more inspiration for seasonal eating.


Our broad beans are past their best now, leathery in texture, so are shelled. It’s a bit of a phaff, but well worth it. Simply blanch for a couple of minutes in boiling water, then plunge into a bowl of cold water with ice. The skins will then be easy to squeeze and the tender insides squashed out.

I also like to skin the tomatoes – it’s up to you if you want to make a passata or keep them in chunks.


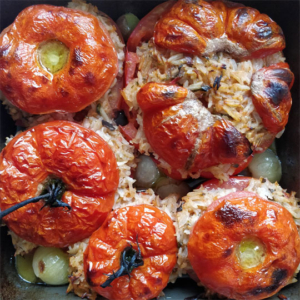
Here is our minestrone recipe, though feel free to adapt according to what you have ripe and ready, and vary the amounts if you don’t have as much veg ready and ripe. We like to cook in bulk and freeze, so this will make around ten generous portions:

 

August Harvest Minestrone

August Harvest Minestrone

Bridge Cottage Minestrone

(Makes ten portions – enough to keep some in the fridge and freeze the rest for winter)

2 tbsp olive oil

1 large onion

4 cloves garlic

3 red peppers

Handful each of French, Runner, Borlotti beans, chopped.

Broad beans

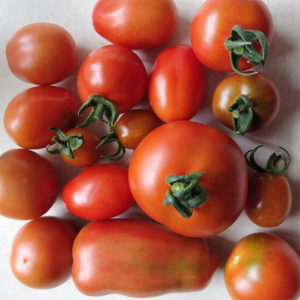
1 kg ripe tomatoes

4 courgettes

Chopped fresh herbs eg oregano, parsley, basil.

2 litres stock (chicken or vegetable)

100g small pasta – we like little star-shaped Stellete but Orzo works well too.

Salt and pepper


Method

Shell the broad beans and remove skins by blanching for two minutes in boiling water, then plunging into a bowl of iced water. Squeeze to remove outer shells.

Prepare the tomatoes: Simply score with a sharp knife then put in a heatproof bowl, and cover with boiling water. Leave for a couple of minutes, then drain. Peel off the skins once cold enough to handle, and whizz them up in a blender to give a beautiful tomato sauce. If you don’t like the pips, then pass through a sieve. Alternately, skin then chop into rough chunks for a chunkier soup.

In a large saucepan, heat the olive oil and gently cook the onion, adding the tomatoes, peppers, beans, chopped herbs and stock. Bring everything to the boil and cook for five minutes before adding the chopped courgettes, crushed garlic and pasta. Cook for a further ten minutes or until the pasta is done. Season with salt and pepper.

Enjoy warm, then cool the rest for the freezer, putting in recycled plastic bags or tubs, and labelling with the date. You’ll be glad you went to the bother in darkest January!

As ever, we’d love you to share your thoughts, either by leaving a comment here or on our social media pages, where this article will be shared.

You can find the Bridge Cottage Way on Facebook Twitter and Instagram.

You might enjoy some of the writing and ideas in other sections of this website, as we look towards leading more sustainable lives by growing our own food and creating dishes in line with seasonal eating, or head to our handy ‘Month by Month’ guides to find out what we have been doing here at Bridge Cottage as the months go by:

Many thanks for reading.

With Facebook and Instagram algorithms being fickle friends at times, be sure to get all new posts from The Bridge Cottage Way by signing up for the mailing list here. This will go our four times a year, with the seasons in Spring, Summer, Autumn and Winter. We, of course, will not share your details with third parties, and you have the right to unsubscribe at any time.
Tim & Sue in the Bridge Cottage Way garden


How to build a hotbox for propagation, early seed sowing and growing

Hot box propagation

Hotbox propagation

Making a hotbox may well be the answer if are you chomping at the bit to get the growing season started, It’s still February and last week we had snow. However, the sun started shining this week after a long Winter. We are still in Lockdown due to the pandemic and goodness knows we are longing to get growing again. Last year’s lockdown seemed so much easier to bear, with veggies to grow and gardens to tend, but we must remember it is still Winter!

Hotbox propagation. for early seed sowing and growing

Hotbox propagation. for early seed sowing and growing

Last year Tim built a hot box for the greenhouse, and it’s brilliant! We can set seeds away and grow then on without fear of the frost getting to them. I know some of you who have seen pictures of this on the Bridge Cottage Way Facebook page have asked how he made it, so here you go.

It’s quite simple. We got the idea and all the help we needed from Jungle Seeds.

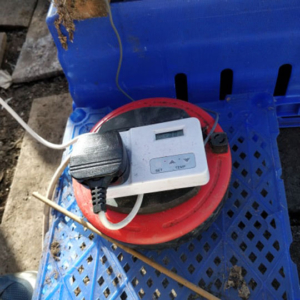
You will need a greenhouse or cold frame and a source of electricity. We have run an outdoor extension lead from the garage into the greenhouse. We have taken care to cover any electrical parts with a bucket so avoid accidents when watering!

The heat comes from Bio Green Soil Warming cables.  available from Jungle Seeds.


Building a hotbox for early seed sowing a propagation

Building a hotbox for early seed sowing a propagation

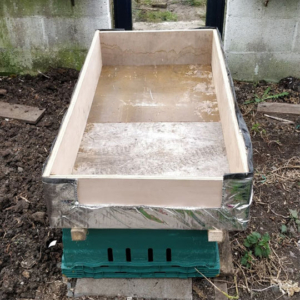
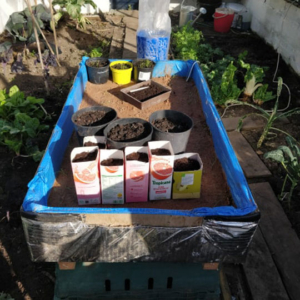
We started by building a wooden box. The bottom was taken from an old dining room table, and the sides, off-cuts of plywood. You may want to build something smaller, a tray for example. In this first picture, you can see it has been covered on the outside by insulation. We used this insulation as we had it hanging around after building the sauna. You might want to use polystyrene, or Kingspan. Use what you have!

Building a hotbox for early seed sowing and propagation

Building a hotbox for early seed sowing and propagation

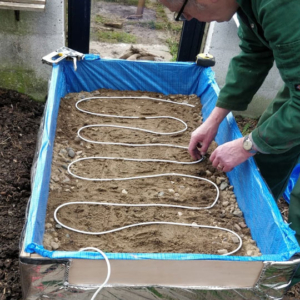
Next, add a layer of sand, and then lay the cables on top of that. We got the Bio Green Warming Cables from Jungle Seeds, and you’ll see that they give basic instructions too for building a hotbox.

The cable is normally laid in runs 3″ to 4″ apart. This layout will allow you to raise the soil temperature by 11-13 C, above the greenhouse ambient. Higher temperatures can be achieved by laying the cable runs as close together as 5cm. In this case, a thermostat should be used to precisely control the soil temperature to avoid overheating.

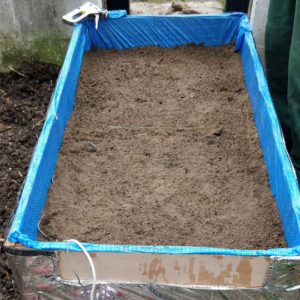
After laying the cables, cover again with another layer of sand. Water all this well. It needs to be kept moist to give good heat transference.

building hot box propagation, early seed sowing and growing

building a hot box for propagation, early seed sowing and growing


building a hot box for propagation, early seed sowing and growing

building a hot box for propagation, early seed sowing and growing

A top tip is to cover the plug socket and thermostat with an upturned bucket. This prevents any water from getting in the electrics when watering the greenhouse!

At night, a layer of bubble wrap can go over the top to tuck your baby plants in.


building a hot box for propagation, early seed sowing and growing

building a hot box for propagation, early seed sowing and growing

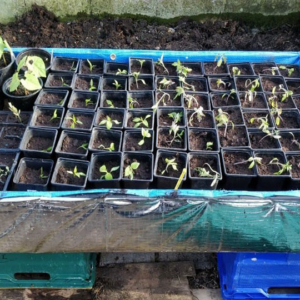
That’s all there is to it! We’ve set leeks, board beans, chillies, lettuce and tomatoes away already and they are growing well in the hot box. You can see I’ve used sawn-off juice bottles as seed pots – waste not, want not!

Do get in touch if you have any questions!

Wishing you a very happy growing season.

As ever, we’d love you to share your thoughts, either by leaving a comment here or on our social media pages, where this article will be shared.

You can find the Bridge Cottage Way on Facebook Twitter and Instagram.

You might enjoy some of the writing and ideas in other sections of this website, as we look towards leading more sustainable lives by growing our own food and creating dishes in line with seasonal eating, or head to our handy ‘Month by Month’ guides to find out what we have been doing here at Bridge Cottage as the months go by:


Many thanks for reading.

With Facebook and Instagram algorithms being fickle friends at times, be sure to get all new posts from The Bridge Cottage Way by signing up for the mailing list here. This will go our four times a year, with the seasons in Spring, Summer, Autumn and Winter. We, of course, will not share your details with third parties, and you have the right to unsubscribe at any time.
Tim & Sue in the Bridge Cottage Way garden

Looking at Leeks: Growing and Eating.

Looking at Leeks: Growing and Eating

Looking at Leeks: Growing and Eating

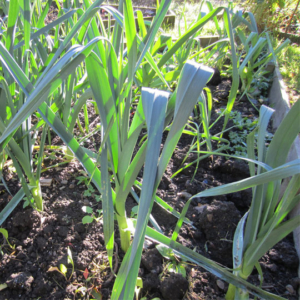
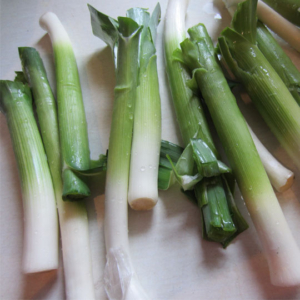
Do you grow leeks? Would you like to grow leeks? They are a hardy crop, standing with patience and fortitude in the ground, month in, month out, waiting to be plucked. Tolerant of the cold and ice, they are a welcome treat in the depths of winter or as tender young things in the summer. I thought I’d share some tips I’ve learnt along the way, plus some tried and tested family recipes.

Looking at Leeks: Growing and Eating

Looking at Leeks: Growing and Eating

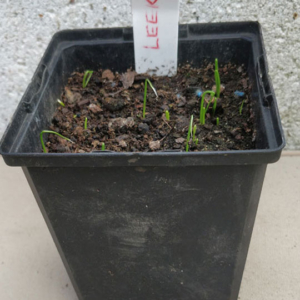
It is February and thoughts are turning to this year’s growing season. My granddaughter and I have been sowing leeks this week. One of the earliest crops to get underway. They will grow in pots indoors or a propagator and then go into the greenhouse to grow on during early Spring.  

Sow your leeks early in the season, Feb – April. Then sow again later in the year, to allow for a succession of crops. Read more about planting in succession here:
Looking at Leeks: Growing and Eating

Looking at Leeks: Growing and Eating

Start your leeks off in a deep pot – they like to send their roots deep down. This will help strong plants to grow. Just sprinkle on top of seed compost, and then cover with a fine layer. Pop somewhere fairly warm: a propagator, warm windowsill or sunny greenhouse once winter’s chill is over.

Looking at Leeks: Growing and Eating

Looking at Leeks: Growing and Eating

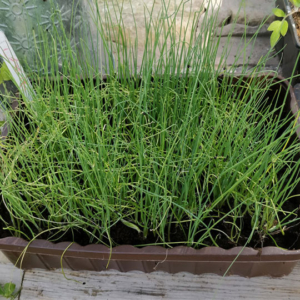
Don’t be tempted to put too many in the seed tray, or you’ll end up with far too many and they’ll be all choked up. We’ve been a bit heavy-handed with our seed sprinkling – you might want to give them a bit more breathing room than we have here!


Looking at Leeks: Growing and Eating

Looking at Leeks: Growing and Eating

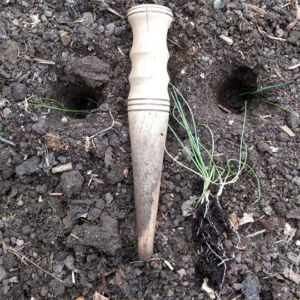
Once your seedlings are large enough to handle – you need a good bit of growth at the top, tease them gently apart, and plant out in the veggie plot using a dibber or stick to make deep holes (about 15-20 cm deep). Don’t you just love that word, dibber. It instantly conjures up memories of helping my grandad in his garden. I have my lovely son to thank for making me my dibber. If you don’t have a dibber, find a stout stick! Pop your seedling in the hole and fill with water from a watering can. Plant with enough space so you can get a hoe in between rows to keep the weeds down later on That’s all there is to it!

You will be rewarded with delicious, nutritious leeks to feed yourselves and your families.

Here are some tried and tested recipes the family have loved here at Bridge Cottage. They all serve a family of four, so scale down for smaller portions. We are meat eaters, so have included bacon in the Leek and Bacon pudding, but feel free to leave it out.

Top tip – when washing leeks, slit the tops with a deep cross and hold upside down under running water, teasing out layer to get all the soil out. Nowt worse than a crunch of grit when you munch!

Looking at Leeks: Growing and Eating

Looking at Leeks: Growing and Eating

Cheesy Leek Gratin

Ingredients

4 large leeks

25g butter

½  tbsp plain flour

Approx. 1 pt milk

100g cheddar cheese

2 handfuls breadcrumbs*

Fresh parsley, finely chopped (optional)

*(whizz up some stale crusts in a food processor – top tip: keep a bag in the freezer so you never have to throw away stale bread)

Method

Wash the leeks well, and chop into chunks. Sauté in the butter for a couple of mins until just tender. Stir in the flour, and then add milk a little at a time until you have the consistency of double cream. Add grated cheddar and season with salt and pepper. Pour into an overproof dish.

Mix the breadcrumbs with chopped parsley, season and place on top of the leeks. Bake in a medium over for 10 minutes, or until breadcrumbs brown.

Leek & Bacon Pudding

Ingredients

125g / 5 oz wholewheat flour

1 ½ tsp baking powder

50g / 20z shredded suet

2 chopped leeks

3-4 rashers streaky bacon, chopped

1 tsp mixed fresh herbs or ½ tsp dried

I medium egg

Method

Mix together flour, baking powder, suet, leeks, bacon, herbs and season with salt and pepper.

Mix with egg, adding a little milk if necessary, to make a soft dropping consistency (so mixture drops off spoon when held aloft)

Grease a 600ml/1 pint pudding basin and put in a piece of greaseproof or parchment paper to just cover the bottom.

Put pudding mixture in basin. Cover with greaseproof paper and foil and tie with string.

Steam for 1 ½ hours. If you don’t have a steamer, place a saucer in the bottom of a large pan, and cover with boiling water. Place pudding on saucer and put lid on pan, topping up water when necessary.

Serve with parsley sauce.

Sue Reed writes for the Bridge Cottage Way

Sue Reed writes for the Bridge Cottage Way

There are, of course, lots of other recipes for leeks – we love a leek risotto, or that old favourite, leek and potato soup. 

As ever, we’d love you to share your thoughts, either by leaving a comment here or on our social media pages, where this article will be shared.

You can find the Bridge Cottage Way on Facebook Twitter and Instagram.


You might enjoy some of the writing and ideas in other sections of this website, as we look towards leading more sustainable lives by growing our own food and creating dishes in line with seasonal eating, or head to our handy ‘Month by Month’ guides to find out what we have been doing here at Bridge Cottage as the months go by:

Many thanks for reading.

With Facebook and Instagram algorithms being fickle friends at times, be sure to get all new posts from The Bridge Cottage Way by signing up for the mailing list here. This will go our four times a year, with the seasons in Spring, Summer, Autumn and Winter. We, of course, will not share your details with third parties, and you have the right to unsubscribe at any time.

Tim & Sue in the Bridge Cottage Way garden

Late Summer Sowing for Autumn & Winter Veg

Autumn at Bridge Cottage

Autumn at Bridge Cottage

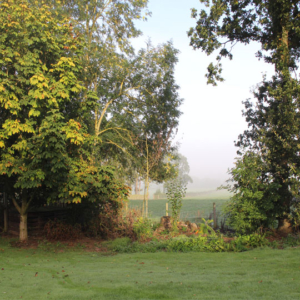
It is late Summer here, and Autumn is knocking on the garden gate. I have noticed the conker tree on the corner of the lane by the nature reserve is starting to change colour. The nights are drawing in, and last night we noticed it getting dark around nine. However, it is not time to give up sowing seeds! There is still plenty of warmth in the air and light in the skies to get some late summer seed sowing done.

July and August are the times to sow seeds for winter veg that can be harvested around Christmas, or overwintered when it will spring into life again once the warmer weather comes. If, along with the tardiness of this post, setting seeds away feels too late, then opt for buying plugs of seedlings. Good choices for sowing now are broccoli, both calabrese and purple or white sprouting, all the brassicas, ie cabbages, kale, cauliflower, sprouts, kohlrabi and oriental salads like mizuna, and rocket. Spinach and chard will get a good bit of growing done now, and then continue in Spring giving several early pickings in the new year.

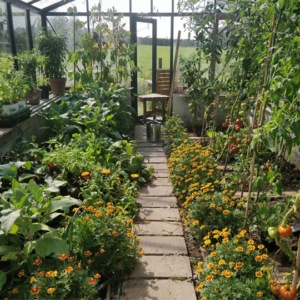
Bridge Cottage Greenhouse

Bridge Cottage Greenhouse

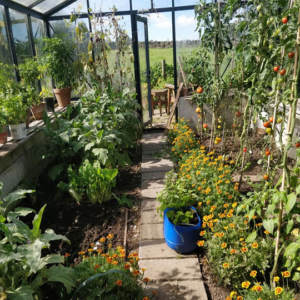
If you have a greenhouse, then as soon as early crops and tomatoes have finished, get some spinach and chard in the ground. Lettuces and radishes are quick to grow, and pak choi, mizuna and rocket will love the cooler temperatures and not be so inclined to bolt. We are experimenting this year with growing a late summer sowing of French beans. I have made a note, however, in my garden journal, to set the seed away earlier next year. If we are too late, then all we will have lost are a few seeds. Nothing ventured, nothing gained. There is also time to sow some more soft herbs in the greenhouse, such as parsley and coriander. Plant your parsley out once the seedlings are bit enough to handle, and it will overwinter well, giving an abundance of vitamin C rich herbage in Spring.

Lifting onions in August

Lifting onions in August

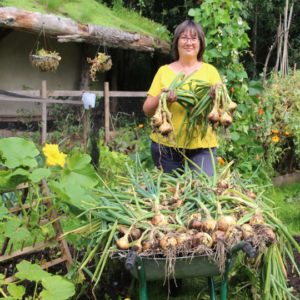
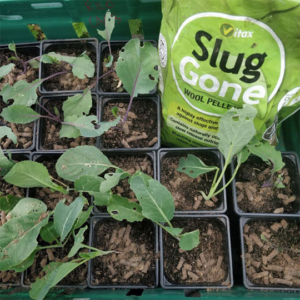
We have just lifted our onions, and space there will be for my patiently waiting red cabbage, kohlrabi, Tuscan and red kale. ‘all year round’ cauliflower and sprouting broccoli. the slugs are doing their darndest to munch their way through them, and so a generous handful of wool pellets has been deployed.

Wool slug pellets on brassica plants

Wool slug pellets on brassica plants

The brassicas are also waiting patiently for us to build another structure for netting. There is nothing more soul-destroying than nursing your seedlings, keeping slugs and rabbits off them, only to find the cabbage whites have had a party on them, and caterpillars are making lace from the leaves. Net all brassicas as soon as they are planted and be aware that the cabbage white butterflies will still lay their eggs on the leaves if they so much as touch the outside. We have found out the hard way this year, which goes to show that there is always something new to learn. How my friend Julia, who is new to gardening, escaped with this unscathed and un-netted broccoli, I do not know how she has managed this. It is beautiful though, and I’m thrilled to hear of so many who have started growing their own veg this year, during the coronavirus pandemic. We will need our homegrown food more than ever in the years to come.

Did you read the article I shared on our social media pages this week? It was about community initiatives to grow food and support food banks and those in the community for whom fresh food is beyond their budget. We’re hoping at Hexham Fresh Food Bank to keep supplying our local food bank, West Northumberland Food Bank, with homegrown produce through the winter months. The challenge is on, so I’d better go and get some late summer sowing and planting done.

Guardian article: How coronavirus has led to a UK boom in community food growing

Thanks for reading, and happy gardening.

As ever, we’d love you to share your thoughts, either by leaving a comment here or on our social media pages, where this article will be shared.

You can find the Bridge Cottage Way on Facebook Twitter and Instagram.

You might enjoy some of the writing and ideas in other sections of this website, as we look towards leading more sustainable lives by growing our own food and creating dishes in line with seasonal eating, or head to our handy ‘Month by Month’ guides to find out what we have been doing here at Bridge Cottage as the months go by:

Many thanks for reading.

With Facebook and Instagram algorithms being fickle friends at times, be sure to get all new posts from The Bridge Cottage Way by signing up for the mailing list here. This will go our four times a year, with the seasons in Spring, Summer, Autumn and Winter. We, of course, will not share your details with third parties, and you have the right to unsubscribe at any time.
Tim & Sue in the Bridge Cottage Way garden


Succession Planting for Vegetables All Year Round

Succession Planting

Succession Planting

Succession planting has nothing to do with the monarchy but refers to the system of planting crops at regular intervals with thought and planning throughout the growing season to make sure you have vegetables all year round. This helps reduce the gluts and shortages, although I can do nothing about the glut of courgettes that so many of experience in summer.

It’s the middle of August as I write, and we’ve just eaten a spinach and chard omelette for lunch, with salad on the side. Thanks to succession planting, we enjoy these three crops more or less the whole year through. Let me explain.

We all know the buzz of excitement as Spring appears, the days become sunny and warm (well, for some they do) and the seed packets come out of storage and new ones bought in garden centres or online. Perhaps now is time to give a shout-out to Premier Seeds Direct, Real Seeds and Higgledy Garden who have done a fabulous job at supplying us with seeds during this crazy pandemic year.

Seeds for Winter Veg

Seeds for Winter Veg

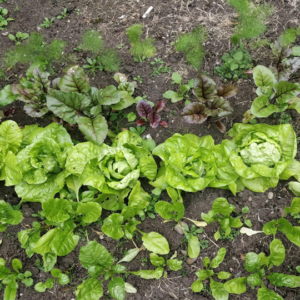
It’s so easy to plant too many seeds at once – and my top tip here is only planting a few of the seeds you are going to grow, in succession; a few lettuces at a time, a short row of spinach and chard, and maybe half your broad beans, leaving more to plant in a month’s time. Lettuce, spinach, chard and beetroot are crops I like to sow at maybe four intervals throughout the growing season.

Make the most of your containers here, and a succession of tubs of cut and come again salad leaves can be very handy.

The more tender plants like runner beans courgettes, squash can go in once early crops like garlic, early beetroot or onions are out.

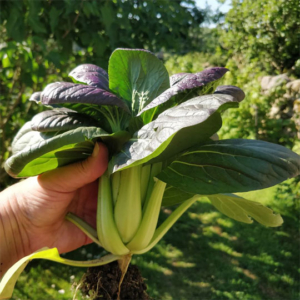
Spring grown pak choi

Spring grown pak choi

Then there are those plants which don’t do as well in the hot summer months. We had wonderful pak choi this Spring but found the second sowing bolted in July. I’m going to sow some now that the days are shortening, and it should fare better over the next few weeks. Pak choi is a fairly quick crop to grow, as is rocket (clue’s in the name) and is another crop that likes to be sown early and later in the growing season.

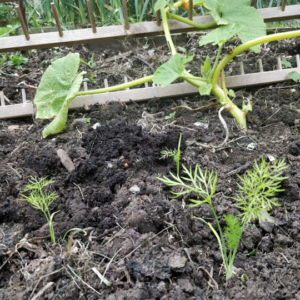
Companion Planting

Companion Planting

Fennel too likes to grown away from summer’s heat. We’ve just put in some fennel that had been sown in plugs, next to this climbing squash. Fennel and squash do well grown together if you are into companion planting. 

Late summer is the time to think ahead towards the winter. Do you want braised red cabbage with your Christmas dinner? Then get some planted out in the summer months. There is still plenty of fine weather in these late summer months and the ground beautifully warm, for crops to grow and be harvested at the end of the growing season or remain in the ground to give lovely fresh vegetables over Winter and Spring. Kale, cabbages, sprouting broccoli, all-year-round cauliflower, perpetual spinach, chard, beets are all good examples of crops to overwinter.


Wool slug pellets on brassica plants

Wool slug pellets on brassica plants

Don’t forget to cover your brassicas with net – those pretty while butterflies we see flitting around the veg patch are longing to lay their eggs on your cabbages, which will in turn to hungry caterpillars. The slugs are doing their darndest to prevent my winter veg growing, but I’ve just given them a liberal sprinkling of wool slug pellets, so fingers crossed they make it into the ground.

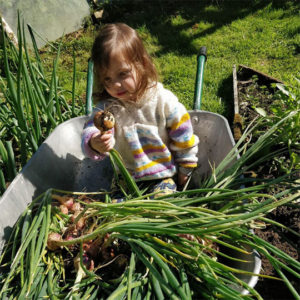
The Lady of Shallot

The Lady of Shallot

Speed is of the essence, and it’s an idea to have young plants or seeds ready for when early crops are out. We’re pulling up our onions on Saturday, with some help from the Lady of Shallot here, and have kohlrabi, red cabbage, red and Tuscan kale and cauliflower waiting to go in. The slugs are doing their darndest to prevent this, but I’ve just given them a liberal sprinkling of wool slug pellets.

If you’ve got a greenhouse, or live down South, then this is a whole different ball game, and your growing season is extended even further at either end. We have great success growing French, dwarf and borlotti beans in the greenhouse early doors, and then sow again outside once the dangers of frost have passed.


This year are going to experiment with a third, very late sowing of French beans in the greenhouse. We’re not sure it will work, but all we will have lost are a few seeds and a bit of time or trouble. If ever you are in doubt about sowing – give it a go! We can also never predict what the weather is going to be like, so nothing ventured, nothing gained.

Bridge Cottage Greenhouse

Bridge Cottage Greenhouse

Tim is always saying, ‘write it down’ and a garden journal is a really useful tool. Succession planting is about planning and remembering what has worked one year to the next. However, I’m rubbish at following my own advice, and so often forget to write successes and failures down, which is surprising, seeing as I’m a writer.

There are various online digital planners, and after a quick look down the Google tube, I found this Vegetable Garden Planner App from Growveg. I’ve not used it myself, I love a journal, but would be interested to hear from anyone who has found a good gardening planning digital tool.

I do hope this has been useful if you’re new to gardening or succession planting. Please get in touch if there is anything I haven’t covered, or if you have any questions.

I’m off to sow those late French beans and some pak choi to grow in the greenhouse once the tomatoes and aubergines have finished.

See also: Late Summer Sowing for Autumn & Winter Veg

Happy Gardening!

Sue

Biennial Sowing in Summer

Biennial Sowing in Summer

As ever, we’d love you to share your thoughts, either by leaving a comment here or on our social media pages, where this article will be shared.

You can find the Bridge Cottage Way on Facebook Twitter and Instagram.

You might enjoy some of the writing and ideas in other sections of this website, as we look towards leading more sustainable lives by growing our own food and creating dishes in line with seasonal eating, or head to our handy ‘Month by Month’ guides to find out what we have been doing here at Bridge Cottage as the months go by:

Many thanks for reading.

With Facebook and Instagram algorithms being fickle friends at times, be sure to get all new posts from The Bridge Cottage Way by signing up for the mailing list here. This will go our four times a year, with the seasons in Spring, Summer, Autumn and Winter. We, of course, will not share your details with third parties, and you have the right to unsubscribe at any time.
Tim & Sue in the Bridge Cottage Way garden

July 2020 Blog – Summer at Bridge Cottage

July 2020 in The Bridge Cottage Garden

July 2020 in The Bridge Cottage Garden

Welcome to the July 2020 blog, where we look back at life in the Bridge Cottage garden and kitchen over the past month, and our attempts to live a more sustainable life in this summer month.

It’s been a wet and cold July up here in Northumberland, and we’ve been wondering where summer went to. I think we had it back in May! I hear the south is basking in hot sunshine, but as I write this, it’s grey and windy, and two of our sunflowers have just blown down. Never mind, we have sunshine to look forward to this weekend, and the garden is in full bloom, with dahlias and lilies coming into their own, and tall sunflowers reaching for the sky, turning their faces to look for the sun.

Hexham-Fresh-Food-Bank-Donation

Hexham Fresh Food Bank Donation

We are very grateful for our garden during these difficult Covid-19 times. Growing your own food has never been so important, and we’re delighted to hear of many of you planting out allotments and veg plots for the first time. We’ve continued to support our local Food Bank, dropping off donations for the Hexham Fresh Food Bank Group. This is a great scheme; food poverty being a tragic part of life for so many in our communities

The lockdown was eased after a fashion, but we still kept ourselves very much to ourselves. Having kept out of the supermarkets during the lockdown, we found our shopping habits continued in this vein, and with so much ready in the garden, we have been eating very simply indeed. In Hexham, we have some great independent shops, which have seen us buying cheese, butter, olives & cream for our local Deli at Number 4, and rice, pasta, coffee and other basics from the new Refill Shop on Market Street. We have a fabulous Farmer’s Market in Hexham town centre too.

July saw us engage with Plastic Free July, and whilst we’ve always been keen to reduce our use of plastic (one of the reasons we steer clear of supermarkets where possible), this month we really looked at the plastic in our home and made a few more changes to our habits.


Plastic Free July - Who Gives a Crap

Plastic Free July – Who Gives a Crap

Toilet rolls are an ongoing debate with many, and discussions took place over on our Facebook and Instagram accounts about where the bamboo is sourced, that so much of ethical toilet roll is made from, where it is made, and how it is shipped. We bought a box of ‘Who Gives a Crap’ and very much like that their rolls are made from recycled paper, and that this past year they donated 3.2 million pounds to help provide sanitation in communities where it is lacking.

Plastic-Free-July

Plastic-Free-July

Refill shops are a great way of saving plastic, and we’ve made the switch to solid shampoo bars, and refills for washing-up liquid and other household cleaning products. We’ve also now got a pile of reusable wipes in the bathroom for when our granddaughter has her nappy changes or if we need a freshen up, made by cutting up an old towel. A handy bag hangs on the loo roll holder, and they are washed, ready to be used again.

There are so many other ways single-use plastic can be reduced – our local Eco Home shop, Matthais Winter, will take toothpaste tubes for recycling, and has a huge range of products. We recently needed new clothes pegs and found some wooden ones there.

Spinach and Eggs

Spinach and Eggs

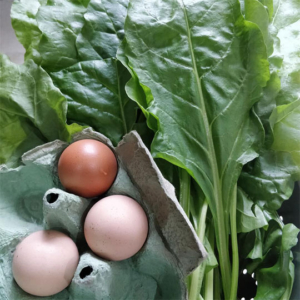
The garden is now being bountiful, with so many wonderful veggies and fruit. We’ve eaten some glorious meals using spinach and kale and discovered Hugh Fearnley-Whittingstall’s recipe for Spouffle in his book, Veg. The Bridge Cottage chickens are laying well, so spinach quiches and omelettes are regulars on the table. Courgettes are coming thick and fast, and the red onions and shallot lifted, thanks to our little helper, the Lady of Shallot.

The Lady of Shallot

The Lady of Shallot


Nasturtium Pesto Ingredients

Nasturtium Pesto Ingredients

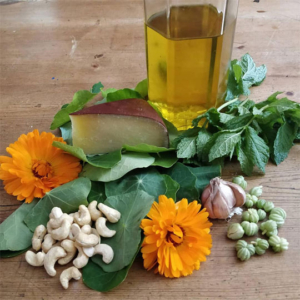
Pam Corbin in her book, Preserves, gives a wonderful nasturtium pesto recipe, which we had with roast chicken, cooked in our outdoor wood-fired oven.


Redcurrant and Almond Cake

Redcurrant and Almond Cake

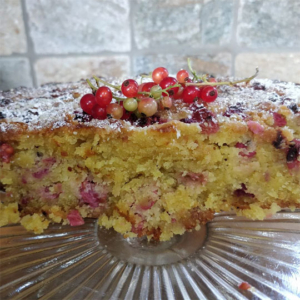
July is the month for soft fruit, and we’ve picked pounds of raspberries, blackcurrants and redcurrants. I discovered a great recipe for a redcurrant cake from Mrs Portly’s Kitchen, and an equally wonderful blackcurrant cheesecake from Gill Meller’s fabulous book Root, Stem, Leaf, Flower. We have enjoyed some warm days, and homemade ice-cream – so much better than shop-bought!

Many have been jam and jelly making in earnest – I’ve made a batch of redcurrant jelly, but apart from that have been too busy gardening or writing content for this new website, so all the soft fruit picked has gone into the freezer. Tim will soon be making raspberry and blackcurrant vinegar, and I’ll make up batched of summer fruit compote to have with our homemade yoghurt in the mornings, or on porridge. You’ll find a recipe for Raspberry Jam over in The Bridge Cottage Kitchen.

Summer Herbal Tea

Summer Herbal Tea

We’re continuing to dry herbs for use over winter and make our own herbal teas. July is seeing me use calendula, borage, mint and lemon balm in a delicious tea. We’re also drinking a lot of cucumber water – with a bit of fizz from the soda stream. I had a friend over for a socially distanced cup of tea (how I’ve missed my friends during lockdown) and took this as an opportunity to make a batch of herby shortbread. This time I used calendula and borage, but have also had great success with calendula and thyme or lavender shortbread.

Seeds for Winter Veg

Seeds for Winter Veg

Now is also a great time to sow winter salad, bulb fennel, winter cabbages, all year round cauliflower, spinach, kale and sprouting broccoli, which will sprout in the early Spring. The long days are still here, and once onions are lifted, and potatoes dug, there will be space for these late summer sowings. I think we get so excited in Spring and can plant massive amounts of seeds, then successional sowing can sometimes go out of the window. I’m off this afternoon to pop some fennel seedlings in the ground, next to the squash. I wrote about companion planting this month. our vegetables are like us, they have friends they’d rather be with than others, That is one reason for all the nasturtiums, borage and calendulas in the garden, They make great companions for many plants.


Tomatoes

Tomatoes

Tomatoes are ripening nicely in the greenhouse, and in next month’s instalment, I’ll let you know how we make our own passata and ‘sun’ dried tomatoes. It’s a daily job to keep everything watered and fed. We’re so glad we took the time to make our own organic comfrey feed. We’ve been adding borage to the bin too, and this provides so many good nutrients. The tomatoes love it!

July 2020 Veg Plot

July 2020 Veg Plot

I think I’d better go now, I could waffle on forever! I hope this has given you a snapshot of life in July here in 2020, a year that will go down in history for many reasons. Will this be the year you started to grow your own food? I hope so!


As ever, we’d love you to share your thoughts, either by leaving a comment here or on our social media pages, where this article will be shared.

You can find the Bridge Cottage Way on Facebook Twitter and Instagram.

You might enjoy some of the writing and ideas in other sections of this website, as we look towards leading more sustainable lives by growing our own food and creating dishes in line with seasonal eating, or head to our handy ‘Month by Month’ guides to find out what we have been doing here at Bridge Cottage as the months go by:

Many thanks for reading.

With Facebook and Instagram algorithms being fickle friends at times, be sure to get all new posts from The Bridge Cottage Way by signing up for the mailing list here. This will go our four times a year, around the Summer and Winter Solstices, and the Spring and Autumn Equinox. We, of course, will not share your details with third parties, and you have the right to unsubscribe at any time.
Tim & Sue in the Bridge Cottage Way garden

Growing Raspberries from the Bridge Cottage Garden

Growing Raspberries

Growing Raspberries

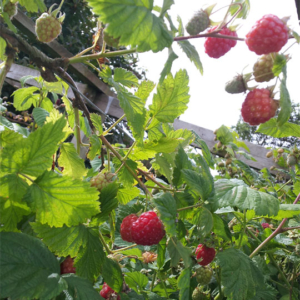
As I write, it is July and raspberry season is in full swing. Every day I go out into the garden, and come back with a big bowlful, eating them for breakfast with our homemade yoghurt, or freezing to use later. It’s a very busy time in the garden, and we make the most of sunny days outside, but rainy days are busy making jams, jellies, vinegars and puddings. Raspberries are so easy to grow and seem to love these Northern climes. I remember well the summer job I had as an eighteen-year-old, up in Inverness at a raspberry picking farm, but I’ll leave those tales for the memoir!

Let’s take a look at growing raspberries. Firstly, where to get raspberry canes from? Any fellow gardeners or allotment holders who grow raspberries will be sure to have a few spare canes they can pull up for you. Don’t be shy, ask! Here in Hexham, we have a Facebook group, Hexham Plant Swop, and it’s a great place to source plants such as raspberry canes. Do you have one in your area, or could you set one up?

Growing Raspberries

Growing Raspberries

The ’cheap shops’ – Aldi, Lidl etc are also great places for soft fruit and can be relatively inexpensive. We’ve brought some great fruit trees and fruit bushes from Aldi.

Then of course, there are your garden centres, which will have a variety of summer and autumn fruiting varieties when the season is right.

If you grow a variety of summer and autumn raspberries, you will have this delicious soft fruit all summer long, extending into autumn. What a treat!

How to plant, grow and prune raspberries

Plant raspberry canes about 45 cm apart, in rows about 1.8 m apart. We grow them along the fence to the chicken field. Give the roots a good soak before they are planted. Raspberries like an open, sunny position, and will need to be tied in as they grow.

You may like to grow them in a clump or in a large container if space in the ground is short. You can use a central support for this.

Some people net their raspberries, to keep the birds away, but we have so many, I don’t mind sharing them with the blackbirds, who sit cheekily on top of the fence as I pick, or fly out from underneath the canes with pieces of ripe, red, juicy fruit in their beaks. They are welcome to a few, as long as they don’t take the piddle!

Mulching raspberries with grass cuttings

Mulching raspberries with grass cuttings

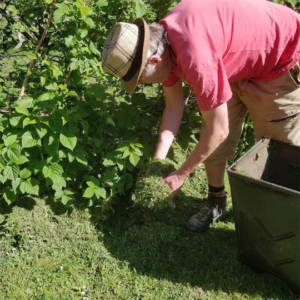
Give your raspberries some organic feed in the Spring, and mulch around the roots to prevent weeds and to keep the moisture in. We use grass cuttings for this.

Raspberries like to wander, and you’ll soon find canes popping up where they are not welcome. Just pull them up, donate to a friend, or consider establishing a new patch. It’s a good idea to move your raspberry patch every few years. You can let a new one grow where the suckers have popped up or dig up and transplant. This keeps them free or tolerant of virus diseases. If you do keep them in the same place indefinitely, the canes will become weaker, and the fruits smaller.

Are your raspberries summer fruiting or autumn fruiting?


Summer Fruiting Raspberries

Tie summer fruiting raspberry canes to a fence or stake

Tie summer fruiting raspberry canes to a fence or stake

July is the month when the summer fruiting raspberries are at their best here at Bridge Cottage, though further south this may well be June. Summer fruiting raspberries produce fruit on last year’s growth. You need to tie in your raspberry canes, either by using string to tie to a fence, as we have done in the photo here, of by providing a fence or stakes for support. As the fruits appear on the stems you have tied up, new shoots will appear in front, with green, young stems. These will bear the fruit next year.

When you have finished harvesting, which for us will be in August sometime, cut the fruited canes at ground level, and tie in the new, green canes. This can be done in winter, although I like to get it done as soon as the fruited canes have finished preventing the new ones becoming too battered by the wind.


Autumn Fruiting Raspberries

Autumn fruiting raspberries start to produce fruit for us at the end of August and will go through to the end of September. The canes with autumn raspberries tend to be shorter, and as such don’t need as much staking as the summer ones. Mine don’t have any staking at all. These will need pruning after they have fruited. Cut right down to the ground. This can be left to do in the winter.

growing raspberries

growing raspberries

Considering how expensive raspberries are in the shops, growing raspberries yourself makes great sense, especially considering how easy they are to grow. You’ll be reducing your single plastic use, by not buying fruit in plastic punnets, and reducing your carbon footprint by reducing the transport miles of your food. You will be able to enjoy fresh, organic food, at a fraction of the cost.

Raspberries and homemade yogurt

Raspberries and homemade yoghurt

There are so many ways to use raspberries, and I’d love to hear from you of some of your favourite ways of eating this delicious fruit.

We make our own yoghurt, so this is a simple but favourite way to enjoy raspberries for breakfast.

  • Make Your Own Yoghurt


Here are some of ours, and if you hop over to the Bridge Cottage Kitchen, you’ll find recipes for:

As ever, we’d love you to share your thoughts, either by leaving a comment here or on our social media pages, where this article will be shared.

You can find the Bridge Cottage Way on Facebook Twitter and Instagram.

You might enjoy some of the writing and ideas in other section of this website, as we look towards leading more sustainable lives by growing our own food and creating dishes in line with seasonal eating, or head to our handy ‘Month by Month’ guides to find out what is seasonal and on topic:

Many thanks for reading.

With Facebook and Instagram algorithms being fickle friends at times, be sure to get all new posts from The Bridge Cottage Way by signing up for the mailing list here. This will go our four times a year, around the Summer and Winter Solstices, and the Spring and Autumn Equinox. We, of course, will not share your details with third parties, and you have the right to unsubscribe at any time.
Tim & Sue in the Bridge Cottage Way garden

Thanks for reading. Best wishes, Tim and Sue Reed


Grow Better Veg with Companion Planting

Companion Planting - Courgette growing with calendula and borage.

Companion Planting – Courgette growing with calendula and borage.

Companion planting. Like us, plants have friends, and like us, they have are some they like more than others. For example, my potatoes love hanging out with horseradish but put the squashes right off their game.

Companion planting

Companion planting

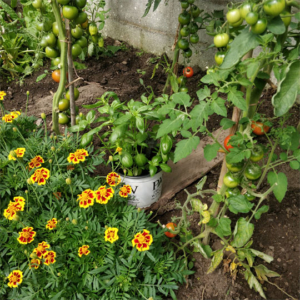
We’ve known about companion planting for a while, and in the greenhouse, we take care to grow French Marigolds alongside the tomatoes. As well as looking very pretty, these attract the hoverflies, which much on aphids and other pests. Basil likes to be there too, but at a distance and prefers to stay in its pots.

Tomatoes and Marigolds. Companion Planting in the Greenhouse

Tomatoes and Marigolds. Companion Planting in the Greenhouse

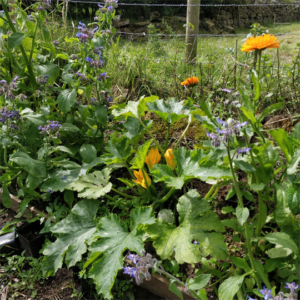
We find it useful to start a few trays of calendulas, French marigold and nasturtiums off in the early spring, to pop in alongside beans, or in pots. Our courgettes are loving the companionship of borage and nasturtiums and are just coming into that prolific stage where you are scratching your head in the kitchen for some new inspiration with courgette recipes. The borage self-seeds from the year before – although strictly an annual, once you have borage in the garden, it won’t leave you.


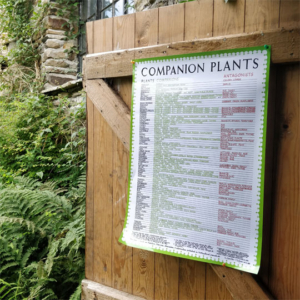
Herb Society UK Companion Planting Poster

Herb Society UK Companion Planting Poster

We follow the Herb Society UK on both Facebook and Instagram, and this year bought a very useful poster from them, which is pinned to the back of the potting shed door. It gives a long list of plants, their companions, and antagonists.

I’d been wondering why, out of six squashes planted, two had yellowing leaves and were failing to thrive….the answer may well be that potatoes are antagonists to squashes. It will be interesting to see if they pick up once the potatoes have been dug up. We could move them, but where to? The garden is full to bursting. We may well pop a borage plant in there, as I see from my poster that borage is a good companion plant to squash – goodness knows, the borage is doing really well, providing masses of edible blue flowers as well as material to go in the dustbin for making organic comfrey feed. 

The onions are about to be lifted, and I see from our chart that carrots and beetroot both like onions, so it seems a good idea to pop in a few rows of late carrots and beetroot once they’ve been dug up. Although I’ll have to sneak in the beetroot – Tim thinks it’s the food of the devil – I disagree!

Next year, I’m looking forward to trialling the Three Sisters method of planting squash, beans and sweetcorn together – though whether there will be enough sun for sweetcorn in Northumberland remains to be seen.

I had a quick look on the internet for useful links and companion planting charts and have found a few, which I hope will be helpful to you.

Here are the links:


As ever, we’d love you to share your thoughts, either by leaving a comment here or on our social media pages, where this article will be shared.

You can find the Bridge Cottage Way on Facebook Twitter and Instagram.

You might enjoy some of the writing and ideas in other section of this website, as we look towards leading more sustainable lives by growing our own food and creating dishes in line with seasonal eating, or head to our handy ‘Month by Month’ guides to find out what is seasonal and on topic:

Many thanks for reading.

With Facebook and Instagram algorithms being fickle friends at times, be sure to get all new posts from The Bridge Cottage Way by signing up for the mailing list here. This will go our four times a year, around the Summer and Winter Solstices, and the Spring and Autumn Equinox. We, of course, will not share your details with third parties, and you have the right to unsubscribe at any time.
Tim & Sue in the Bridge Cottage Way garden

Thanks for reading. Best wishes, Tim and Sue Reed

Tying up Unruly Peas, Mangetout & Broad Beans

Mangetout in the Bridge Cottage Garden

Mangetout in the Bridge Cottage Garden

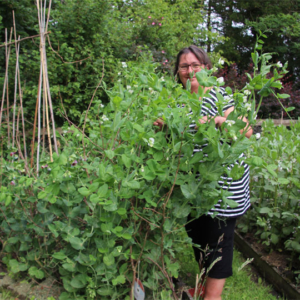
It’s June, and the crops are growing well in the Bridge Cottage garden, but I have unruly beds of broad beans and mangetout that have grown to be taller than me in places and are starting to waft and wave. If we get a windy day, they will snap, so I thought I’d better get them fettled.

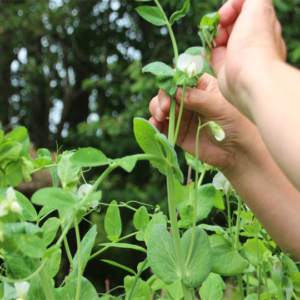
First, the tops were nipped out. This will stop them getting any taller, help them to bush out, and the tips, lightly steamed are delicious to eat.


Pinch out the tips of broad beans and mangetout

Pinch out the tips of broad beans and mangetout


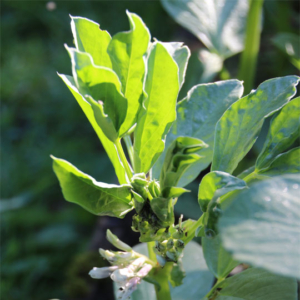
If growing broad beans, pinching out the tips will also help to deter blackfly. These are very tasty, lightly steamed.

Broad Bean tips

Broad Bean tips


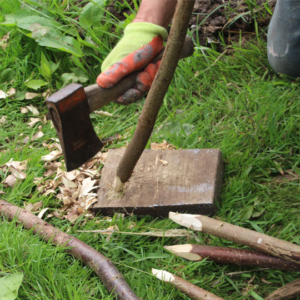
Sharpening the ends of hazel poles to make stakes

Sharpening hazel poles for stakes

We coppiced a hazel tree in the winter, and so have these beautiful hazel poles to use. You could also use garden canes, but I like the rustic feel of the hazel, and am not a fan of going to garden centres unless I have to! Tim used an axe the sharpen the ends to make them easier to drive into the ground.

Beds of mangetout, peas and broad beans in the Bridge Cottage Garden

Beds of mangetout, peas and broad beans in the Bridge Cottage Garden

Placing the supports around the crops, I used natural twine, and wound it around the poles, skirting the broad beans and mangetout at three different height levels.


A job well done! Now my broad beans and peas can continue to grow without the risk of falling over or getting too tall.


Mmm, mangetout are delicious

Mmm, mangetout are delicious

We had a little visitor to Nanny and Grandad’s garden today, and she thought that her first taste of mangetout, freshly picked was ‘delicious’ 🙂


Are you growing peas, beans or mangetout?


Have you had your first harvest yet?


As ever, we’d love you to share your thoughts, either by leaving a comment here or on any of our social media pages, where this article will be shared.

You can find the Bridge Cottage Way on Facebook Twitter and Instagram.

You might enjoy some of the writing and ideas in other section of this website, as we look towards leading more sustainable lives by growing our own food and creating dishes in line with seasonal eating, or head to our handy ‘Month by Month’ guides to find out what is seasonal and on topic:

Many thanks for reading.

With Facebook and Instagram algorithms being fickle friends at times, be sure to get all new posts from The Bridge Cottage Way by signing up for the mailing list here. This will go our four times a year, around the Summer and Winter Solstices, and the Spring and Autumn Equinox. We of course will not share your details with third parties, and you have the right to unsubscribe at any time.
Make your own Organic Comfrey Feed

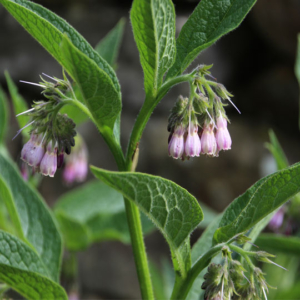
Comfrey

comfrey

We cut down comfrey to make our own organic comfrey feed here at Bridge Cottage at the end of May or beginning of June to make a feed for our tomatoes, peppers, cucumbers, dahlias and clematis, hanging baskets and indoor pot plants. this process then continues throughout the summer, as comfrey if fast-growing.


Comfrey is an excellent source of potassium, an essential plant nutrient for flower, seed and fruit production. Its leaves contain 2-3 times more potassium than farmyard manure. The comfrey root grows very deep, tapping sources of potassium in the subsoil that would not normally be available to plants and thus makes comfrey a superb plant for the organic gardener who is looking to use homemade, organic means of fertilising crops. We also add nettles to the mix, as they contain nitrogen, which is important for leafy growth


Other plants to add to the comfrey feed bucket are nettles, rich in nitrogen and borage.

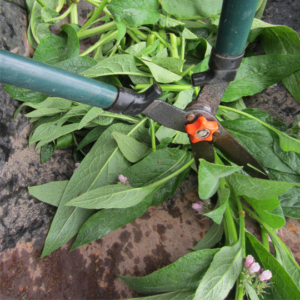
cutting comfrey with shears

Cutting comfrey with shears

We like to leave the cutting of comfrey until the bees have had their fill of the nectar from the flowers, which here in Northumberland is around the beginning of June. It might be earlier if you are in more southern climes.

We grow Russian comfrey, but be warned – this is very invasive, so unless you have a big plot, you might like to look for the Bocking 14 variety which is easier to tame. Bocking 14 is also higher in nutrient content than the wild comfrey.  See if you have a local plant swop group or find someone with a big clump who is happy to divide it for you. Once established, this is a prolific plant, so finding some shouldn’t be a problem.


Cut the leaves using shears and wearing gloves, about 5cm from the ground. You can be brutal, and this plant will soon grow back, allowing you to do another cutting from it later in the year.


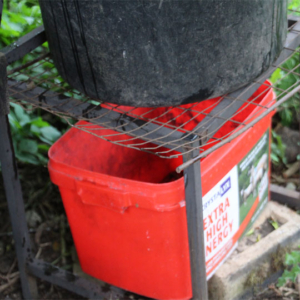
Comfrey feed drips into container under bin

Comfrey feed drips into the container under the bin

There are two schools of thought when it comes to making the feed. If you are a fan of Gardener’s World, you may have seen Monty Don adding comfrey leaves to a bucket of water and letting that steep. It produces a less concentrated feed, is easy to do, but boy, does it stink! Use approximately 1kg leaves to 15 litres of water. After about 4-6 weeks this can be strained, and the leaves put on the compost heap. It can then be watered directly onto your plants.

Another method is to make a concentrate. Use a container with a hole in the bottom, or a bokashi bin. Place the leaves in the bin, chop with shears, and then press own with a weight. (we use a couple of bricks in a bucket) and allow the leaves to rot of their own accord, catching drips of this precious black liquid, which should be used sparingly. Use in a ratio of one-part feed to ten parts water.


dilute comfrey feed with water

Organic Comfrey Feed

Feed your crops:

  • tomatoes/peppers in pots – feed 3 times a week
  • tomatoes/cucumbers in greenhouse beds – feed twice a week
  • indoor and outdoor pot plants/hanging baskets – feed once a week

Feed tomato plants with comfrey feed as the first fruits set


Other uses for Comfrey:

Composting

Place cut or bruised comfrey leaves in alternate layers throughout your compost heap. Their decomposition will encourage bacterial action causing the heap to heat up and speed up the composting process.


Mulch

Use as a mulch.  Chop up comfrey leaves with grass cuttings and place a 5cm layer on the surface of the soil around all plants. This will slowly rot down to provide nutrients and act as a mulch to keep in moisture and help control weeds.


Leaf Mould Seed Compost

Add fresh cut leaves to your leaf mould heap. Their nutrient-rich liquid will be absorbed, making it a perfect medium for growing seeds and potting compost.


Planting Potatoes & Beans

Fertilise the bottom of your potato and runner bean trenches with a layer of comfrey leaves. As they break down, the plant roots will access the potassium-rich fertiliser.

If you master the making of an organic feed, your plants will love you and so will the planet.

Happy gardening 🙂

As ever, we’d love you to share your thoughts, either by leaving a comment here or on any of our social media pages, where this article will be shared.

You can find the Bridge Cottage Way on Facebook Twitter and Instagram.

You might enjoy some of the writing and ideas in other section of this website, as we look towards leading more sustainable lives by growing our own food and creating dishes in line with seasonal eating, or head to our handy ‘Month by Month’ guides to find out what is seasonal and on topic:

Many thanks for reading.

With Facebook and Instagram algorithms being fickle friends at times, be sure to get all new posts from The Bridge Cottage Way by signing up for the mailing list here. This will go our four times a year, around the Summer and Winter Solstices, and the Spring and Autumn Equinox. We of course will not share your details with third parties, and you have the right to unsubscribe at any time.