Tag Archive for: growing

How to build a hotbox for propagation, early seed sowing and growing

Hot box propagation

Hotbox propagation

Making a hotbox may well be the answer if are you chomping at the bit to get the growing season started, It’s still February and last week we had snow. However, the sun started shining this week after a long Winter. We are still in Lockdown due to the pandemic and goodness knows we are longing to get growing again. Last year’s lockdown seemed so much easier to bear, with veggies to grow and gardens to tend, but we must remember it is still Winter!

Hotbox propagation. for early seed sowing and growing

Hotbox propagation. for early seed sowing and growing

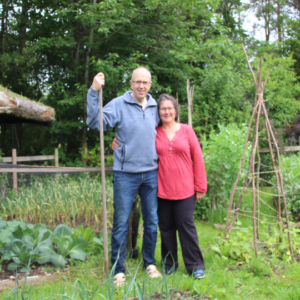
Last year Tim built a hot box for the greenhouse, and it’s brilliant! We can set seeds away and grow then on without fear of the frost getting to them. I know some of you who have seen pictures of this on the Bridge Cottage Way Facebook page have asked how he made it, so here you go.

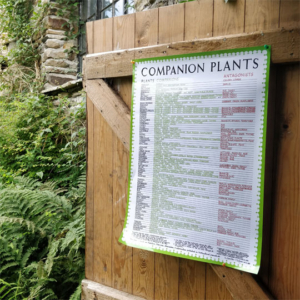
It’s quite simple. We got the idea and all the help we needed from Jungle Seeds.

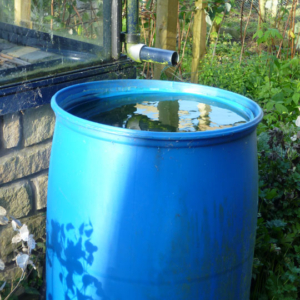
You will need a greenhouse or cold frame and a source of electricity. We have run an outdoor extension lead from the garage into the greenhouse. We have taken care to cover any electrical parts with a bucket so avoid accidents when watering!

The heat comes from Bio Green Soil Warming cables.  available from Jungle Seeds.


Building a hotbox for early seed sowing a propagation

Building a hotbox for early seed sowing a propagation

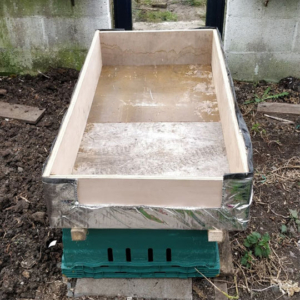
We started by building a wooden box. The bottom was taken from an old dining room table, and the sides, off-cuts of plywood. You may want to build something smaller, a tray for example. In this first picture, you can see it has been covered on the outside by insulation. We used this insulation as we had it hanging around after building the sauna. You might want to use polystyrene, or Kingspan. Use what you have!

Building a hotbox for early seed sowing and propagation

Building a hotbox for early seed sowing and propagation

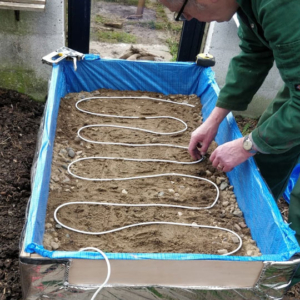
Next, add a layer of sand, and then lay the cables on top of that. We got the Bio Green Warming Cables from Jungle Seeds, and you’ll see that they give basic instructions too for building a hotbox.

The cable is normally laid in runs 3″ to 4″ apart. This layout will allow you to raise the soil temperature by 11-13 C, above the greenhouse ambient. Higher temperatures can be achieved by laying the cable runs as close together as 5cm. In this case, a thermostat should be used to precisely control the soil temperature to avoid overheating.

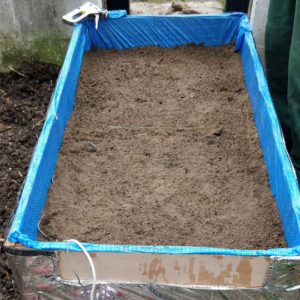
After laying the cables, cover again with another layer of sand. Water all this well. It needs to be kept moist to give good heat transference.

building hot box propagation, early seed sowing and growing

building a hot box for propagation, early seed sowing and growing


building a hot box for propagation, early seed sowing and growing

building a hot box for propagation, early seed sowing and growing

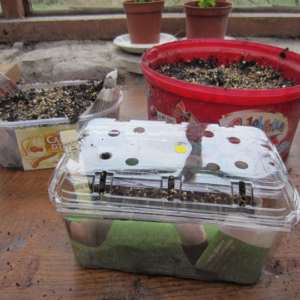
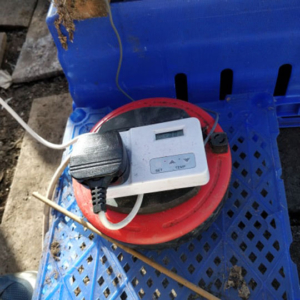
A top tip is to cover the plug socket and thermostat with an upturned bucket. This prevents any water from getting in the electrics when watering the greenhouse!

At night, a layer of bubble wrap can go over the top to tuck your baby plants in.


building a hot box for propagation, early seed sowing and growing

building a hot box for propagation, early seed sowing and growing

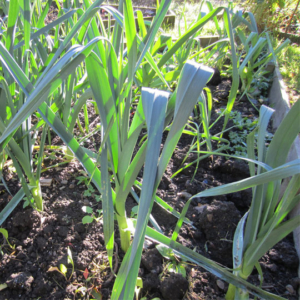
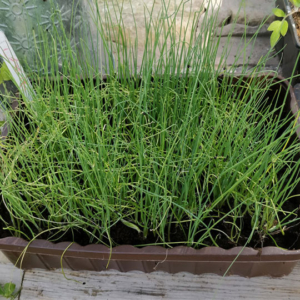
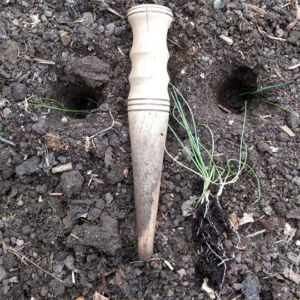
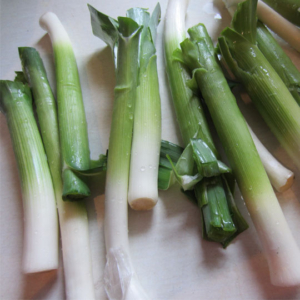
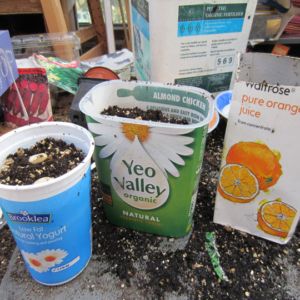
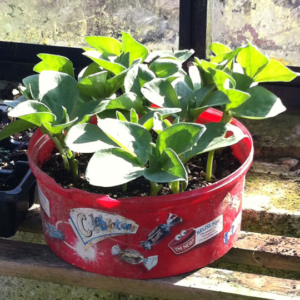
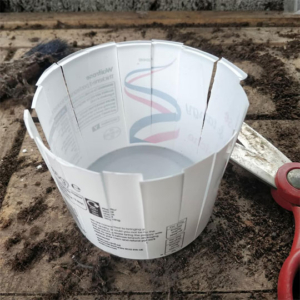
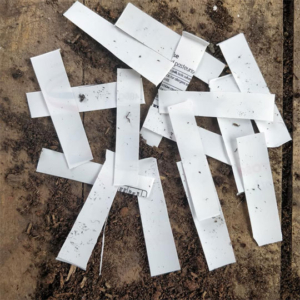
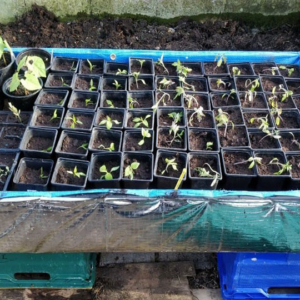
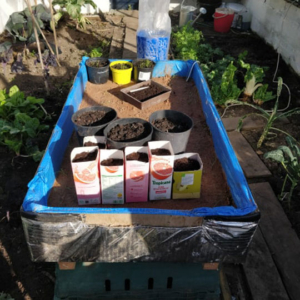
That’s all there is to it! We’ve set leeks, board beans, chillies, lettuce and tomatoes away already and they are growing well in the hot box. You can see I’ve used sawn-off juice bottles as seed pots – waste not, want not!

Do get in touch if you have any questions!

Wishing you a very happy growing season.

As ever, we’d love you to share your thoughts, either by leaving a comment here or on our social media pages, where this article will be shared.

You can find the Bridge Cottage Way on Facebook Twitter and Instagram.

You might enjoy some of the writing and ideas in other sections of this website, as we look towards leading more sustainable lives by growing our own food and creating dishes in line with seasonal eating, or head to our handy ‘Month by Month’ guides to find out what we have been doing here at Bridge Cottage as the months go by:


Many thanks for reading.

With Facebook and Instagram algorithms being fickle friends at times, be sure to get all new posts from The Bridge Cottage Way by signing up for the mailing list here. This will go our four times a year, with the seasons in Spring, Summer, Autumn and Winter. We, of course, will not share your details with third parties, and you have the right to unsubscribe at any time.

Tim & Sue in the Bridge Cottage Way garden

Looking at Leeks: Growing and Eating.

Looking at Leeks: Growing and Eating

Looking at Leeks: Growing and Eating

Do you grow leeks? Would you like to grow leeks? They are a hardy crop, standing with patience and fortitude in the ground, month in, month out, waiting to be plucked. Tolerant of the cold and ice, they are a welcome treat in the depths of winter or as tender young things in the summer. I thought I’d share some tips I’ve learnt along the way, plus some tried and tested family recipes.

Looking at Leeks: Growing and Eating

Looking at Leeks: Growing and Eating

It is February and thoughts are turning to this year’s growing season. My granddaughter and I have been sowing leeks this week. One of the earliest crops to get underway. They will grow in pots indoors or a propagator and then go into the greenhouse to grow on during early Spring.  

Sow your leeks early in the season, Feb – April. Then sow again later in the year, to allow for a succession of crops. Read more about planting in succession here:
Looking at Leeks: Growing and Eating

Looking at Leeks: Growing and Eating

Start your leeks off in a deep pot – they like to send their roots deep down. This will help strong plants to grow. Just sprinkle on top of seed compost, and then cover with a fine layer. Pop somewhere fairly warm: a propagator, warm windowsill or sunny greenhouse once winter’s chill is over.

Looking at Leeks: Growing and Eating

Looking at Leeks: Growing and Eating

Don’t be tempted to put too many in the seed tray, or you’ll end up with far too many and they’ll be all choked up. We’ve been a bit heavy-handed with our seed sprinkling – you might want to give them a bit more breathing room than we have here!


Looking at Leeks: Growing and Eating

Looking at Leeks: Growing and Eating

Once your seedlings are large enough to handle – you need a good bit of growth at the top, tease them gently apart, and plant out in the veggie plot using a dibber or stick to make deep holes (about 15-20 cm deep). Don’t you just love that word, dibber. It instantly conjures up memories of helping my grandad in his garden. I have my lovely son to thank for making me my dibber. If you don’t have a dibber, find a stout stick! Pop your seedling in the hole and fill with water from a watering can. Plant with enough space so you can get a hoe in between rows to keep the weeds down later on That’s all there is to it!

You will be rewarded with delicious, nutritious leeks to feed yourselves and your families.

Here are some tried and tested recipes the family have loved here at Bridge Cottage. They all serve a family of four, so scale down for smaller portions. We are meat eaters, so have included bacon in the Leek and Bacon pudding, but feel free to leave it out.

Top tip – when washing leeks, slit the tops with a deep cross and hold upside down under running water, teasing out layer to get all the soil out. Nowt worse than a crunch of grit when you munch!

Looking at Leeks: Growing and Eating

Looking at Leeks: Growing and Eating

Cheesy Leek Gratin

Ingredients

4 large leeks

25g butter

½  tbsp plain flour

Approx. 1 pt milk

100g cheddar cheese

2 handfuls breadcrumbs*

Fresh parsley, finely chopped (optional)

*(whizz up some stale crusts in a food processor – top tip: keep a bag in the freezer so you never have to throw away stale bread)

Method

Wash the leeks well, and chop into chunks. Sauté in the butter for a couple of mins until just tender. Stir in the flour, and then add milk a little at a time until you have the consistency of double cream. Add grated cheddar and season with salt and pepper. Pour into an overproof dish.

Mix the breadcrumbs with chopped parsley, season and place on top of the leeks. Bake in a medium over for 10 minutes, or until breadcrumbs brown.

Leek & Bacon Pudding

Ingredients

125g / 5 oz wholewheat flour

1 ½ tsp baking powder

50g / 20z shredded suet

2 chopped leeks

3-4 rashers streaky bacon, chopped

1 tsp mixed fresh herbs or ½ tsp dried

I medium egg

Method

Mix together flour, baking powder, suet, leeks, bacon, herbs and season with salt and pepper.

Mix with egg, adding a little milk if necessary, to make a soft dropping consistency (so mixture drops off spoon when held aloft)

Grease a 600ml/1 pint pudding basin and put in a piece of greaseproof or parchment paper to just cover the bottom.

Put pudding mixture in basin. Cover with greaseproof paper and foil and tie with string.

Steam for 1 ½ hours. If you don’t have a steamer, place a saucer in the bottom of a large pan, and cover with boiling water. Place pudding on saucer and put lid on pan, topping up water when necessary.

Serve with parsley sauce.

Sue Reed writes for the Bridge Cottage Way

Sue Reed writes for the Bridge Cottage Way

There are, of course, lots of other recipes for leeks – we love a leek risotto, or that old favourite, leek and potato soup. 

As ever, we’d love you to share your thoughts, either by leaving a comment here or on our social media pages, where this article will be shared.

You can find the Bridge Cottage Way on Facebook Twitter and Instagram.


You might enjoy some of the writing and ideas in other sections of this website, as we look towards leading more sustainable lives by growing our own food and creating dishes in line with seasonal eating, or head to our handy ‘Month by Month’ guides to find out what we have been doing here at Bridge Cottage as the months go by:

Many thanks for reading.

With Facebook and Instagram algorithms being fickle friends at times, be sure to get all new posts from The Bridge Cottage Way by signing up for the mailing list here. This will go our four times a year, with the seasons in Spring, Summer, Autumn and Winter. We, of course, will not share your details with third parties, and you have the right to unsubscribe at any time.

Tim & Sue in the Bridge Cottage Way garden

Grow Better Veg with Companion Planting

Companion Planting - Courgette growing with calendula and borage.

Companion Planting – Courgette growing with calendula and borage.

Companion planting. Like us, plants have friends, and like us, they have are some they like more than others. For example, my potatoes love hanging out with horseradish but put the squashes right off their game.

Companion planting

Companion planting

We’ve known about companion planting for a while, and in the greenhouse, we take care to grow French Marigolds alongside the tomatoes. As well as looking very pretty, these attract the hoverflies, which much on aphids and other pests. Basil likes to be there too, but at a distance and prefers to stay in its pots.

Tomatoes and Marigolds. Companion Planting in the Greenhouse

Tomatoes and Marigolds. Companion Planting in the Greenhouse

We find it useful to start a few trays of calendulas, French marigold and nasturtiums off in the early spring, to pop in alongside beans, or in pots. Our courgettes are loving the companionship of borage and nasturtiums and are just coming into that prolific stage where you are scratching your head in the kitchen for some new inspiration with courgette recipes. The borage self-seeds from the year before – although strictly an annual, once you have borage in the garden, it won’t leave you.


Herb Society UK Companion Planting Poster

Herb Society UK Companion Planting Poster

We follow the Herb Society UK on both Facebook and Instagram, and this year bought a very useful poster from them, which is pinned to the back of the potting shed door. It gives a long list of plants, their companions, and antagonists.

I’d been wondering why, out of six squashes planted, two had yellowing leaves and were failing to thrive….the answer may well be that potatoes are antagonists to squashes. It will be interesting to see if they pick up once the potatoes have been dug up. We could move them, but where to? The garden is full to bursting. We may well pop a borage plant in there, as I see from my poster that borage is a good companion plant to squash – goodness knows, the borage is doing really well, providing masses of edible blue flowers as well as material to go in the dustbin for making organic comfrey feed. 

The onions are about to be lifted, and I see from our chart that carrots and beetroot both like onions, so it seems a good idea to pop in a few rows of late carrots and beetroot once they’ve been dug up. Although I’ll have to sneak in the beetroot – Tim thinks it’s the food of the devil – I disagree!

Next year, I’m looking forward to trialling the Three Sisters method of planting squash, beans and sweetcorn together – though whether there will be enough sun for sweetcorn in Northumberland remains to be seen.

I had a quick look on the internet for useful links and companion planting charts and have found a few, which I hope will be helpful to you.

Here are the links:


As ever, we’d love you to share your thoughts, either by leaving a comment here or on our social media pages, where this article will be shared.

You can find the Bridge Cottage Way on Facebook Twitter and Instagram.

You might enjoy some of the writing and ideas in other section of this website, as we look towards leading more sustainable lives by growing our own food and creating dishes in line with seasonal eating, or head to our handy ‘Month by Month’ guides to find out what is seasonal and on topic:

Many thanks for reading.

With Facebook and Instagram algorithms being fickle friends at times, be sure to get all new posts from The Bridge Cottage Way by signing up for the mailing list here. This will go our four times a year, around the Summer and Winter Solstices, and the Spring and Autumn Equinox. We, of course, will not share your details with third parties, and you have the right to unsubscribe at any time.

Tim & Sue in the Bridge Cottage Way garden

Thanks for reading. Best wishes, Tim and Sue Reed

Recycling Plastic in the Garden

We all now know that we should be reducing our plastic waste, and recycling plastic in the garden is one way of doing this. When I wrote about this back in 2011, on the old Bridge Cottage Way Blogspot site, we were just learning about the tragic byproduct of the plastics industry that is the phenomenon known as The Great Pacific Garbage Patch. This vast expanse in the North Pacific Ocean, in fact, twice the size of France, had become the largest landfill in the world and was made up of plastic. Every year it kills millions of seabirds and 100,000 marine mammals.

Recycling Plastic in the Garden

Recycling Plastic in the Garden

David Attenborough brought the nation’s attention to the dreadful sea of plastic in our oceans in his programme, Blue Planet, and this brought the issue of plastic waste to the mainstream. We’ve been trying to reduce our plastic consumption here at Bridge Cottage for decades. There are many ways to reduce plastic consumption around the home, and I’ll write later about our experiences with Plastic Free July 2020, but for the time being, let’s concentrate on ways to reduce plastic in the garden, and specifically here with planting.

If you visit any garden centre, you will see rows and rows of plastic plant pots, and plastic seed trays, and folk with armfuls of these, eager to start the new planting season. But ask yourself, is all this new plastic really necessary?

Before we carry on, let’s address the debate on the issues of growing food in recycled plastic. Can we still call ourselves organic gardeners if we grow food in plastic? Is plastic safe to grow food in? What about all those chemicals it leaches into the soil?

Recycling Plastic in the Garden

Recycling Plastic in the Garden

I’m talking about Bisphenol A (BPA). All plastics leach chemicals. Some plastics are harmful and can leach toxins into the soil, especially when heated or exposed to sunlight or prolonged periods of time. BPA is not found in food-grade plastic, and therefore these containers are deemed safe to use as the chemicals they leach have low toxicity levels and the amounts leached are very small.

You can check to see if your recycled container is safe to use by looking for the symbol on it – there will be a triangle with a stamp on, and numbers 1,2,4 & 5 – (see diagram) are safe to use.

Food Grade Plastic Labelling

Food Grade Plastic Labelling

Tetra packs used for plant-based milk and fruit juices can make great planters. Crops such as runner beans and sweet corn that have long roots love a chopped off Tetra pack. Toilet roll inner tubes whilst not plastic, are also a great recycling hack for growing sweet peas. Just pop the whole kits and kaboodle into the soil when it’s time for planting. The tube will biodegrade and the root remains undisturbed. No plastic needed there, my dear!


Recycling Plastic in the Garden

Recycling Plastic in the Garden

Plastic containers that have fruit such as grapes in even have plastic lids that can be used as mini propagator. Larger containers such as sweet or biscuit boxes are great for sowing lots of big seeds in. I used this ‘Celebrations’ tin for broad bean seeds one year.

Recycling Plastic in the Garden

Recycling Plastic in the Garden

Don’t forget to wash the containers well before use, and put some holes in the bottom for drainage, taking care not to put holes in yourself!


I add a double layer of newspaper to any clear containers to stop the light getting through to the roots. The paper can be planted in the garden as it soon rots down.


Recycling Plastic in the Garden

Recycling Plastic in the Garden

Once you’ve sown your seeds, you’ll need to label them, and a plastic lid, yoghurt or crème fraiche pot comes in very handy here too – just cut it into strips and write on with permanent marker pen or wax crayon.

Recycling Plastic in the Garden

Recycling Plastic in the Garden

Don’t forget, once you have planted your seedlings in the garden, wash and dry the containers and store away in the shed for next year.


Going completely plastic-free is very hard, and I guess a step too far for many, ourselves included, but here is one way our plastic kitchen waste can be recycled.

By recycling your food-grade plastic pots to sow your seeds in or make plant labels, you are doing your bit to help the environment. You will also save money and space in your recycling bin!

Remember the ‘Buyerachy of Needs’ which encourages in the first instance, to use what we have?


Sustainable Living. The Buyerachy of Needs by Sarah Lazarovic

Sustainable Living. The Buyerachy of Needs by Sarah Lazarovic

As ever, we’d love you to share your thoughts, either by leaving a comment here or one our social media pages, where this article will be shared.

You can find the Bridge Cottage Way on Facebook Twitter and Instagram.

You might enjoy some of the writing and ideas in other section of this website, as we look towards leading more sustainable lives by growing our own food and creating dishes in line with seasonal eating, or head to our handy ‘Month by Month’ guides to find out what is seasonal and on topic:

Many thanks for reading.

With Facebook and Instagram algorithms being fickle friends at times, be sure to get all new posts from The Bridge Cottage Way by signing up for the mailing list here. This will go our four times a year, around the Summer and Winter Solstices, and the Spring and Autumn Equinox. We of course will not share your details with third parties, and you have the right to unsubscribe at any time.