Tag Archive for: garden

How to build a hotbox for propagation, early seed sowing and growing

Hot box propagation

Hotbox propagation

Making a hotbox may well be the answer if are you chomping at the bit to get the growing season started, It’s still February and last week we had snow. However, the sun started shining this week after a long Winter. We are still in Lockdown due to the pandemic and goodness knows we are longing to get growing again. Last year’s lockdown seemed so much easier to bear, with veggies to grow and gardens to tend, but we must remember it is still Winter!
Hotbox propagation. for early seed sowing and growing

Hotbox propagation. for early seed sowing and growing

Last year Tim built a hot box for the greenhouse, and it’s brilliant! We can set seeds away and grow then on without fear of the frost getting to them. I know some of you who have seen pictures of this on the Bridge Cottage Way Facebook page have asked how he made it, so here you go.

It’s quite simple. We got the idea and all the help we needed from Jungle Seeds.

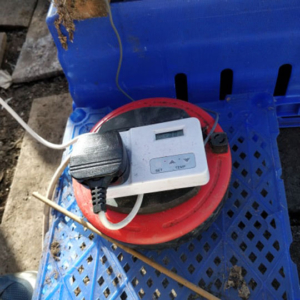
You will need a greenhouse or cold frame and a source of electricity. We have run an outdoor extension lead from the garage into the greenhouse. We have taken care to cover any electrical parts with a bucket so avoid accidents when watering!

The heat comes from Bio Green Soil Warming cables.  available from Jungle Seeds.
 

Building a hotbox for early seed sowing a propagation

Building a hotbox for early seed sowing a propagation

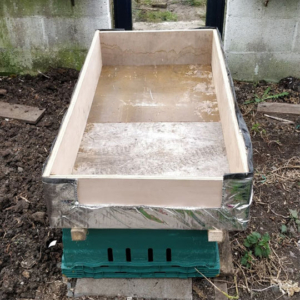
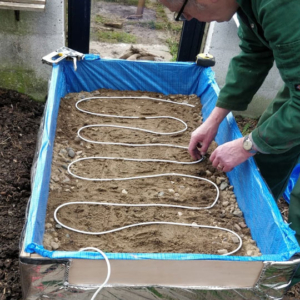
We started by building a wooden box. The bottom was taken from an old dining room table, and the sides, off-cuts of plywood. You may want to build something smaller, a tray for example. In this first picture, you can see it has been covered on the outside by insulation. We used this insulation as we had it hanging around after building the sauna. You might want to use polystyrene, or Kingspan. Use what you have!
Building a hotbox for early seed sowing and propagation

Building a hotbox for early seed sowing and propagation

Next, add a layer of sand, and then lay the cables on top of that. We got the Bio Green Warming Cables from Jungle Seeds, and you’ll see that they give basic instructions too for building a hotbox.

The cable is normally laid in runs 3″ to 4″ apart. This layout will allow you to raise the soil temperature by 11-13 C, above the greenhouse ambient. Higher temperatures can be achieved by laying the cable runs as close together as 5cm. In this case, a thermostat should be used to precisely control the soil temperature to avoid overheating.

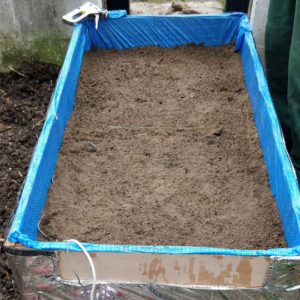
After laying the cables, cover again with another layer of sand. Water all this well. It needs to be kept moist to give good heat transference.
building hot box propagation, early seed sowing and growing
building a hot box for propagation, early seed sowing and growing


building a hot box for propagation, early seed sowing and growing

building a hot box for propagation, early seed sowing and growing

A top tip is to cover the plug socket and thermostat with an upturned bucket. This prevents any water from getting in the electrics when watering the greenhouse!

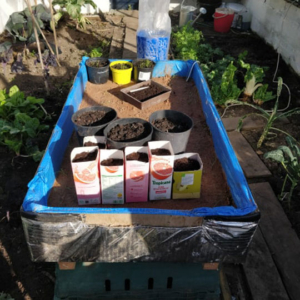
At night, a layer of bubble wrap can go over the top to tuck your baby plants in.


building a hot box for propagation, early seed sowing and growing

building a hot box for propagation, early seed sowing and growing

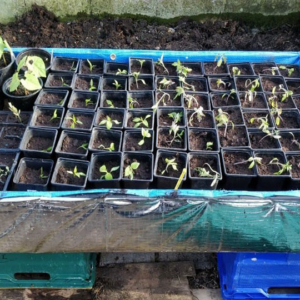
That’s all there is to it! We’ve set leeks, board beans, chillies, lettuce and tomatoes away already and they are growing well in the hot box. You can see I’ve used sawn-off juice bottles as seed pots – waste not, want not!

Do get in touch if you have any questions!

Wishing you a very happy growing season.

As ever, we’d love you to share your thoughts, either by leaving a comment here or on our social media pages, where this article will be shared.

You can find the Bridge Cottage Way on Facebook Twitter and Instagram.

You might enjoy some of the writing and ideas in other sections of this website, as we look towards leading more sustainable lives by growing our own food and creating dishes in line with seasonal eating, or head to our handy ‘Month by Month’ guides to find out what we have been doing here at Bridge Cottage as the months go by:


Many thanks for reading.

With Facebook and Instagram algorithms being fickle friends at times, be sure to get all new posts from The Bridge Cottage Way by signing up for the mailing list here. This will go our four times a year, with the seasons in Spring, Summer, Autumn and Winter. We, of course, will not share your details with third parties, and you have the right to unsubscribe at any time.
Tim & Sue in the Bridge Cottage Way garden

Succession Planting for Vegetables All Year Round

Succession Planting

Succession Planting

Succession planting has nothing to do with the monarchy but refers to the system of planting crops at regular intervals with thought and planning throughout the growing season to make sure you have vegetables all year round. This helps reduce the gluts and shortages, although I can do nothing about the glut of courgettes that so many of experience in summer.

It’s the middle of August as I write, and we’ve just eaten a spinach and chard omelette for lunch, with salad on the side. Thanks to succession planting, we enjoy these three crops more or less the whole year through. Let me explain.

We all know the buzz of excitement as Spring appears, the days become sunny and warm (well, for some they do) and the seed packets come out of storage and new ones bought in garden centres or online. Perhaps now is time to give a shout-out to Premier Seeds Direct, Real Seeds and Higgledy Garden who have done a fabulous job at supplying us with seeds during this crazy pandemic year.

Seeds for Winter Veg

Seeds for Winter Veg

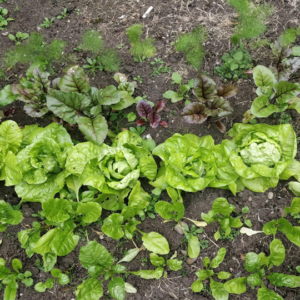
It’s so easy to plant too many seeds at once – and my top tip here is only planting a few of the seeds you are going to grow, in succession; a few lettuces at a time, a short row of spinach and chard, and maybe half your broad beans, leaving more to plant in a month’s time. Lettuce, spinach, chard and beetroot are crops I like to sow at maybe four intervals throughout the growing season.

Make the most of your containers here, and a succession of tubs of cut and come again salad leaves can be very handy.

The more tender plants like runner beans courgettes, squash can go in once early crops like garlic, early beetroot or onions are out.

Spring grown pak choi

Spring grown pak choi

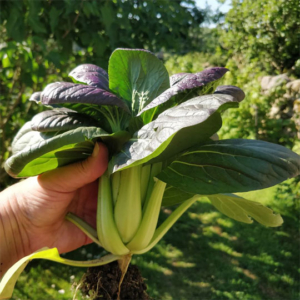
Then there are those plants which don’t do as well in the hot summer months. We had wonderful pak choi this Spring but found the second sowing bolted in July. I’m going to sow some now that the days are shortening, and it should fare better over the next few weeks. Pak choi is a fairly quick crop to grow, as is rocket (clue’s in the name) and is another crop that likes to be sown early and later in the growing season.

Companion Planting

Companion Planting

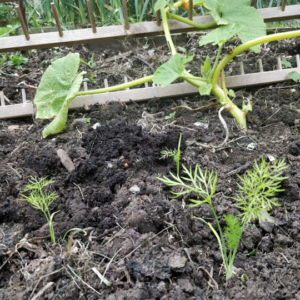
Fennel too likes to grown away from summer’s heat. We’ve just put in some fennel that had been sown in plugs, next to this climbing squash. Fennel and squash do well grown together if you are into companion planting. 

Late summer is the time to think ahead towards the winter. Do you want braised red cabbage with your Christmas dinner? Then get some planted out in the summer months. There is still plenty of fine weather in these late summer months and the ground beautifully warm, for crops to grow and be harvested at the end of the growing season or remain in the ground to give lovely fresh vegetables over Winter and Spring. Kale, cabbages, sprouting broccoli, all-year-round cauliflower, perpetual spinach, chard, beets are all good examples of crops to overwinter.


Wool slug pellets on brassica plants

Wool slug pellets on brassica plants

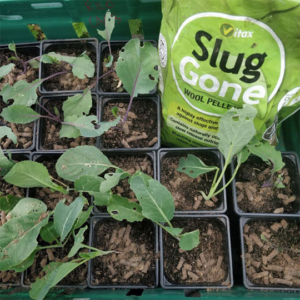
Don’t forget to cover your brassicas with net – those pretty while butterflies we see flitting around the veg patch are longing to lay their eggs on your cabbages, which will in turn to hungry caterpillars. The slugs are doing their darndest to prevent my winter veg growing, but I’ve just given them a liberal sprinkling of wool slug pellets, so fingers crossed they make it into the ground.

The Lady of Shallot

The Lady of Shallot

Speed is of the essence, and it’s an idea to have young plants or seeds ready for when early crops are out. We’re pulling up our onions on Saturday, with some help from the Lady of Shallot here, and have kohlrabi, red cabbage, red and Tuscan kale and cauliflower waiting to go in. The slugs are doing their darndest to prevent this, but I’ve just given them a liberal sprinkling of wool slug pellets.

If you’ve got a greenhouse, or live down South, then this is a whole different ball game, and your growing season is extended even further at either end. We have great success growing French, dwarf and borlotti beans in the greenhouse early doors, and then sow again outside once the dangers of frost have passed.


This year are going to experiment with a third, very late sowing of French beans in the greenhouse. We’re not sure it will work, but all we will have lost are a few seeds and a bit of time or trouble. If ever you are in doubt about sowing – give it a go! We can also never predict what the weather is going to be like, so nothing ventured, nothing gained.

Bridge Cottage Greenhouse

Bridge Cottage Greenhouse

Tim is always saying, ‘write it down’ and a garden journal is a really useful tool. Succession planting is about planning and remembering what has worked one year to the next. However, I’m rubbish at following my own advice, and so often forget to write successes and failures down, which is surprising, seeing as I’m a writer.

There are various online digital planners, and after a quick look down the Google tube, I found this Vegetable Garden Planner App from Growveg. I’ve not used it myself, I love a journal, but would be interested to hear from anyone who has found a good gardening planning digital tool.

I do hope this has been useful if you’re new to gardening or succession planting. Please get in touch if there is anything I haven’t covered, or if you have any questions.

I’m off to sow those late French beans and some pak choi to grow in the greenhouse once the tomatoes and aubergines have finished.

See also: Late Summer Sowing for Autumn & Winter Veg

Happy Gardening!

Sue

Biennial Sowing in Summer

Biennial Sowing in Summer

As ever, we’d love you to share your thoughts, either by leaving a comment here or on our social media pages, where this article will be shared.

You can find the Bridge Cottage Way on Facebook Twitter and Instagram.

You might enjoy some of the writing and ideas in other sections of this website, as we look towards leading more sustainable lives by growing our own food and creating dishes in line with seasonal eating, or head to our handy ‘Month by Month’ guides to find out what we have been doing here at Bridge Cottage as the months go by:

Many thanks for reading.

With Facebook and Instagram algorithms being fickle friends at times, be sure to get all new posts from The Bridge Cottage Way by signing up for the mailing list here. This will go our four times a year, with the seasons in Spring, Summer, Autumn and Winter. We, of course, will not share your details with third parties, and you have the right to unsubscribe at any time.
Tim & Sue in the Bridge Cottage Way garden

In Praise of the Nasturtium from the Bridge Cottage Garden

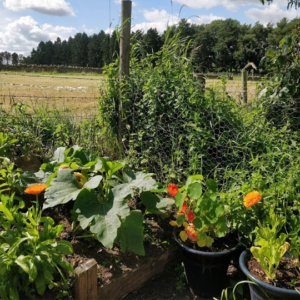
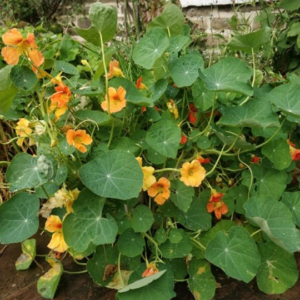
Nasturtiums in the Bridge Cottage Garden

Nasturtiums in the Bridge Cottage Garden

I’d like to take a moment to sing the praise of the humble nasturtium, which is such a useful little plant, and one we love to grow in the Bridge Cottage garden.

Nasturtiums grow well in borders, pots and hanging baskets, and will creep and crawl, up trellises and over walls, bringing vibrant colour to the garden throughout the summer months. They are quick to grow and easy to grow from seed – a great plant to get children to grow, to introduce them to gardening.

This year, my hanging baskets have been filled with the simple nasturtium, grown from seeds saved from last year. Due to lockdown, I didn’t fill my salt-glazed hanging pots (thank you Errington Reay) with the usual mix of annuals bought from my local garden centre, but instead, as many of us had to do, started thinking out of the box, to what I could use that we already had. Saved nasturtium seed to the rescue and I’m loving the bright, sunny display they are putting on.


Nasturtium Pesto

Nasturtium Pesto

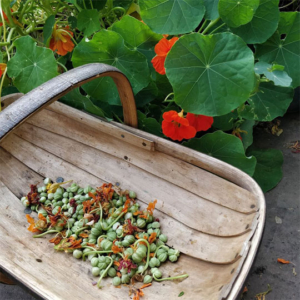
The bees are also loving the trumpet-shaped blooms and can be seen taking their fill of nectar. A far more sustainable practice and they are giving me nutritious food for free in the shape of nasturtium leaves and flowers for salads, nasturtium pesto and I’m now collecting the seed pods to make ‘poor man’s capers’.

Hop over to the Bridge Cottage Kitchen to find out more about eating nasturtium:

Companion Planting with Nasturtium

Companion Planting with Nasturtium

We also plant nasturtium as a companion plant and have planted them alongside our courgettes and squash. If I consult my handy companion plant poster, bought from the Herb Society UK, I see that as well as being pals with squash, courgette and marrow, the friendly nasturtium is also buddies with apples, pears, radish and tomatoes. We’ve got a few in pots, so might well move them under the apple trees, which are heavily laden with fruit at the moment.

Nasturtium Seeds

Nasturtium Seeds

Start your nasturtiums off in early Spring, in seeds trays in the greenhouse or on a sunny windowsill. Transplant and then plant out in late Spring. You might want to keep an eye out for caterpillars – brush off any eggs that appear, and go out regularly to remove caterpillars.

August is seed collecting time for many of our flowers and saving your nasturtium seed for next year is a great plan. You may well find that they self-seed, but just to be on the safe side, collect some in a large brown envelop and leave somewhere warm and dry. Don’t forget to write on the envelope what they are, especially if you have different varieties. I was sent some nasturtium seeds by the writer Sarah Rayner, aka The Creative Pumpkin on Instagram after attending a writing workshop in her beautiful garden in Brighton, which was festooned with nasturtiums. We love a seed swap!

Do grow nasturtiums and do you have a favourite variety?

We’d love to hear from you – just pop a comment in the box below.

Nasturtium

Nasturtium


Hop over to the Bridge Cottage kitchen to find out 4 Delicious Ways to Use Nasturtium 


As ever, we’d love you to share your thoughts, either by leaving a comment here or on our social media pages, where this article will be shared.

You can find the Bridge Cottage Way on Facebook Twitter and Instagram.

You might enjoy some of the writing and ideas in other sections of this website, as we look towards leading more sustainable lives by growing our own food and creating dishes in line with seasonal eating, or head to our handy ‘Month by Month’ guides to find out what we have been doing here at Bridge Cottage as the months go by:

Many thanks for reading.

With Facebook and Instagram algorithms being fickle friends at times, be sure to get all new posts from The Bridge Cottage Way by signing up for the mailing list here. This will go our four times a year, with the seasons in Spring, Summer, Autumn and Winter. We, of course, will not share your details with third parties, and you have the right to unsubscribe at any time.

Tim & Sue in the Bridge Cottage Way garden


Recycling Plastic in the Garden

We all now know that we should be reducing our plastic waste, and recycling plastic in the garden is one way of doing this. When I wrote about this back in 2011, on the old Bridge Cottage Way Blogspot site, we were just learning about the tragic byproduct of the plastics industry that is the phenomenon known as The Great Pacific Garbage Patch. This vast expanse in the North Pacific Ocean, in fact, twice the size of France, had become the largest landfill in the world and was made up of plastic. Every year it kills millions of seabirds and 100,000 marine mammals.

Recycling Plastic in the Garden

Recycling Plastic in the Garden

David Attenborough brought the nation’s attention to the dreadful sea of plastic in our oceans in his programme, Blue Planet, and this brought the issue of plastic waste to the mainstream. We’ve been trying to reduce our plastic consumption here at Bridge Cottage for decades. There are many ways to reduce plastic consumption around the home, and I’ll write later about our experiences with Plastic Free July 2020, but for the time being, let’s concentrate on ways to reduce plastic in the garden, and specifically here with planting.

If you visit any garden centre, you will see rows and rows of plastic plant pots, and plastic seed trays, and folk with armfuls of these, eager to start the new planting season. But ask yourself, is all this new plastic really necessary?

Before we carry on, let’s address the debate on the issues of growing food in recycled plastic. Can we still call ourselves organic gardeners if we grow food in plastic? Is plastic safe to grow food in? What about all those chemicals it leaches into the soil?

Recycling Plastic in the Garden

Recycling Plastic in the Garden

I’m talking about Bisphenol A (BPA). All plastics leach chemicals. Some plastics are harmful and can leach toxins into the soil, especially when heated or exposed to sunlight or prolonged periods of time. BPA is not found in food-grade plastic, and therefore these containers are deemed safe to use as the chemicals they leach have low toxicity levels and the amounts leached are very small.

You can check to see if your recycled container is safe to use by looking for the symbol on it – there will be a triangle with a stamp on, and numbers 1,2,4 & 5 – (see diagram) are safe to use.

Food Grade Plastic Labelling

Food Grade Plastic Labelling

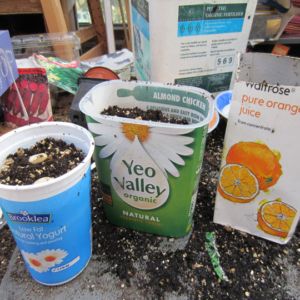
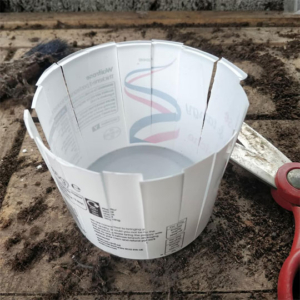
Tetra packs used for plant-based milk and fruit juices can make great planters. Crops such as runner beans and sweet corn that have long roots love a chopped off Tetra pack. Toilet roll inner tubes whilst not plastic, are also a great recycling hack for growing sweet peas. Just pop the whole kits and kaboodle into the soil when it’s time for planting. The tube will biodegrade and the root remains undisturbed. No plastic needed there, my dear!


Recycling Plastic in the Garden

Recycling Plastic in the Garden

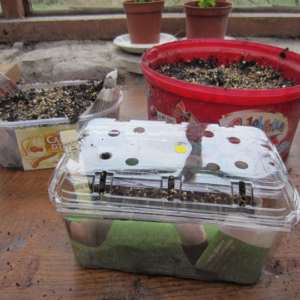
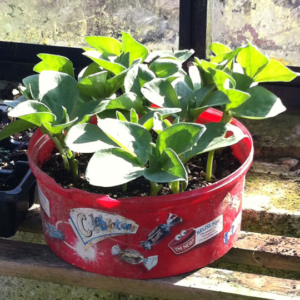
Plastic containers that have fruit such as grapes in even have plastic lids that can be used as mini propagator. Larger containers such as sweet or biscuit boxes are great for sowing lots of big seeds in. I used this ‘Celebrations’ tin for broad bean seeds one year.

Recycling Plastic in the Garden

Recycling Plastic in the Garden

Don’t forget to wash the containers well before use, and put some holes in the bottom for drainage, taking care not to put holes in yourself!


I add a double layer of newspaper to any clear containers to stop the light getting through to the roots. The paper can be planted in the garden as it soon rots down.


Recycling Plastic in the Garden

Recycling Plastic in the Garden

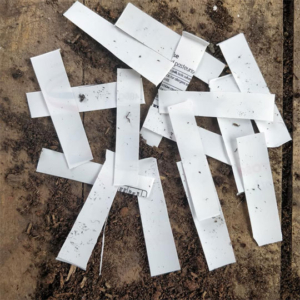
Once you’ve sown your seeds, you’ll need to label them, and a plastic lid, yoghurt or crème fraiche pot comes in very handy here too – just cut it into strips and write on with permanent marker pen or wax crayon.

Recycling Plastic in the Garden

Recycling Plastic in the Garden

Don’t forget, once you have planted your seedlings in the garden, wash and dry the containers and store away in the shed for next year.


Going completely plastic-free is very hard, and I guess a step too far for many, ourselves included, but here is one way our plastic kitchen waste can be recycled.

By recycling your food-grade plastic pots to sow your seeds in or make plant labels, you are doing your bit to help the environment. You will also save money and space in your recycling bin!

Remember the ‘Buyerachy of Needs’ which encourages in the first instance, to use what we have?


Sustainable Living. The Buyerachy of Needs by Sarah Lazarovic

Sustainable Living. The Buyerachy of Needs by Sarah Lazarovic

As ever, we’d love you to share your thoughts, either by leaving a comment here or one our social media pages, where this article will be shared.

You can find the Bridge Cottage Way on Facebook Twitter and Instagram.

You might enjoy some of the writing and ideas in other section of this website, as we look towards leading more sustainable lives by growing our own food and creating dishes in line with seasonal eating, or head to our handy ‘Month by Month’ guides to find out what is seasonal and on topic:

Many thanks for reading.

With Facebook and Instagram algorithms being fickle friends at times, be sure to get all new posts from The Bridge Cottage Way by signing up for the mailing list here. This will go our four times a year, around the Summer and Winter Solstices, and the Spring and Autumn Equinox. We of course will not share your details with third parties, and you have the right to unsubscribe at any time.
Tying up Unruly Peas, Mangetout & Broad Beans

Mangetout in the Bridge Cottage Garden

Mangetout in the Bridge Cottage Garden

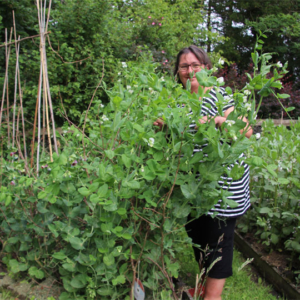
It’s June, and the crops are growing well in the Bridge Cottage garden, but I have unruly beds of broad beans and mangetout that have grown to be taller than me in places and are starting to waft and wave. If we get a windy day, they will snap, so I thought I’d better get them fettled.

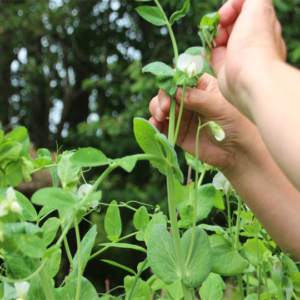
First, the tops were nipped out. This will stop them getting any taller, help them to bush out, and the tips, lightly steamed are delicious to eat.


Pinch out the tips of broad beans and mangetout

Pinch out the tips of broad beans and mangetout


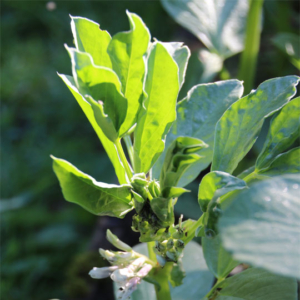
If growing broad beans, pinching out the tips will also help to deter blackfly. These are very tasty, lightly steamed.

Broad Bean tips

Broad Bean tips


Sharpening the ends of hazel poles to make stakes

Sharpening hazel poles for stakes

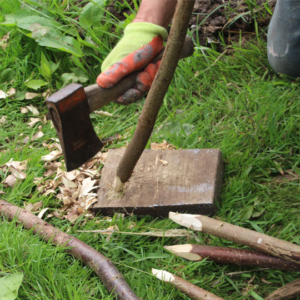
We coppiced a hazel tree in the winter, and so have these beautiful hazel poles to use. You could also use garden canes, but I like the rustic feel of the hazel, and am not a fan of going to garden centres unless I have to! Tim used an axe the sharpen the ends to make them easier to drive into the ground.

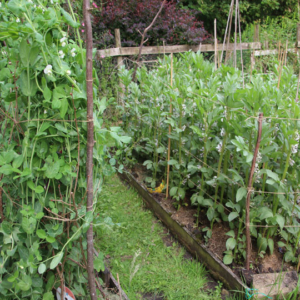
Beds of mangetout, peas and broad beans in the Bridge Cottage Garden

Beds of mangetout, peas and broad beans in the Bridge Cottage Garden

Placing the supports around the crops, I used natural twine, and wound it around the poles, skirting the broad beans and mangetout at three different height levels.


A job well done! Now my broad beans and peas can continue to grow without the risk of falling over or getting too tall.


Mmm, mangetout are delicious

Mmm, mangetout are delicious

We had a little visitor to Nanny and Grandad’s garden today, and she thought that her first taste of mangetout, freshly picked was ‘delicious’ 🙂


Are you growing peas, beans or mangetout?


Have you had your first harvest yet?


As ever, we’d love you to share your thoughts, either by leaving a comment here or on any of our social media pages, where this article will be shared.

You can find the Bridge Cottage Way on Facebook Twitter and Instagram.

You might enjoy some of the writing and ideas in other section of this website, as we look towards leading more sustainable lives by growing our own food and creating dishes in line with seasonal eating, or head to our handy ‘Month by Month’ guides to find out what is seasonal and on topic:

Many thanks for reading.

With Facebook and Instagram algorithms being fickle friends at times, be sure to get all new posts from The Bridge Cottage Way by signing up for the mailing list here. This will go our four times a year, around the Summer and Winter Solstices, and the Spring and Autumn Equinox. We of course will not share your details with third parties, and you have the right to unsubscribe at any time.
Make your own Organic Comfrey Feed

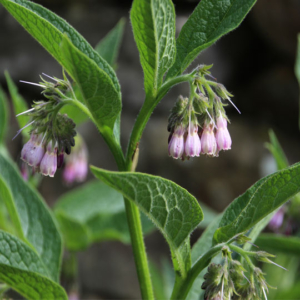
Comfrey

comfrey

We cut down comfrey to make our own organic comfrey feed here at Bridge Cottage at the end of May or beginning of June to make a feed for our tomatoes, peppers, cucumbers, dahlias and clematis, hanging baskets and indoor pot plants. this process then continues throughout the summer, as comfrey if fast-growing.


Comfrey is an excellent source of potassium, an essential plant nutrient for flower, seed and fruit production. Its leaves contain 2-3 times more potassium than farmyard manure. The comfrey root grows very deep, tapping sources of potassium in the subsoil that would not normally be available to plants and thus makes comfrey a superb plant for the organic gardener who is looking to use homemade, organic means of fertilising crops. We also add nettles to the mix, as they contain nitrogen, which is important for leafy growth


Other plants to add to the comfrey feed bucket are nettles, rich in nitrogen and borage.

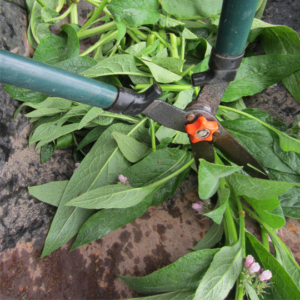
cutting comfrey with shears

Cutting comfrey with shears

We like to leave the cutting of comfrey until the bees have had their fill of the nectar from the flowers, which here in Northumberland is around the beginning of June. It might be earlier if you are in more southern climes.

We grow Russian comfrey, but be warned – this is very invasive, so unless you have a big plot, you might like to look for the Bocking 14 variety which is easier to tame. Bocking 14 is also higher in nutrient content than the wild comfrey.  See if you have a local plant swop group or find someone with a big clump who is happy to divide it for you. Once established, this is a prolific plant, so finding some shouldn’t be a problem.


Cut the leaves using shears and wearing gloves, about 5cm from the ground. You can be brutal, and this plant will soon grow back, allowing you to do another cutting from it later in the year.


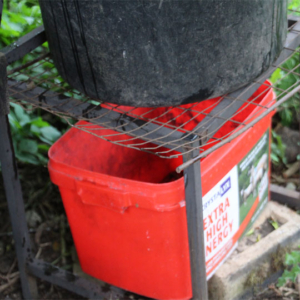
Comfrey feed drips into container under bin

Comfrey feed drips into the container under the bin

There are two schools of thought when it comes to making the feed. If you are a fan of Gardener’s World, you may have seen Monty Don adding comfrey leaves to a bucket of water and letting that steep. It produces a less concentrated feed, is easy to do, but boy, does it stink! Use approximately 1kg leaves to 15 litres of water. After about 4-6 weeks this can be strained, and the leaves put on the compost heap. It can then be watered directly onto your plants.

Another method is to make a concentrate. Use a container with a hole in the bottom, or a bokashi bin. Place the leaves in the bin, chop with shears, and then press own with a weight. (we use a couple of bricks in a bucket) and allow the leaves to rot of their own accord, catching drips of this precious black liquid, which should be used sparingly. Use in a ratio of one-part feed to ten parts water.


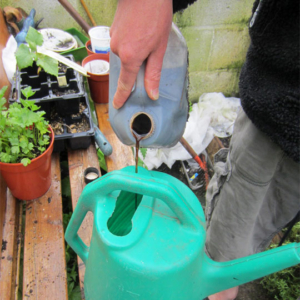
dilute comfrey feed with water

Organic Comfrey Feed

Feed your crops:

  • tomatoes/peppers in pots – feed 3 times a week
  • tomatoes/cucumbers in greenhouse beds – feed twice a week
  • indoor and outdoor pot plants/hanging baskets – feed once a week

Feed tomato plants with comfrey feed as the first fruits set


Other uses for Comfrey:

Composting

Place cut or bruised comfrey leaves in alternate layers throughout your compost heap. Their decomposition will encourage bacterial action causing the heap to heat up and speed up the composting process.


Mulch

Use as a mulch.  Chop up comfrey leaves with grass cuttings and place a 5cm layer on the surface of the soil around all plants. This will slowly rot down to provide nutrients and act as a mulch to keep in moisture and help control weeds.


Leaf Mould Seed Compost

Add fresh cut leaves to your leaf mould heap. Their nutrient-rich liquid will be absorbed, making it a perfect medium for growing seeds and potting compost.


Planting Potatoes & Beans

Fertilise the bottom of your potato and runner bean trenches with a layer of comfrey leaves. As they break down, the plant roots will access the potassium-rich fertiliser.

If you master the making of an organic feed, your plants will love you and so will the planet.

Happy gardening 🙂

As ever, we’d love you to share your thoughts, either by leaving a comment here or on any of our social media pages, where this article will be shared.

You can find the Bridge Cottage Way on Facebook Twitter and Instagram.

You might enjoy some of the writing and ideas in other section of this website, as we look towards leading more sustainable lives by growing our own food and creating dishes in line with seasonal eating, or head to our handy ‘Month by Month’ guides to find out what is seasonal and on topic:

Many thanks for reading.

With Facebook and Instagram algorithms being fickle friends at times, be sure to get all new posts from The Bridge Cottage Way by signing up for the mailing list here. This will go our four times a year, around the Summer and Winter Solstices, and the Spring and Autumn Equinox. We of course will not share your details with third parties, and you have the right to unsubscribe at any time.
Garden & Kitchen News from Bridge Cottage June 2020

Glastonbury 1985

Glastonbury 1985

It’s June 2020 and as I write this, the wind is howling and the rain is lashing down, It’s proper Glastonbury weather. It would have been Glastonbury’s 50th anniversary, but due to Coronavirus, it’s been cancelled. I last went in 1985 – it was a sea of mud, and I can’t remember who I saw. Now I’m happy to leave the thronging crowds to the youngsters, and spend the summer months in the garden.

Mangetout and Broad Bean Tips

Mangetout and Broad Bean Tips

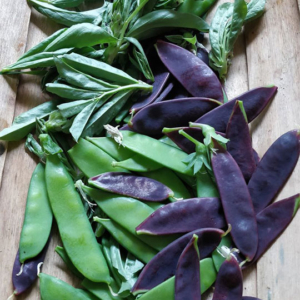
June is a busy month in the garden, and welcome crops have been making themselves known in the Bridge Cottage kitchen. We’ve had our first tastes of mangetout, with a fabulous purple variety this year, Mangetout Snow Pea, Purple Shiraz as well as the more usual green variety. In the trug in this photo, you can also see the tops of broad beans which have been pinched out to deter blackfly.

Read more about:  Tying up Unruly Peas, Mangetout and Broad Beans. 

Both mangetout and broad bean tips only need to be steamed for a couple of minutes of added to a stir fry and cooked lightly to be enjoyed.

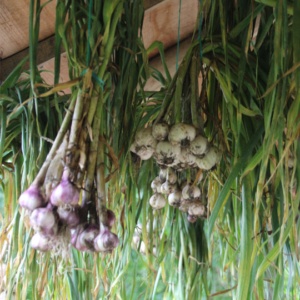
Garlic bulbs drying under the eaves of the roundhouse

Garlic bulbs drying under the eaves of the roundhouse


Our garlic crop has been harvested and is now hanging under the eaves of the sauna to dry. It got rust right at the end, but doesn’t seem to have suffered too badly for it. Soon the onions will be following suit – not with rust, but by being harvested.

dilute comfrey feed with water

Organic Comfrey Feed

The black liquid of our organic comfrey feed is starting to drip into the container beneath the compost bucket and this rich feed will now be added to water and be fed to my tomatoes and other fruiting crops. The hanging baskets, dahlias and sunflowers.

Making Organic Comfrey Feed


Growing Food in The Bridge Cottage Garden

Growing Food in The Bridge Cottage Garden

It’s time now to think ahead to the winter and make sure you have winter veg sown. It’s not too late to set seed away for next Spelderflowerring’s Purple Sprouting Broccoli or kale and cabbages for over winter.

Salad crops too can be sown every month to ensure you have a regular supply of lettuces and not a glut all at once, and then a barren time. It’s too hot in the greenhouse now to grow rocket, but we’re having good success with rocket and cut and come again lettuce grown in containers on the patio.


Growing Food in The Bridge Cottage Garden

Growing Food in The Bridge Cottage Garden

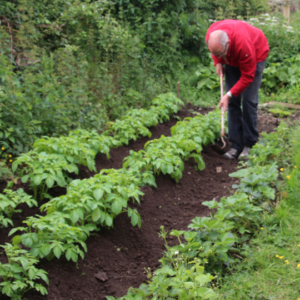
The potatoes are growing well and Tim has been earthing these up to allow as many potatoes to grow as possible.
The chard and spinach are both wonderful, and over on The Bridge Cottage Kitchen page, I’ve written out a recipe for using chard. We have kale ready for eating, and I’ll be getting some tonight to go with our Sunday dinner.

It’s strawberry time now, but we have lost our crop to the blackbirds. They were new plants in this year, and we should have thrown a net over them to protect them from the birds. Oh well, the birds are welcome to them. We have plenty to eat with rhubarb still going strong, and the gooseberries ripening nicely.

Gooseberry and elderflower ice cream

Gooseberry and elderflower ice cream

I thought I’d better use up the soft fruit that is still in the freezer from last year and made a delicious gooseberry and elderflower ice-cream, which you can try for yourselves.

Talking of elderflowers, now is the time to gather them, not forgetting to thank tree and bough. I’ve made elderflower vinegar, and will be mixing this with olive oil for a delicious summery salad dressing.

Elderflower cordial

Elderflower cordial

Of course, elderflower cordial is a must, and can be frozen in small plastic bottles for use throughout the year. I only take a few blooms from each tree, saving plenty to turn into elderberries, which we’ll come to again in the autumn.

  • Elderflower recipes


The front of Bridge Cottage is laden with pink roses, and I thank whoever it was who was here before us and planted them. I’ve been drying rose petals to use in herbal teas. Now is a fabulous time to dry herbs, petals and leaves for use in the kitchen and for making tea, and this can see you right through the winter.

Roses on Bridge Cottage

Roses on Bridge Cottage

Elderflower and mint tea

Elderflower and mint tea

See my post over on the Bridge Cottage Kitchen page on using summer herbs for cooking and for teas. In June, I’ve been able to dry mint, lemon balm, sage, elderflower, rose, and rosebay willowherb. I’ve also made a couple of jars of herb salt, which will add delicious seasoning to our cooking.


The big news this June, has been the finishing of the pizza oven, and we’re enjoying lots of alfresco dining. If you’d like to see the movie we made about the build, head over to YouTube by following this link: the Bridge Cottage Pizza Oven Build. Tim’s worked really hard on this, and we’re very proud of him.

This is just a snapshot of some of the goings-on at Bridge Cottage this June. Head over to the other pages to get more in-depth writing about:

As ever, we’d love you to share your thoughts, either by leaving a comment here or one our social media pages, where this article will be shared.

You can find the Bridge Cottage Way on Facebook Twitter and Instagram. and sign up to our mailing list.