The world is crying out for change. We are not experts, nor do we have all the answers, but we try to live as sustainably as possible. The Bridge Cottage Way is here to share what we have learnt and hope we can inspire you along the way.

Kombucha Brewing

Kombucha Brewing

Kombucha Brewing

Kombucha Brewing

I first stumbled across kombucha,  that lightly fermented fizzy drink made from sugar and tea, and a culture called a scoby (symbiotic culture of bacteria and yeast) when in November 2019 I gave up booze and was looking for a grown-up drink that wasn’t sweet and sickly and didn’t cost a fortune.

Not that you have to have given up alcohol to enjoy drinking kombucha. Kombucha has health benefits all of its own.

Rather than type out their words and risk being accused of plagiarism, here is a post from those good folk at BBC Good Food, sharing some of the alleged health benefits of drinking kombucha.

Not being prepared to part with large sums of money for shop-bought kombucha, I set about learning to make my own.

I am sure there are far better guides to making your own kombucha that the one I am going to share with you. When I started, I went to The Happy Pear, a jolly couple of lads from Ireland who are both pleasing to the eye and full of sound advice about healthy living. I watched their YouTube video and it told me all I needed to know.

The Happy Pear Kombucha Brewing Video

However, here is how I brew it.

FIRST FERMENT

You will need:

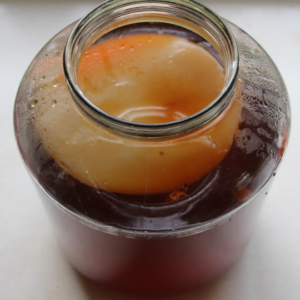
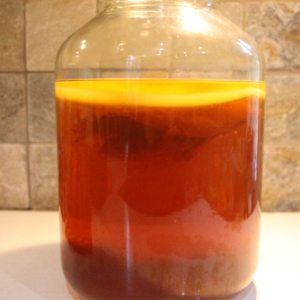
  • Kombucha Brewing - A scoby floating in the brew,

    Kombucha Brewing – A scoby floating in the brew,

    A Scoby – Symbiotic Culture of Bacteria and Yeast. This is the being that floats or bobs about, doing its magic to turn sweetened tea into kombucha. With each new batch a new baby scoby is formed, so if you know someone already who brews their own kombucha, then see if they have a baby scoby you can adopt.
    Failing that, head online – I got mine from Happy Kombucha who also do starter kits, have full instructions and guides and are generous with their advice.


  • Tea: You then need cooled, fermented tea. Green tea or black tea – take your pick. I like the freshness of taste that comes with green tea kombucha and like to think it is even healthier. use four tea bags or two tablespoons tea. Use around 2 litres boiled water to make your tea.


If you have a filter jug, kombucha prefers filtered water or spring water – but don’t go buying plastic bottles!! We don’t want any more non disposable plastic in the world.


  • Sugar: 150g – 180g granulated sugar.

Add sugar to the tea – don’t worry, the sugar is fermented out!

So, brew up a batch of tea and sugar and leave to cool.

  • Wide Necked Jar: Without squeezing the tea bags, drain your cold tea into a wide necked jar. I’m using these wide necked glass jars that I got from a local delicatessen – they were olive jars.

Top us with cooled water.

Another word of warning – scobies don’t like metal – so don’t strain your tea through a metal sieve or stir with a metal spoon. I’ve found a cotton cloth bag bought for straining nuts of making vegan milk to be great. I got mine from Amazon, but other sellers are available I’m sure. I even take off my rings to be extra kind.
Kombucha Brewing

Kombucha Brewing

Then lower your scoby along with around 200ml starter liquid from a previous batch or the liquid your scoby arrived with. Wish him happy brewing, cover and leave in a warmish place for around 10 days.

SECOND FERMENT
 

Kombucha Brewing - second ferment

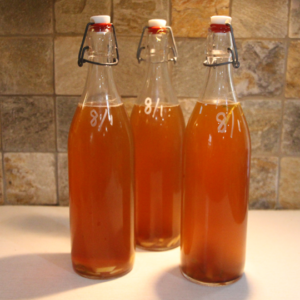
Kombucha Brewing – second ferment

You should by now have a healthy-looking white rubbery crust on top of your kombucha. Congratulations, you have made a kombucha baby! This can be popped into a scoby nursery with some of the fermented liquid, passed on to a friend or put on the compost heap. We have a septic tank here, and I like to think that if kombucha keeps my gut healthy then maybe it will do the same for the septic tank. But how can we flush our babies down the loo? Give it a new home, and encourage your friends to take up kombucha brewing too.

  • Pressure Bottles Into sterilised pressure bottles – like the ones Grolsh use for beer – the ones with metal swing tops. Add a tsp of sugar ( I find coconut sugar works well) and any flavouring you want to add. You can leave it plain, but the addition of some natural flavouring can be fun. As we’re huge fans of seasonal eating, we make this depending on what’s available.

Lime and ginger to flavour kombucha in the second ferment

Lime and ginger to flavour kombucha in the second ferment

  • Flavouring Strips of ginger or lime/lemon zest work well, apple slices or fresh raspberries or blackberries too. –  experiment and let us know on social media what you prefer.Now, siphon your kombucha through the nut bag and into a jug, then pour it into your sterilised bottles, making sure any fluid used for sterilising is rinsed away. Leave for another week.

There are two schools of thought on burping. Some burp and some don’t. It depends on how much fizz you want. If you don’t release the pressure, make sure you open your kombucha over the sink.

Then store it in the fridge! This should arrest the fermenting process but still open with caution.

Enjoy the taste, health benefits & sustainability of your home-brewed kombucha.

Kombucha Brewing - the outtake

Kombucha Brewing – the outtake

Now for the outtake! It’s not easy pouring kombucha with one hand whilst taking a photo with the other. Note to self – use a tripod and camera timer!!

In case you’re wondering if I’m still totally alcohol-free? No. I gave up for just shy of a year, and during that time, reset my relationship with booze, but when Tim sold his accountancy business and retired, I shared a bottle of very decent red wine with him and I do still love a gin and tonic!

For other posts on fermented food and seasonal eating, head back to the kitchen, or why not pop into the garden to see what’s growing or what jobs can be done?

If you’d like to join the gentle rhythm of our four newsletters that come out via Substack, on the Spring and Autumn Equinox and Winter and Summer Solstices, then sign up here:

The Bridge Cottage Way Newsletter on Substack.

To follow Sue’s writing journey and hear about other published work, her debut, The Rewilding of Molly McFLynn and other writing, sign up to Sue Reed Writes on Substack or hunt her out on her social media and website of that name.

Want to leave a comment? We’d love to hear from you


Christmas Needn’t Cost the Earth. Part Three. Christmas Brunch.

Last week, in Part Two of Christmas Needn’t Cost the Earth,  we decorated the house with gathered grasses and seed heads, and during the cold snap in part one, we made ice art for the front door. This week, we share some Bridge Cottage recipes with you for making your own Christmas morning brunch of home smoked salmon, homemade cream cheese and freshly baked bannocks.

Christmas Needn't Cost the Earth. Christmas Brunch

Christmas Needn’t Cost the Earth. Christmas BrunchLast week, in Part Two of ‘Christmas, Needn’t Cost the Earth’, we decorated the house with gathered grasses and seed heads, and during the cold snap in part one, we made ice art for the front door. This week, we share some Bridge Cottage recipes with you for making your own Christmas brunch of home-smoked salmon, homemade cream cheese and freshly baked bannocks. Vegans look away.

We have a family name for a full English, and that’s a Daddy breakfast – the works, sausage, bacon, eggs, beans, but this is known as a Tommy brunch after our eldest son, who loves the tradition of smoked salmon as a treat on Christmas morning. In the past we’ve wrestled with bagels, proving them overnight and popping in a pan of boiling sugar water to glaze and then baking – quite a phaff! This year, we’re going with bannocks. Easy, cheap and quick to make. Of course, had to do a dummy run to get the photos for you and test that all was delicious.

Christmas Needn't Cost the Earth: homemade bannocks for brunch

Christmas Needn’t Cost the Earth: homemade bannocks for brunch

The recipe for bannocks, from the Gaelic bannach comes courtesy of Felicity Cloake who writes for the Guardian.

Felicity Cloake – The Perfect Bannocks.

The bannock recipe calls for buttermilk, but we’ve used the runoff we get from our tub of homemade yoghurt. It’s known as acid whey, and if you make your own yoghurt, you can collect this clear yellowy liquid in a jam jar in the fridge. We make a 3-pint tub of yoghurt every week and use any leftover to make soft cheese.

I’ve shared this in what has become a very popular post: Homemade Yoghurt and Soft Cheese.

Soft cheese is so easy – it’s just a case of hanging yoghurt in a piece of muslin overnight and collecting the drips in a bowl. We like it plain with our smoked salmon, but can have added chives

That’s the bannocks and soft cheese took care of, now to smoke our salmon!

As I said, Vegans look away.

Sustainably Sourced Salmon

Sustainably Sourced Salmon

Farmed salmon is getting a lot of bad press now, and quite rightly so in some cases. You might like to look at a more sustainable fish such as mackerel, but we’ve checked carefully and are assured that our salmon comes from a sustainable source. We have a wonderful old-fashioned butcher/fishmonger/veg shop in Haltwhistle, Belly Bell’s. It’s proper old school. Our granddaughter, Daisy loves a trip on the train (it’s only ten mins up the line) to go to Billy Bell’s for a pie. ‘Good old, Billy Bell’ we all chant.

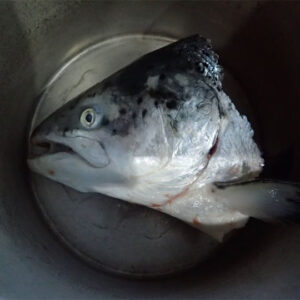
Making fish stock with the salmon head

Making fish stock with the salmon head

With the salmon collected from Billy Bell’s – you might like to get a smaller fillet, half a salmon perhaps rather than a whole fish, we set about preparing it. This is the point at which I leave the kitchen. I’m not happy around fish heads. The only time in my life I’ve ever fainted was in a Spanish fish market when all the gaping fish mouths, and glassy eyes became too much for the pregnant me.

Tim chops the head off and fillets the salmon, putting the head and bones in a pressure cooker to make fish stock which is frozen in bags when cool and saved for a fishy risotto. If you don’t know how to fillet a fish, head over to YouTube and Gordon Ramsey will show you how.

How to fillet salmon by Gordon Ramsey.

Christmas brunch: Salmon fillets

Christmas brunch: Salmon fillets

Next, we decided on what proportion of the fish will be smoked and what will be chopped into fillets to freeze just as they are for the year ahead. It works out so much cheaper than buying individual fillets. And comes with less packaging.

In the summer months, we hot-smoke salmon on the barbeque and this is another option and another post altogether to be written. The method I’m writing about today is for cold smoked salmon.

You can weigh the piece of salmon you’re about to smoke at this stage. This is so you can work out the moisture content before and after curing and how dry your smoked fish is. I’m not a numbers person so don’t really bother with this. I just go by the feel.

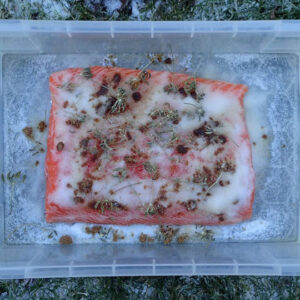
Christmas brunch: curing salmon

Christmas brunch: curing salmon

Using the dry salt method to cure, lay your salmon fillet on a thin layer of cooking salt in a non-metallic container, preferably with a lid. Then rub a good handful of salt and soft brown sugar over the top. You can add juniper or fennel seeds if you have any to hand, although as the moisture is drawn out, I’m not convinced as to how much flavour this imparts. We used fennel seeds this year as we had some growing in the garden. You can also add a small amount of white pepper – just a pinch.

Cover and leave your salmon fillet to cure in the fridge for 3-4 hours. Then rinse off the salt and immediately pat dry on a clean tea towel or kitchen paper. Place on a cooling rack so the air reaches the top and underside and leave on a cool place to dry. The outside should look sealed when it is done.

It is at this stage that you can measure your moisture content and repeat the curing process if it isn’t dry enough.

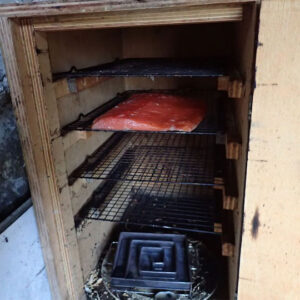
Homemade cold smoker

Homemade cold smoker

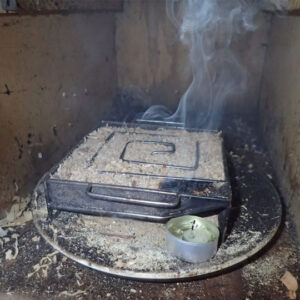
You now need two things: a smoke generator and a container with a hole in the top. When we started, we used a strong cardboard box, a wine box, with a punctured hole in the top. Then Tim got clever and used some discarded plywood to build a smoking box. It really is just a box with a door and a hole in the top. He’s put runners in so we can fit three wire cooling racks in. While the salmon is smoking, we add a block of cheap cheddar to make smoked cheese, or chillies or garlic.

Cold smoking coil

Cold smoking coil

The smoke generator isn’t cheap, but it could make a good gift – I bought it for Tim as a Christmas present some years ago from ProQ Smokers. It’s a metal coil container that is filled with sawdust and has a place for a tealight. The coil is placed at the base of the box, with the sawdust burning slowly, with the smoke escaping through a small hole at the top. Tim reckons it takes two rounds of the coil or a few hours, to smoke a large fillet. You then need to leave the fish to mellow overnight. If it’s cool, and another reason why this is a great midwinter make, just leave it in the box outside.

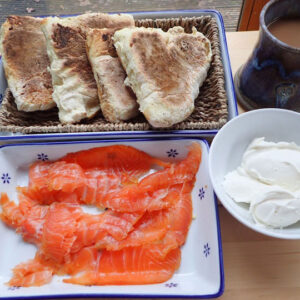
Christmas brunch: cold smoked salmon, bannocks and cream cheese

Christmas brunch: cold smoked salmon, bannocks and cream cheese

All that’s left now is to slice thinly, and once we’ve rushed downstairs to see if ‘he’s been’, and opened our stockings (we’re still very big kids at heart here), then Christmas breakfast brunch can be laid up.

Merry Christmas

Merry Christmas

I’ll leave Tom, of the Tommy brunch fame and his fiancée, Rachel to toast you.

Merry Christmas everyone!


I’ll be putting out the Winter Solstice Newsletter in a few days, so if you’d like to add your name to the mailing list, let me know using this comment box or sign yourself up using the newsletter link:

Bridge Cottage Quarterly Newsletter.


Christmas Needn’t Cost the Earth. Part 2. Natural Decorations

Natural Decorations

Christmas Needn't Cost the Earth. Natural Decorations

Christmas Needn’t Cost the Earth. Natural Decorations

Christmas decorations that are sustainable, homemade and natural have got to be winners in our book, and when they look as good as this Christmas star and are easy to make it’s a no-brainer.

I hear that pampas grass is having a comeback in interior design. I remember when pampas grass in a front garden was code for swingers living there, but we’ll not cast any assertions on our farming neighbour who most generously lets me trim his pampas before winter sets in.


Christmas Needn't Cost the Earth. Natural Decorations

Christmas Needn’t Cost the Earth. Natural Decorations

I went on a gathering mission earlier in the season and tied bundles in the shed. Gather dried grasses, seed heads and anything you think will look good for decorations when the weather is dry and store them in a dry, cool place ready for use. Make sure you only take what you need, as when the weather gets cold seed heads to provide valuable food for birds.

Natural Christmas decorations

Natural Christmas decorations

We love growing honesty, and its random way of self-seeding guarantees these silver discs are in plentiful supply. We get ours from Ben from Higgledy Garden. Just rub the brown casings off with your thumb and forefinger to reveal the treasure. I love how a small sprig of honesty and a fir cone make this charming little angel. I used a glue gun to stick a ready-made felt ball on top of the fir cone and added either an acorn cup or a small sprig of dried lichen as hair. Suspend with a piece of thread and there you have a very cute, natural tree decoration.

Back to our star!

Natural Christmas decorations

Natural Christmas decorations

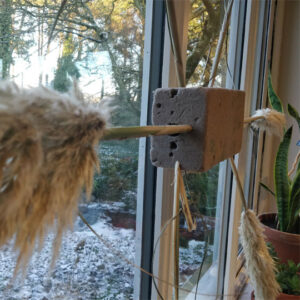
The framework for the star is quite simply a block of dry oasis with a garden cane threaded through and then tied onto the window handles. You can experiment in your house to see where it could hang. If it can’t hang, make a standing decoration – place the oasis in a dish and tie it on, taking the string right around the oasis and dish.

Natural Christmas decorations

Natural Christmas decorations

Now it’s just a question of arranging your grasses, teasels and seed heads. I started with teasels to give structure, my memory going back to my mother doing the flower arranging in church. It’s all about balance – Then simply build up your sculpture – make sure you add depth by allowing some to come forwards. The oasis is finally covered using bits of old man’s beard that had gone fluffy in the airing cupboard.

If your finances allow the cost of the electricity, a few soft white lights threaded through to bring this alive at night and make a fantastic window piece. However, it still looks great without the lights.

Easy peasy, making good use of what we have and reducing the drain on our planet’s precious resources.

ice sculpture. natural decorations

ice sculpture. natural decorations

I’ve been loving seeing your ice sculptures. Haven’t we been having the perfect weather for them? It’s forecast to be -8 here tonight. Here’s one from Ann in Northumberland who shared this on Twitter (@suereedwrites) and tells us that she’s getting all her sisters to make them. Apart from the one in Australia!

Christmas Needn’t Cost the Earth – Ice Art. 

We are giving lots of homemade gifts this year and Tim has his Papa Elf hat in and is beavering away in the garage, but I can’t tell you what he’s making – walls have ears! I’m off to bottle the sloe gin earlier and boil up some fudge for friends’ gifts – I’ll write more on sustainable gift-giving later. Do let us know what you are making for Christmas, and remember, Christmas really doesn’t need to cost the earth.


As ever, we’d love you to share your thoughts, either by leaving a comment here or on our social media pages, where this article will be shared.

You can find the Bridge Cottage Way on Facebook Twitter and Instagram.

You might enjoy some of the writing and ideas in other sections of this website, as we look towards leading more sustainable lives by growing our own food and creating dishes in line with seasonal eating, or head to our handy ‘Month by Month’ guides to find out what we have been doing here at Bridge Cottage as the months go by:

Many thanks for reading.

With Facebook and Instagram algorithms being fickle friends at times, be sure to get all new posts from The Bridge Cottage Way by signing up for the mailing list by this link:

Newsletter sign-up form link.

This will go out four times a year, with the seasons in Spring, Summer, Autumn and Winter. We, of course, will not share your details with third parties, and you have the right to unsubscribe at any time.

You can use the link above or the form below to ask us to sign you up for the newsletter, or just a message or comment on this post. We’d love to hear from you!


Christmas Needn’t Cost The Earth: Eco-friendly Makes for Yule.

Christmas Needn’t Cost the Earth.

Christmas really does not need to cost the earth. In this article, I’d like to share some eco-friendly ways to decorate your home, welcome guests and make presents without a glimpse of plastic, imported crap or throwaway junk.

Just like the Blue Peter advent crown, I’m going to add to this article a week at a time. There’s far too much to share in one sitting and besides, I’m busy sewing little cerise corduroy frocks for the grandchildren and getting ahead with Christmas baking. Evenings are spent knitting and Tim’s out in the garage like one of Santa’s elves making gifts. Of course, I can’t share these makes with you just yet. Walls have ears you know.

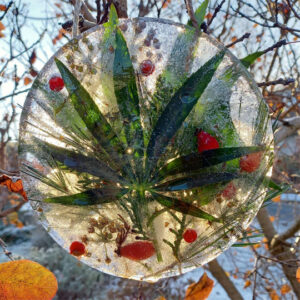
Christmas Ice Sculpture

Christmas Ice Sculpture

Let’s start with this ice sculpture to hang from the front porch, a tree, over a flat balcony, or a railing. It’s easily made and costs nothing apart from a bit of time and freezer energy.

You will need:

  • a tray of some description – a sandwich cake tin would be fine, a foil tray, a tea tray – anything with shallow sides that will withstand being frozen. We have a circular metal tray that’s quite big, but any size will do.
  • Secateurs
  • Garden foliage, greenery and berries
  • Length of string 30-40cm
  • A flat space in the freezer
Christmas Ice Sculpture

Christmas Ice Sculpture

Method

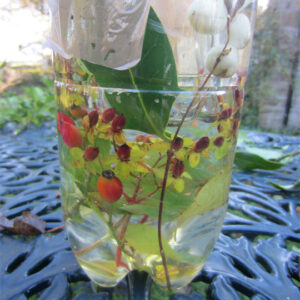
Gather greenery – some berries add colour – and arrange it in your tray or tin.

Add a small length string to the top and lay it so the loop is hanging over the edge. This will freeze in the water and give you a hanging loop

Fill with water and lay flat in the freezer being careful not to spill. You might want to sort out a flat space in your freezer first.

When the weather is frosty, remove it from the tray and hang it outside to welcome your guests into your home. I find running the base of the tray under a cold tap for a couple of minutes is enough to loosen the ice.

Of course, as soon as the weather goes above freezing your ice sculpture will melt. We have the dubious fortune to live in a frost pocket in Northumberland, so ice sculptures tend to last for several weeks!

Tea Light Ice Sculptures

Tea Light Ice Sculptures

Tea Light Sculptures

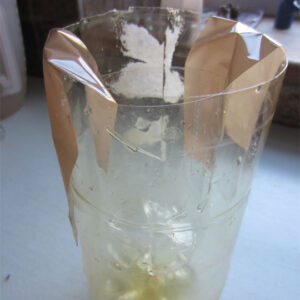
Another idea is to make tea light holders once using the same method and the bottom 20-30cms of two plastic bottles.

Tea Light Ice Sculptures

Tea Light Ice Sculptures

You’ll need one that is smaller than the other so that when suspended with tape there is a gap at the sides and underneath. See photo.

Then it’s the same as for the tray method – fill the gaps with Christmas greenery and berries, fill with water, leaving the centre cavity clear. This is where your tea light will go. Freeze and then remove them from the plastic bottles before you place them outside on a frosty evening. So pretty!

Tea Light Ice Sculptures

Tea Light Ice Sculptures


Let us know how your ice sculptures go or share any inventions on this theme on social media.

Next week we’ll look at natural Christmas decorations from gathered seed heads and grasses.

Part 2 Natural Christmas Decorations


As ever, we’d love you to share your thoughts, either by leaving a comment here or on our social media pages, where this article will be shared.

You can find the Bridge Cottage Way on Facebook Twitter and Instagram.

You might enjoy some of the writing and ideas in other sections of this website, as we look towards leading more sustainable lives by growing our own food and creating dishes in line with seasonal eating, or head to our handy ‘Month by Month’ guides to find out what we have been doing here at Bridge Cottage as the months go by:

Many thanks for reading.

With Facebook and Instagram algorithms being fickle friends at times, be sure to get all new posts from The Bridge Cottage Way by signing up for the mailing list by this link:

Newsletter sign-up form link.

This will go out four times a year, with the seasons in Spring, Summer, Autumn and Winter. We, of course, will not share your details with third parties, and you have the right to unsubscribe at any time.

You can use the link above or the form below to ask us to sign you up for the newsletter, or just a message or comment on this post. We’d love to hear from you!


Tim & Sue in the Bridge Cottage Way garden


Autumn Equinox Gathering. A Foraged Wreath

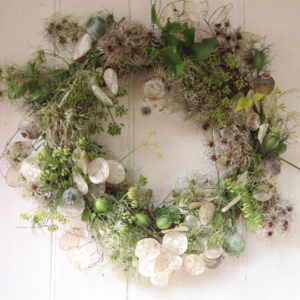
Autumn Equinox Gathering. A wreath for the front door

Autumn Equinox Gathering. A wreath for the front door

There’s a nip in the air as the autumn equinox opens the garden gate and a new season enters. Apples are falling from the trees, crying out to be juiced, dried and turned into crumbles. A bucket of green tomatoes sits in the kitchen waiting to be made into chutney, and the last of the blackberries are winking in the sun. It’s a time for gathering, for bringing in what is ripe and ready and for laying down the stores for winter. I also like to look at what is over in the garden, at the seed heads and plants that can be dried and brought indoors to decorate the house. It’s been a busy few days looking after grandchildren and juicing apples and today I fancied doing something creative, just for me. I thought an autumn equinox wreath to decorate the front door might be a fun thing to make, so took myself off around the garden, secateurs in hand to clip a few bits and bobs.

Poppy seed heads

Poppy seed heads

Beneath the blackberries that grow along the garage wall, poppy heads sway in the breeze and teasels reach for the sky. The goldfinches have had their fill of the teasel seeds and it is now time to gather in those architectural seed heads before autumn’s storms batter them to the ground. Before taking them inside to dry, shake poppy seeds from the dried heads on the ground where you want them to flower next year, and you’ll be rewarded with poppies galore. What glorious forms these two have.

Autumn Equinox Gathering. Honesty seed heads

Autumn Equinox Gathering. Honesty seed heads

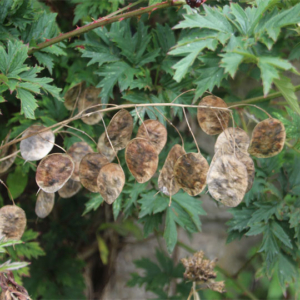
Jostling for a place amongst the dock leaves and nettles the honesty has also gone to seed. Don’t be fooled by the murky brown casings – there’s silver treasure inside!


Honesty seed heads

Honesty seed heads

Fir Cone Christmas Angel with Honesty WingsA quick rub, front and back, and the casings disappear. Again, scatter the seeds where you will then bring the silver inside before the winds of autumn shred it. I just love honesty in decorations. I used it last year to make wings for Christmas angels.
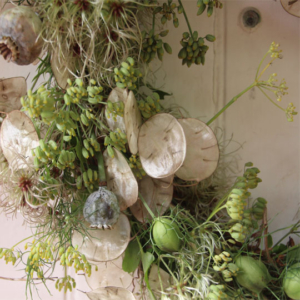

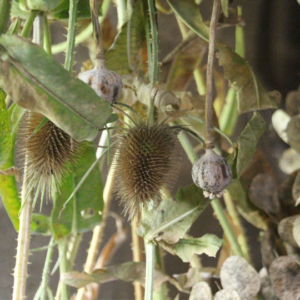
 

Another plant that romps away in our garden is old man’s beard. We thought it was a fancy clematis when we spotted it on Jim Morrison’s grave in the Père Lachaise Cemetery in Paris and pocketed some seeds. However, he breaks on through to the other side whenever given the chance and spills over fences and gateways. Dried, it looks as tousled and as wonderful as the singer himself. Before we dry fennel seeds to make tea or add to our apple and fennel chutney, I’ve lifted a few seed heads and have added all the above in this late summer wreath that is now hanging on the front door.

Autumn Equinox Wreath

Autumn Equinox Wreath

It’s easy to make and uses the same method as making a Christmas wreath. Gather small bunches of whatever you are using: in my case, a seeded flowerhead from old man’s beard, a fennel seed head, a sprig of honesty, a nigella and poppy seed head, and tie to a wreath form using this florist’s wire. You can make your own wreath form by tying willow in a circle and binding or buy one from your local florist, or online. If you can, make your own, I found one in Hobbycraft for a fiver, made from grapevines, but it was made in China! I don’t know how your ethics sit with that and the transport costs involved. It doesn’t have to be willow: a few pliable twigs are all you need. There are plenty of YouTube tutorials for making your own. Try this one from Tuckshop Flowers:

I’m also mindful of collecting the seed heads, grasses and plants that will be dried to make decorations for Yule or Christmas, whatever you call the festive season. I’ll be talking more about having an eco-Christmas as the seasons draw on, and yes, I hear you: it’s too early to be thinking about Christmas, but in a way it isn’t. Sustainable living is so often about preparing, looking ahead, and laying the groundwork for what is to come. Today it is about gathering and drying so we can make decorations that don’t cost the earth in both monetary and environmental terms.

Foraged Christmas Star

Foraged Christmas Star

I made this star a couple of years back, using pampas grass, teasels, honesty, and seed heads stuck very simply into a dry oasis suspended on a garden cane and with a few white led lights strung through. It really was very simple, but very effective. Last year I made angels from fir cones and hung them from red dogwood stems, but I think I’ll revert to the star this year and so am off around the garden to see what can be gleaned. I’ll write up a step-to-step guide for making this Christmas star a bit later on, but let’s dry what we need first. I’ve hung the teasels, nigella seed heads, honesty and poppy heads upside down from the rafters in the garden shed to dry. Anywhere warm and dry will do.

Teasels and honesty hung to dry

Teasels and honesty hung to dry

We planted hops years ago and never got around to using them to flavour beer. They are rampant! Dried, however, and strewn above the fireplace, with a few white lights woven in, they will look wonderful. They are currently drying in the airing cupboard. Be prepared for plant life to temporarily take over the drying areas of your house!

So there we have it, a beautiful wreath for the front door to mark the Autumn Equinox and dried seed heads and hops gathered to decorate the house at yuletide. Time to light the fire and find my knitting! I have thoroughly enjoyed sharing my Autumn Equinox wreath and this moment of mindfulness with you. As we gather early autumn’s offerings, let us have a moment of reflection, and be grateful for the bounty and beauty of Mother Nature as one season passes, and another arrives. Do share your wreath-making or gathering with us on the usual social media channels – we’d love to see what you make.


As ever, we’d love you to share your thoughts, either by leaving a comment here or on our social media pages, where this article will be shared.

You can find the Bridge Cottage Way on Facebook Twitter and Instagram.

You might enjoy some of the writing and ideas in other sections of this website, as we look towards leading more sustainable lives by growing our own food and creating dishes in line with seasonal eating, or head to our handy ‘Month by Month’ guides to find out what we have been doing here at Bridge Cottage as the months go by:

Many thanks for reading.

With Facebook and Instagram algorithms being fickle friends at times, be sure to get all new posts from The Bridge Cottage Way by signing up for the mailing list here. This will go our four times a year, with the seasons in Spring, Summer, Autumn and Winter. We, of course, will not share your details with third parties, and you have the right to unsubscribe at any time.

Tim & Sue in the Bridge Cottage Way garden

Make your Own Playdough. Sustainable Living with Kids.

homemade playdough salt dough

homemade playdough salt dough

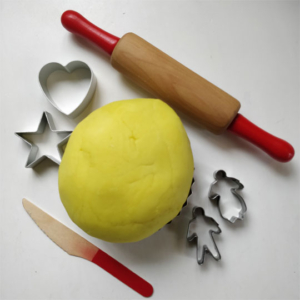
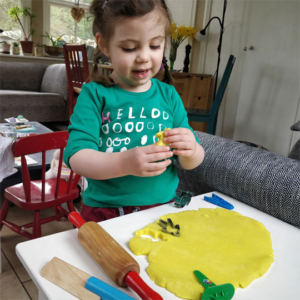
If I had a £1 for every pound of playdough I’ve made over the years, I’d be a rich woman. Homemade playdough is cheap and sustainable, can be used again and again when stored in the fridge. It reduces the need for plastic packaging and transportation and is great fun to play with. As I write this, in early 2021, the shops are shut due to the pandemic. Parents and grandparents looking for affordable ways to entertain the kids, so I thought it timely to share the playdough recipe with you.

We made playdough for our three children as they grew up living remotely in the North Pennines back in the early nineties. We lived miles from the nearest town and didn’t have money for toys apart from Christmas and birthdays, so homemade playdough was a firm favourite. It is also known as salt dough, and uncoloured, can be baked in the oven then painted. We’ve made Christmas tree decorations this way to give as presents.

homemade playdough salt dough

homemade playdough salt dough

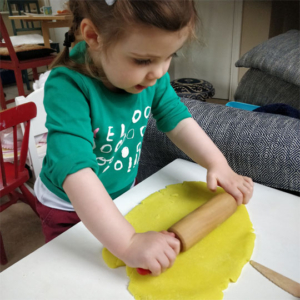
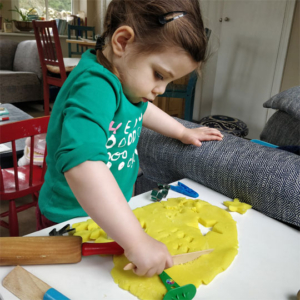
Now our granddaughter Daisy is coming to play while her mummy gets some rest, we are yet again making playdough. It keeps well in the fridge in a recycled plastic bag and is a cheap plaything. Diasy loves making ‘cookies’ and ‘gingerbread people’ using her cutters, but also likes to make tracks through it with a tractor, or footprints using farm animals. We make pizzas, sausages and chips and pies. Daisy has just turned three, and her playdough keeps her happy for ages.


homemade playdough salt dough

homemade playdough salt dough

Here’s the recipe:

Salt dough Playdough

1 cup plain flour

½ cup salt

2 tsp cream of tartar

1 tbsp vegetable oil

1 cup water

Food colouring.

homemade playdough salt dough

homemade playdough salt dough

Whilst these are American cup measures, any cup can be used! It’s the ratio of quantities that is important.

Mix all the dry ingredients – flour, salt and cream of tartar

Whisk in the oil, water and food colouring.

Heat gently in a saucepan on a low heat, stirring constantly. As if by magic, you will have playdough in a matter of minutes!

Knead gently for a minute once cool. Store in the fridge in a recycled plastic bag when not in use and it will keep for weeks if not months.

Hours of fun!


As ever, we’d love you to share your thoughts, either by leaving a comment here or on our social media pages, where this article will be shared.

You can find the Bridge Cottage Way on Facebook Twitter and Instagram.

You might enjoy some of the writing and ideas in other sections of this website, as we look towards leading more sustainable lives by growing our own food and creating dishes in line with seasonal eating, or head to our handy ‘Month by Month’ guides to find out what we have been doing here at Bridge Cottage as the months go by:


Many thanks for reading.

With Facebook and Instagram algorithms being fickle friends at times, be sure to get all new posts from The Bridge Cottage Way by signing up for the mailing list here. This will go our four times a year, with the seasons in Spring, Summer, Autumn and Winter. We, of course, will not share your details with third parties, and you have the right to unsubscribe at any time.

Tim & Sue in the Bridge Cottage Way garden

How to build a hotbox for propagation, early seed sowing and growing

Hot box propagation

Hotbox propagation

Making a hotbox may well be the answer if are you chomping at the bit to get the growing season started, It’s still February and last week we had snow. However, the sun started shining this week after a long Winter. We are still in Lockdown due to the pandemic and goodness knows we are longing to get growing again. Last year’s lockdown seemed so much easier to bear, with veggies to grow and gardens to tend, but we must remember it is still Winter!

Hotbox propagation. for early seed sowing and growing

Hotbox propagation. for early seed sowing and growing

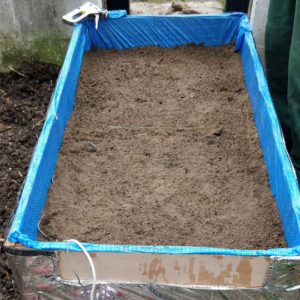
Last year Tim built a hot box for the greenhouse, and it’s brilliant! We can set seeds away and grow then on without fear of the frost getting to them. I know some of you who have seen pictures of this on the Bridge Cottage Way Facebook page have asked how he made it, so here you go.

It’s quite simple. We got the idea and all the help we needed from Jungle Seeds.

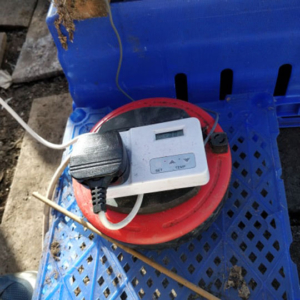
You will need a greenhouse or cold frame and a source of electricity. We have run an outdoor extension lead from the garage into the greenhouse. We have taken care to cover any electrical parts with a bucket so avoid accidents when watering!

The heat comes from Bio Green Soil Warming cables.  available from Jungle Seeds.


Building a hotbox for early seed sowing a propagation

Building a hotbox for early seed sowing a propagation

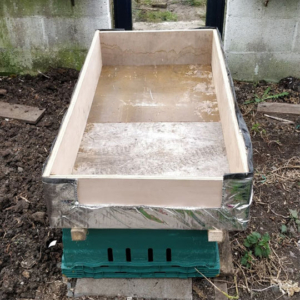
We started by building a wooden box. The bottom was taken from an old dining room table, and the sides, off-cuts of plywood. You may want to build something smaller, a tray for example. In this first picture, you can see it has been covered on the outside by insulation. We used this insulation as we had it hanging around after building the sauna. You might want to use polystyrene, or Kingspan. Use what you have!

Building a hotbox for early seed sowing and propagation

Building a hotbox for early seed sowing and propagation

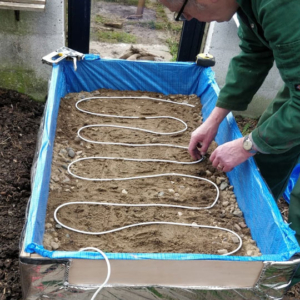
Next, add a layer of sand, and then lay the cables on top of that. We got the Bio Green Warming Cables from Jungle Seeds, and you’ll see that they give basic instructions too for building a hotbox.

The cable is normally laid in runs 3″ to 4″ apart. This layout will allow you to raise the soil temperature by 11-13 C, above the greenhouse ambient. Higher temperatures can be achieved by laying the cable runs as close together as 5cm. In this case, a thermostat should be used to precisely control the soil temperature to avoid overheating.

After laying the cables, cover again with another layer of sand. Water all this well. It needs to be kept moist to give good heat transference.

building hot box propagation, early seed sowing and growing

building a hot box for propagation, early seed sowing and growing


building a hot box for propagation, early seed sowing and growing

building a hot box for propagation, early seed sowing and growing

A top tip is to cover the plug socket and thermostat with an upturned bucket. This prevents any water from getting in the electrics when watering the greenhouse!

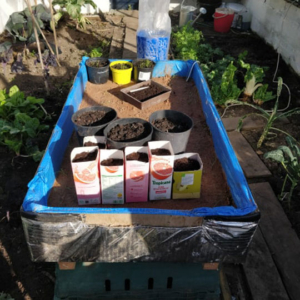
At night, a layer of bubble wrap can go over the top to tuck your baby plants in.


building a hot box for propagation, early seed sowing and growing

building a hot box for propagation, early seed sowing and growing

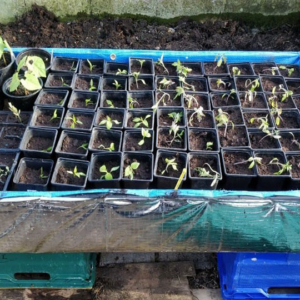
That’s all there is to it! We’ve set leeks, board beans, chillies, lettuce and tomatoes away already and they are growing well in the hot box. You can see I’ve used sawn-off juice bottles as seed pots – waste not, want not!

Do get in touch if you have any questions!

Wishing you a very happy growing season.

As ever, we’d love you to share your thoughts, either by leaving a comment here or on our social media pages, where this article will be shared.

You can find the Bridge Cottage Way on Facebook Twitter and Instagram.

You might enjoy some of the writing and ideas in other sections of this website, as we look towards leading more sustainable lives by growing our own food and creating dishes in line with seasonal eating, or head to our handy ‘Month by Month’ guides to find out what we have been doing here at Bridge Cottage as the months go by:


Many thanks for reading.

With Facebook and Instagram algorithms being fickle friends at times, be sure to get all new posts from The Bridge Cottage Way by signing up for the mailing list here. This will go our four times a year, with the seasons in Spring, Summer, Autumn and Winter. We, of course, will not share your details with third parties, and you have the right to unsubscribe at any time.

Tim & Sue in the Bridge Cottage Way garden

Feeding the Birds in Winter

Winter at Bridge Cottage

Winter at Bridge Cottage

Feeding the birds in Winter. It’s February, and there’s been thick snow on the ground up here in Northumberland for weeks now. The river is starting to freeze over, and while there are some interesting patterns on the windows of the greenhouse, some amazing ice formations in the river, and beautiful icicles hanging from the sauna roof, it’s freezing and the birds are hungry. We have even seen owls hunting by day as they search for food.

Icicles on the sauna roof

Icicles on the sauna roof

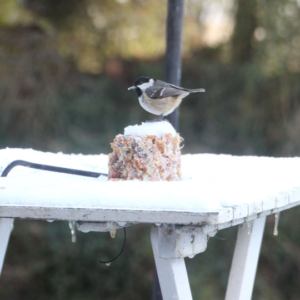
The birds need our help in winter, and feeding and watching the birds can be a great activity for kids. Goodness knows we need all the help we can get to amuse the kids during lockdown at the moment. They may have taken part in the Big Garden Birdwatch in January, but even if you missed it, much fun can still be had from watching the birds fly in and eat the bird food that you have put out.

homemade bird feeder with peanut butter and birdseed

homemade bird feeder with peanut butter and birdseed

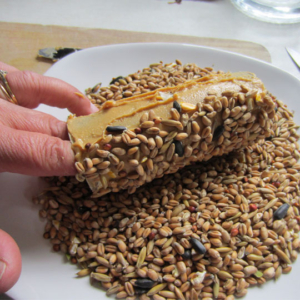
Fir cones can be collected, or toilet rolls saved, covered in peanut butter, then filled in birdseed.

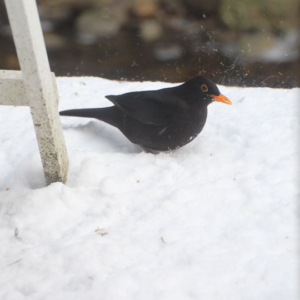
Garlands of fruit can be strung up – chopped apples, grapes, are favourites of blackbirds and thrushes – how about wedging an apple in the crook of a branch? Blackbirds and thrushes prefer to eat from a table or the ground as they are not great at perching.

Blackbird looking for food. Feed the Birds

Blackbird looking for food. Feed the Birds

Had bacon for breakfast? Snip the rind into small pieces – the birds love the fat.

Click this link for a speedy birdseed cake from the good peeps over at the RSPB:

Feed the Birds.

Feed the Birds.

You might enjoy some of the writing and ideas in other sections of this website, as we look towards leading more sustainable lives by growing our own food and creating dishes in line with seasonal eating, or head to our handy ‘Month by Month’ guides to find out what we have been doing here at Bridge Cottage as the months go by:

Many thanks for reading.

With Facebook and Instagram algorithms being fickle friends at times, be sure to get all new posts from The Bridge Cottage Way by signing up for the mailing list here. This will go our four times a year, with the seasons in Spring, Summer, Autumn and Winter. We, of course, will not share your details with third parties, and you have the right to unsubscribe at any time.

Tim & Sue in the Bridge Cottage Way garden

Hexham Fresh Foodbank Group

Produce for Hexham Fresh Food Bank Group

Produce for Hexham Fresh Food Bank Group

Foodbank use has become all too common in our towns, and since the coronavirus pandemic, many more are turning to them for help. All foodbanks welcome donations of tinned and packet food, and volunteers work hard to deliver food to those in need, but what about fresh fruit and vegetables?

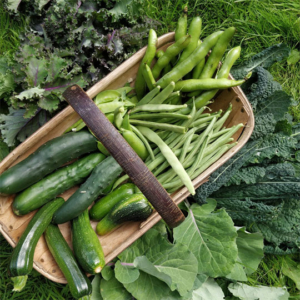
 For many, access to fresh food is just not possible. We are pretty much self-sufficient in homegrown fruit and veg here at Bridge Cottage. We eat seasonally and with our homegrown and home-cooked food. However, for many, fresh fruit and vegetables are not something they are able to bring to their family’s table.  Fresh fruit and vegetables are priced way over their budget. How then, to address this and maybe share some of what we grow?

Ginnie O'Farrell, founder of HExham Fresh Food Bank Group

Ginnie O’Farrell, founder of Hexham Fresh Food Bank Group

For a few years now, we’d dropped surplus cucumbers or apples off at West Northumberland Food Bank or popped them on a table in front of Bridge Cottage with ‘free food, help yourself’ sign. It was small fry though, and it took at an initiative from a Hexham allotment grower, Ginnie O’Farrell to set up the Hexham Fresh Foodbank Group to bring donations of fresh food into some form of organised project, and to increase the awareness and amount of local produce.

We have a Facebook Group, the Hexham Fresh Foodbank Group, and it is through this that we communicate with each other. Many have turned to vegetable growing for the first time, and lockdown gave us all the time to focus on our veggie patches. The Bridge Cottage Way is playing its part in helping new growers learn about growing veg through the posts on this website from The Bridge Cottage Garden, and through social media. We now have over two hundred growers in our community of foodbank growers.

Dropping off produce for Hexham Fresh Food Bank Group at Matthais Winter in Hexham

Dropping off produce for Hexham Fresh Food Bank Group at Matthais Winter in Hexham

This is how Hexham Fresh Foodbank works: on a Thursday, we let the group know via the Facebook page, what we have available, and this is communicated to the food bank, so they know what is coming. Over the weekend, growers drop off homegrown or home-cooked produce at Matthais Winter, the eco-home shop in Hexham. Now that autumn is upon us, and jam and chutney making is, the food bank is welcoming donations of these. Some are even making pies and crumbles. Sam Gilchrist who runs the foodbank has told us our donations are very welcome. They now have a freezer, so homecooked soups are also welcome.

This week there has been great excitement amongst at the Hexham Fresh Food Bank Group, as BBC Look North wanted to film us. It followed an article in The Guardian which talked about how the coronavirus has led to a UK boom in community food growing.

Guardian feature: How the coronavirus has led to a UK boom in community food growing


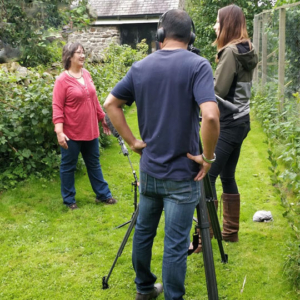
Alison Freeman and Jas from Look North arrive at Bridge Cottage

Alison Freeman and Jas from Look North arrive at Bridge Cottage

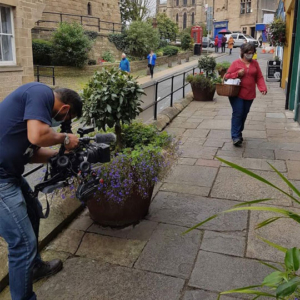
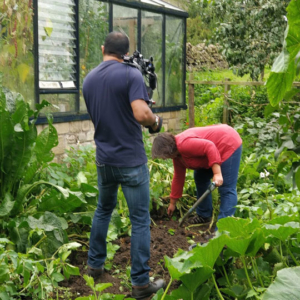
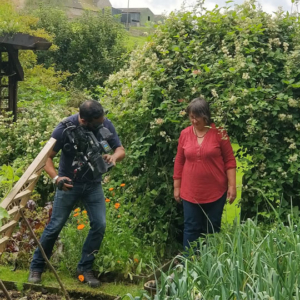
On Wednesday, Alison Freeman came out to Bridge Cottage with her cameraman, Jas and filmed me in the garden, pulling up leeks, digging potatoes and picking kale. I was interviewed about my views on growing and sharing food, then we all raced into Hexham where Ginnie was waiting at Matthais Winter. They filmed me dropping off, then spoke to Ginnie about how the fresh foodbank came about.

Watch the BBC Feature here: Hexham Growers Donate Surplus to Foodbank

Being interviewed on behalf of Hexham Fresh Food Bank Group

Being interviewed on behalf of Hexham Fresh Food Bank Group

We hear folk saying ’foodbanks don’t want fresh food, as people don’t know what to do with it’. To this I reply that it is true, some folk are reluctant to use fresh food for different reasons; indeed, we are told some don’t have access to a cooker or cooking utensils. Some do not have the culinary skills or knowledge of how to cook some of the veg, and some find it all too much of a challenge. However, we should not be making judgements about who uses a food bank, or what level of skills they have.

We do offer recipe cards and simple cooking instructions for those who would like them. Many are only too grateful for the donations of fruit and veg. We are told there are chefs out of work due to coronavirus who are thrilled at the thought of fresh, local organically grown food. A father of a large family was overjoyed with a monster of a red cabbage that was donated, and the feedback from the food bank is really encouraging. Folk are touched by the kindness of strangers, who take the time to grow, pick and bake for them.

Hexham Fresh Food Bank

Digging up potatoes for Hexham Fresh Food Bank Group

The feature went out on Look North at 6.30 on 2nd September, and then was picked up by the National News, where it was aired on BBC Breakfast TV, and well and the BBC one o’clock news. So, if you saw someone in a red t-shirt digging up spuds, that was me! We’re hoping very much that other allotment groups and growers think about how they can donate to food banks. We also hope very much that food banks across the country will welcome fresh, locally grown produce onto their shelves. Fresh food is so expensive, and this a way to get it to those who need it most.

Being filmed for Hexham Fresh Food Bank Group

Being filmed for Hexham Fresh Food Bank Group

Foodbank use, food poverty and the thought of children going hungry is abhorrent in a so-called developed nation in the twenty-first century, and I strongly believe that we must all do our part to help make our communities more resilient in these challenging times. Sustainable living is not just about looking inwards but looking outwards to make sustainable communities. Let’s begin with food.

Hexham Fresh Food Bank

Ginnie and Sue from Hexham Fresh Food Bank Group

As ever, we’d love you to share your thoughts, either by leaving a comment here or on our social media pages, where this article will be shared.

You can find the Bridge Cottage Way on Facebook Twitter and Instagram.

You might enjoy some of the writing and ideas in other sections of this website, as we look towards leading more sustainable lives by growing our own food and creating dishes in line with seasonal eating, or head to our handy ‘Month by Month’ guides to find out what we have been doing here at Bridge Cottage as the months go by:

Many thanks for reading.

With Facebook and Instagram algorithms being fickle friends at times, be sure to get all new posts from The Bridge Cottage Way by signing up for the mailing list here. This will go our four times a year, with the seasons in Spring, Summer, Autumn and Winter. We, of course, will not share your details with third parties, and you have the right to unsubscribe at any time.

Tim & Sue in the Bridge Cottage Way garden


Recycling Plastic in the Garden

We all now know that we should be reducing our plastic waste, and recycling plastic in the garden is one way of doing this. When I wrote about this back in 2011, on the old Bridge Cottage Way Blogspot site, we were just learning about the tragic byproduct of the plastics industry that is the phenomenon known as The Great Pacific Garbage Patch. This vast expanse in the North Pacific Ocean, in fact, twice the size of France, had become the largest landfill in the world and was made up of plastic. Every year it kills millions of seabirds and 100,000 marine mammals.

Recycling Plastic in the Garden

Recycling Plastic in the Garden

David Attenborough brought the nation’s attention to the dreadful sea of plastic in our oceans in his programme, Blue Planet, and this brought the issue of plastic waste to the mainstream. We’ve been trying to reduce our plastic consumption here at Bridge Cottage for decades. There are many ways to reduce plastic consumption around the home, and I’ll write later about our experiences with Plastic Free July 2020, but for the time being, let’s concentrate on ways to reduce plastic in the garden, and specifically here with planting.

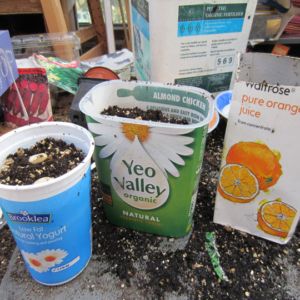
If you visit any garden centre, you will see rows and rows of plastic plant pots, and plastic seed trays, and folk with armfuls of these, eager to start the new planting season. But ask yourself, is all this new plastic really necessary?

Before we carry on, let’s address the debate on the issues of growing food in recycled plastic. Can we still call ourselves organic gardeners if we grow food in plastic? Is plastic safe to grow food in? What about all those chemicals it leaches into the soil?

Recycling Plastic in the Garden

Recycling Plastic in the Garden

I’m talking about Bisphenol A (BPA). All plastics leach chemicals. Some plastics are harmful and can leach toxins into the soil, especially when heated or exposed to sunlight or prolonged periods of time. BPA is not found in food-grade plastic, and therefore these containers are deemed safe to use as the chemicals they leach have low toxicity levels and the amounts leached are very small.

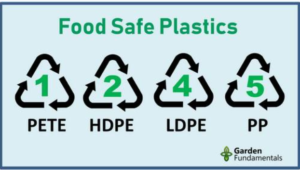
You can check to see if your recycled container is safe to use by looking for the symbol on it – there will be a triangle with a stamp on, and numbers 1,2,4 & 5 – (see diagram) are safe to use.

Food Grade Plastic Labelling

Food Grade Plastic Labelling

Tetra packs used for plant-based milk and fruit juices can make great planters. Crops such as runner beans and sweet corn that have long roots love a chopped off Tetra pack. Toilet roll inner tubes whilst not plastic, are also a great recycling hack for growing sweet peas. Just pop the whole kits and kaboodle into the soil when it’s time for planting. The tube will biodegrade and the root remains undisturbed. No plastic needed there, my dear!


Recycling Plastic in the Garden

Recycling Plastic in the Garden

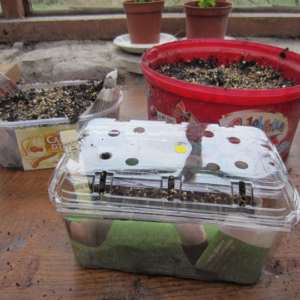
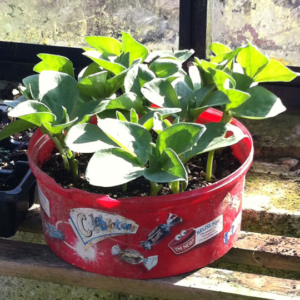
Plastic containers that have fruit such as grapes in even have plastic lids that can be used as mini propagator. Larger containers such as sweet or biscuit boxes are great for sowing lots of big seeds in. I used this ‘Celebrations’ tin for broad bean seeds one year.

Recycling Plastic in the Garden

Recycling Plastic in the Garden

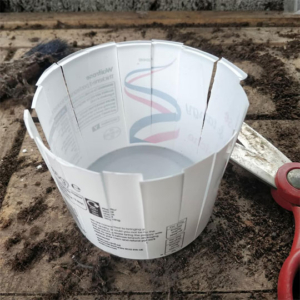
Don’t forget to wash the containers well before use, and put some holes in the bottom for drainage, taking care not to put holes in yourself!


I add a double layer of newspaper to any clear containers to stop the light getting through to the roots. The paper can be planted in the garden as it soon rots down.


Recycling Plastic in the Garden

Recycling Plastic in the Garden

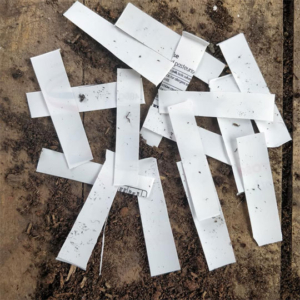
Once you’ve sown your seeds, you’ll need to label them, and a plastic lid, yoghurt or crème fraiche pot comes in very handy here too – just cut it into strips and write on with permanent marker pen or wax crayon.

Recycling Plastic in the Garden

Recycling Plastic in the Garden

Don’t forget, once you have planted your seedlings in the garden, wash and dry the containers and store away in the shed for next year.


Going completely plastic-free is very hard, and I guess a step too far for many, ourselves included, but here is one way our plastic kitchen waste can be recycled.

By recycling your food-grade plastic pots to sow your seeds in or make plant labels, you are doing your bit to help the environment. You will also save money and space in your recycling bin!

Remember the ‘Buyerachy of Needs’ which encourages in the first instance, to use what we have?


Sustainable Living. The Buyerachy of Needs by Sarah Lazarovic

Sustainable Living. The Buyerachy of Needs by Sarah Lazarovic

As ever, we’d love you to share your thoughts, either by leaving a comment here or one our social media pages, where this article will be shared.

You can find the Bridge Cottage Way on Facebook Twitter and Instagram.

You might enjoy some of the writing and ideas in other section of this website, as we look towards leading more sustainable lives by growing our own food and creating dishes in line with seasonal eating, or head to our handy ‘Month by Month’ guides to find out what is seasonal and on topic:

Many thanks for reading.

With Facebook and Instagram algorithms being fickle friends at times, be sure to get all new posts from The Bridge Cottage Way by signing up for the mailing list here. This will go our four times a year, around the Summer and Winter Solstices, and the Spring and Autumn Equinox. We of course will not share your details with third parties, and you have the right to unsubscribe at any time.